How to Add WordPress Icons to Your Website [+3 Tools to Help]
Dayana Mayfield
on
Oct 17, 2024
Do you want to enhance your website and make it stand out? Then you need to be adding icons to your design.
Icons are essential for modern website design. They help to improve both the look and usability of your WordPress site. Whether you're adding social media icons to drive engagement or using visual markers to enhance navigation, WordPress offers several easy ways to incorporate icons into your site.
In this post, we'll explore what WordPress icons are, where to place social icons, and how to add them through plugins and other methods.
What is a WordPress icon?
A WordPress icon is a small graphic or symbol used to improve the look and functionality of your website. Icons can represent different actions, categories, or social media platforms. They help users navigate your site more easily.
You’ll often see icons in menus, buttons, and social media links. They come in various formats like icon fonts, SVGs, or PNGs. WordPress icons not only make your site look more polished but also make things visually clearer for users.
Social icons are a subset of WordPress icons. They are a simple yet powerful way to connect your website visitors with your social media platforms. Adding social icons makes it easy for users to follow or engage with your brand across different channels. It also helps create a seamless bridge between your site and your online presence, which can boost traffic, improve brand recognition, and increase your overall audience reach. With just a click, visitors can explore more of your content outside the website.
Where to place WordPress social icons
Placing WordPress social icons in strategic spots on your website encourages engagement. By putting these icons where they’re easy to find, you can drive more traffic to your social media channels. The best spots depend on your website’s layout and user behavior. Let’s look at three common placements for social icons and how they enhance your site’s functionality.
1. Social icons in the footer
One of the most popular and effective places for social icons is the footer of a website. This area stays consistent across all pages, making it easy for visitors to find your social links no matter where they are on your site. By placing social icons in the footer, you offer users a non-intrusive way to explore your social media at their own pace.
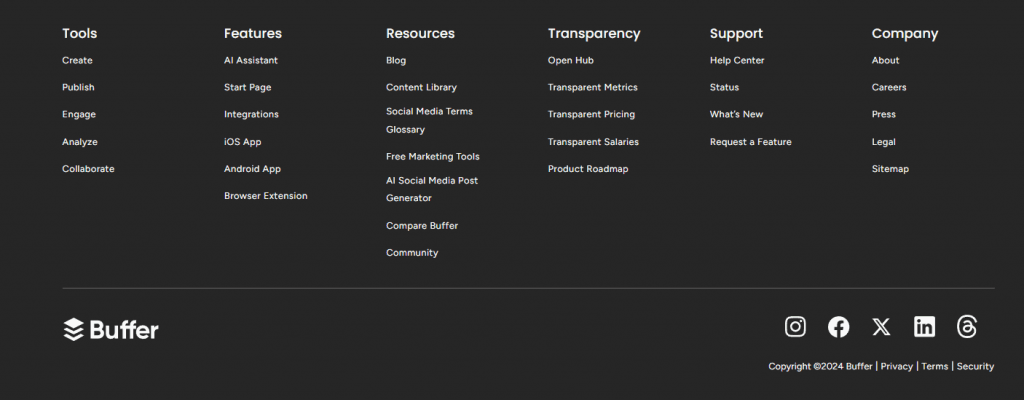
A great example of this can be seen on the Buffer website shown above. Their footer includes clean and simple social icons that match the style of the page. They provide an easy path for visitors to follow them on platforms like X (formerly Twitter) and Facebook.
2. Social icons on the side
Placing social icons on the side of your website keeps them visible as users scroll through content. This placement is a little more intrusive than the footer placement, but it keeps the icons within easy reach.
A floating sidebar takes it a step further and promotes interaction with your social media without disrupting their browsing experience.
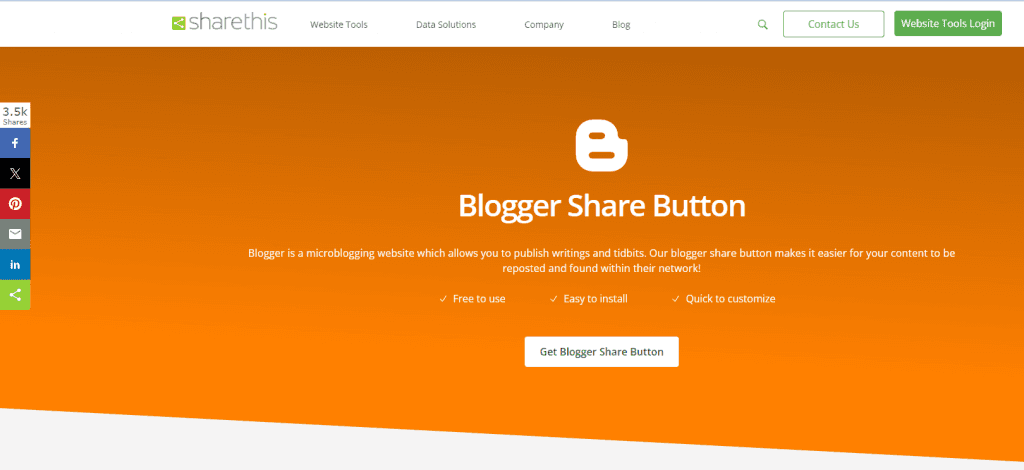
A strong example of the floating sidebar of social icons is on ShareThis website shown above. They offer a Blogger share button that floats along the side of your webpage. This really makes it easy for visitors to engage.
3. Social icons in the header
The header of your website is also a good choice for placing social icons. By featuring them at the top of every page, you make it easy for users to spot your social media links right away. This is especially useful for businesses that want to encourage social engagement early.

The above example of Charnwood Bookkeeping highlights the effectiveness of this approach. Their header includes clean, easy-to-spot social icons that are also on brand.
How to add WordPress blog icons to your website
Option 1: WordPress icons via a Plugin
Adding icons to your WordPress website using a plugin is one of the easiest and most flexible methods. With plugins, you can quickly integrate custom or pre-built icons without any coding knowledge. Here's how you can do it in three simple steps:
Step 1: Install and activate the plugin
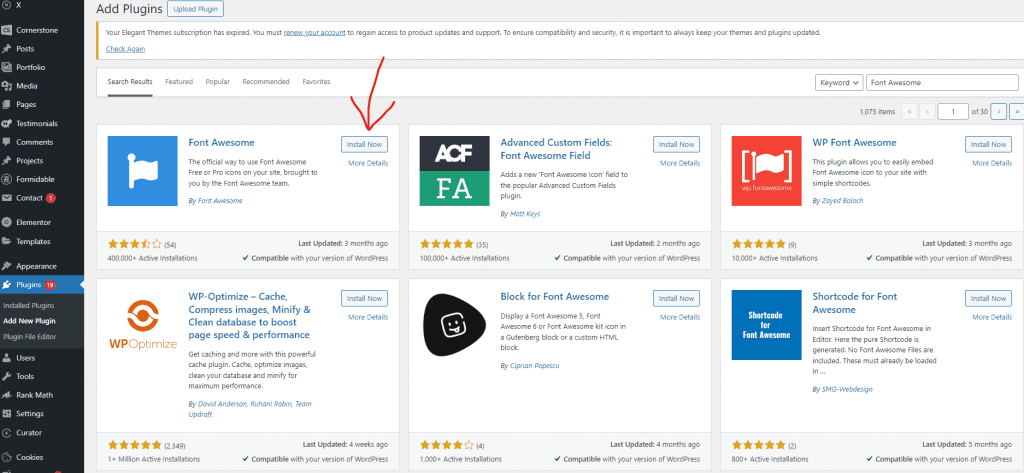
The first step is to install a plugin that supports WordPress icons. Popular plugins like Font Awesome or Social Media Share Buttons & Social Sharing Icons allow you to easily add icons to your site. To install, go to your WordPress dashboard and navigate to Plugins > Add New. Search for the plugin by name, click Install Now, and then activate it. Once activated, the plugin will be ready for use.
When choosing a plugin, make sure to select one with a lot of installations and regular updates. This is evidence that it is a good plugin.
Step 2: Configure the plugin
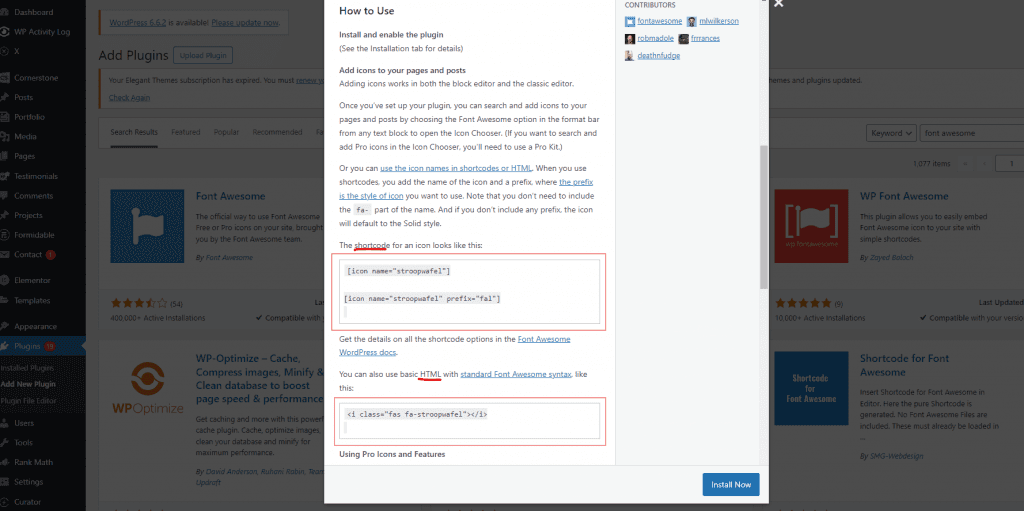
After installation, go to the plugin settings in your WordPress dashboard. Each plugin will have different configuration options. Clicking on More Details of your chosen plugin will provide you with information on how to use and configure the plugin. For example, Font Awesome’s details include everything from descriptions on how to use and configure to installation instructions and more.

Step 3: Add HTML or shortcode to your webpage
Once configured, you’ll need to add the icons to your webpage. Most plugins provide an HTML or shortcode that you can insert directly into a post, page, or widget. With Font Awesome the shortcode and HTML style is described in the Description tab of the More Details.
Simply place the code wherever you want the icon to appear, whether in a widget, post, or page, and it will render automatically when you publish.
Option 2: WordPress icons via Dashicons
Dashicons are WordPress's built-in icon font. This allows you to add icons without the need for an external plugin. It does require a little bit of coding, but it’s perfect for those who want to keep their site lightweight.
Here’s how to add Dashicons to your WordPress site in four simple steps:
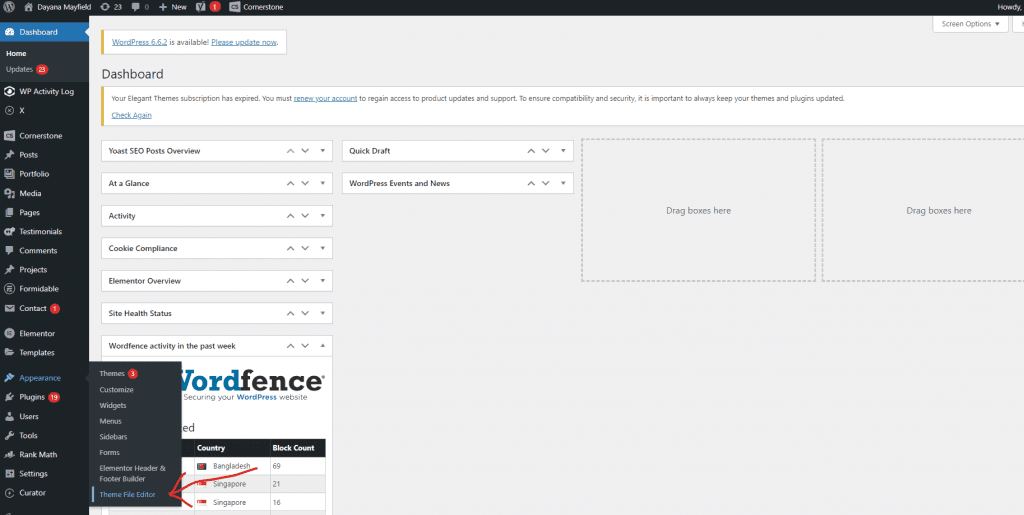
Step 1: Open your WordPress Theme File Editor
The first step is to access the Theme File Editor in WordPress. From your dashboard, navigate to Appearance > Theme File Editor. In this editor, you’ll have access to your theme’s various files, including the functions.php file, which we’ll need to modify to enable Dashicons on the front end of your site.
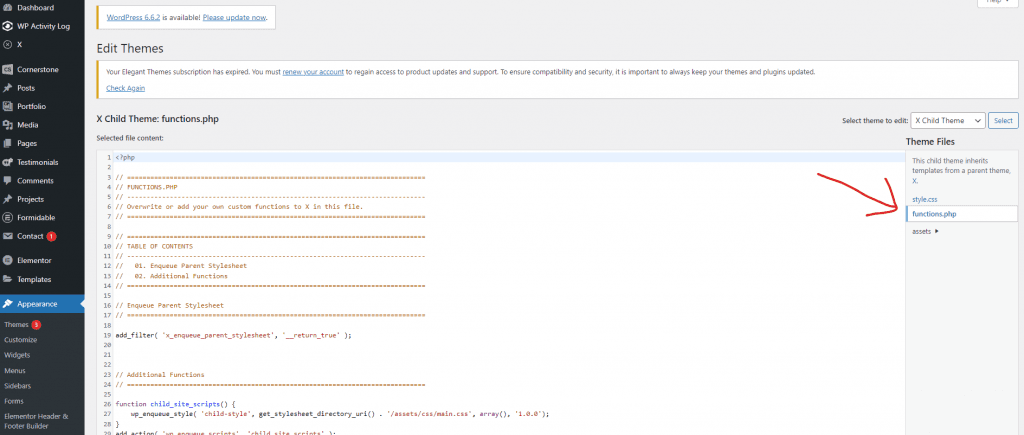
Step 2: Insert the Dashicons code snippet to your functions.php file
On the Theme File Editor page you can access your functions.php file from the Theme Files column to the right.
Once you’re in the functions.php file, you’ll need to add a small code snippet to enable Dashicons on the front end of your website. Dashicons are enabled by default in the WordPress admin area, but not on the front end. To do this, paste the following code into the functions.php file:
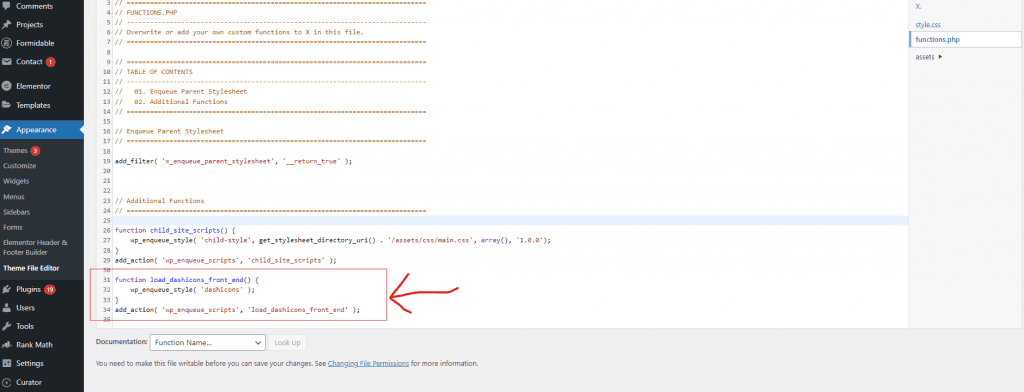
After adding this code, click Update File to save your changes. This will activate the Dashicons library for use across your site.
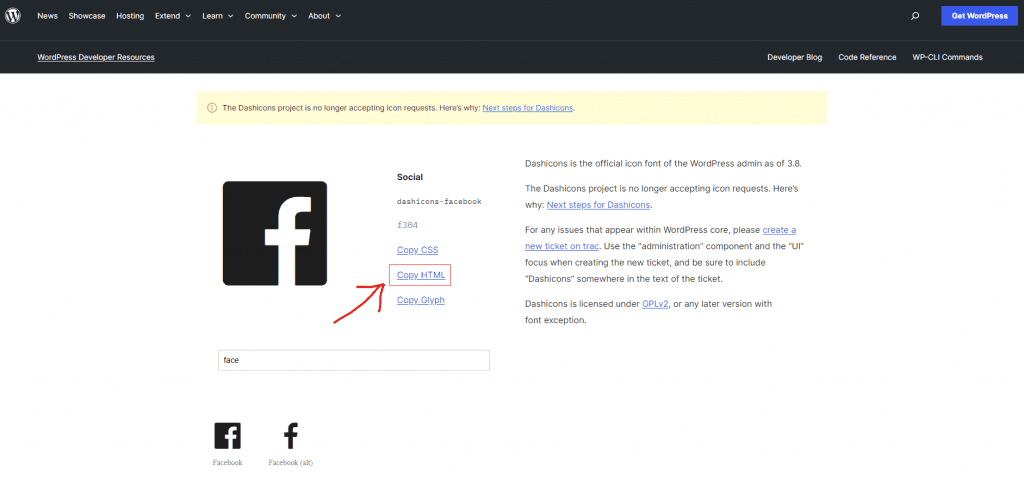
Step 3: Copy and paste the HTML for a Dashicons icon
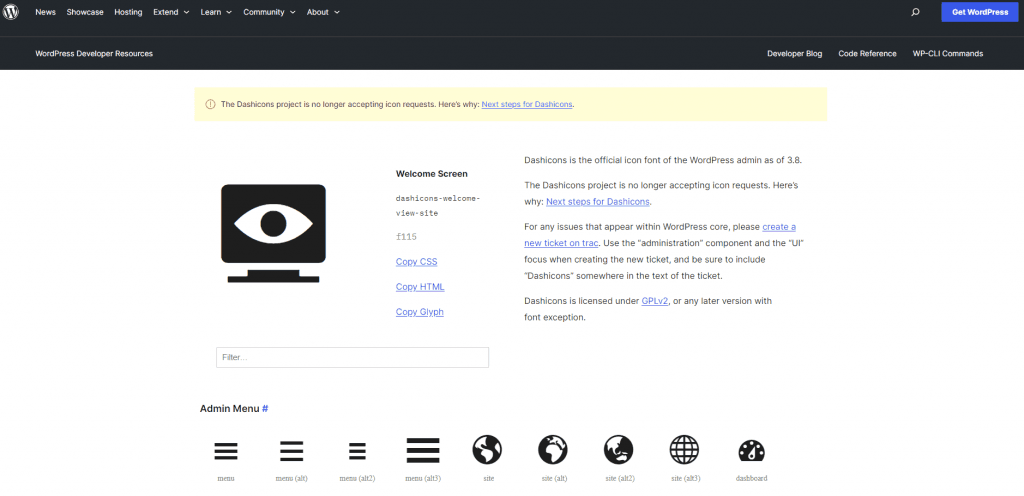
Next, you’ll need to get the HTML for the specific Dashicons icon you want to use. You can find a full list of available icons on the Dashicons website. Each icon has a corresponding HTML class. For example, to add a social icon for Facebook, you would use the following HTML:
Simply copy the appropriate HTML code for the icon you want to use.
Step 4: Add the HTML snippet to your webpage
Finally, paste the Dashicons HTML snippet into your page, post, or widget where you want the icon to appear. This can be done by switching to the Text or HTML tab in the WordPress editor. For example, you can add it to a post like this:
Once added, save or publish the page, and the icon will appear where you placed the snippet. Dashicons are scalable and can be styled with CSS to change their size, color, and alignment, making them a flexible choice for adding icons to your WordPress site.
Final Step: Preview and confirm
Once you’ve added the icons to your site, it’s important to preview and verify that everything looks and functions as expected. Click the Preview button in the WordPress editor to see how the icons look on the live site. Take a moment to check that the icons appear in the correct location and that they match your design preferences in terms of size, color, and placement.
Next, click on each of the social icons to confirm they’re linked to the correct URLs. It’s essential to make sure the icons are functional and lead visitors to your social profiles or intended destinations.
If you notice anything off, like misalignment or incorrect links, go back to your editor to adjust the code or plugin settings. After making changes, repeat the preview process until everything looks perfect.
Once you’re happy with how the icons look and work, you can confidently publish the page for your visitors.
Top WordPress icon tools to consider
Here are three great WordPress icon plugins to get your social icons on your website in no time.
1. Font Awesome
Font Awesome is one of the most widely used icon libraries for WordPress. It offers thousands of free and premium icons in different styles like solid, regular, and brands. It’s easy to integrate into WordPress via plugins or by embedding code directly. With its large selection and flexibility, Font Awesome allows you to add scalable, customizable icons anywhere on your site.
2. FlatIcon
3. Linecons

Linecons is a set of free, line-style vector icons that are perfect for minimalistic designs. It includes icons for various purposes like navigation, multimedia, and basic UI elements. These icons are easy to customize, lightweight, and can be integrated into your WordPress site by downloading the icon set and embedding them via CSS or plugins. Linecons are ideal for websites that want to maintain a clean, modern aesthetic.
So now that you’ve got your WordPress social icons on your website, how about a social media aggregator to share your posts as well? Try our free forever plugin.
Frequently asked questions
1. What are WordPress icons?
WordPress icons are small, visual symbols used to represent actions, categories, or social media links on your website. They help improve navigation and user experience. WordPress includes built-in icons like Dashicons, but you can also add external libraries like Font Awesome for more customization.
2. How can I use WordPress icons on my website?
WordPress icons can improve navigation and highlight key elements like social media links, call-to-action buttons, or categories. They can be placed in various areas such as menus, headers, or sidebars to enhance user interaction. You can use built-in icons like Dashicons or install plugins for additional options.
3. How do I add custom icons to my WordPress site?
To add custom icons, you can use a plugin like Font Awesome or Flatcoin. After installing and activating the plugin, configure the settings to select and customize your icons. Alternatively, you can manually add icons by uploading custom SVGs or using HTML/CSS to insert them directly into your site.
4. What are the best plugins for adding icons to WordPress?
Some of the best plugins for adding icons to WordPress include Font Awesome, Flatcoin, and Linecons. These plugins offer a wide variety of icons, are easy to configure, and allow for customization in size, color, and placement. They are user-friendly and compatible with most WordPress themes.
5. Is it possible to add animated icons to my WordPress website?
Yes, you can add animated icons to your WordPress website using plugins like Lottie Files or Rive. These plugins allow you to integrate lightweight, scalable animations that enhance user interaction. You can also add custom animations by coding SVG or CSS animations directly into your site for more flexibility.
6. How can I add social media icons to my WordPress website?
You can add social media icons to your WordPress website using plugins like Font Awesome or Flatcoin. These plugins allow you to easily place social icons in headers, footers, or sidebars. You can also manually add social icons using HTML or shortcodes provided by plugins or Dashicons.
7. Can I add icons to WordPress menus
Yes, you can add icons to WordPress menus using plugins like Menu Icons by ThemeIsle or Elementor. These plugins allow you to easily insert icons next to menu items for a more visually appealing navigation. You can also manually add icons using HTML and CSS if you prefer custom solutions.
Previous post: