How to Embed Your Facebook Feed in Your Website [Tutorial]
Dayana Mayfield
on
October 17, 2024
With 3.06 billion monthly active users and the 3rd place ranking for most visited website, Facebook remains the social media powerhouse it has been.
With those numbers it’s not surprising that brands continue to spend time and resources creating content for this vast network. When it comes to sharing updates, promotions, news, tips and tutorials with your customers and fans Facebook is still the place to go.
So we know and you know that Facebook is here to stay and their reach is far. I’m sure you’ve got a lot of great content as well. But, are you getting the most out of that content? Have you thought about how else you could be sharing it?
One really smart way to increase your reach and get more content views is through embedding your Facebook Page feed or Facebook alternative sites' feed in your website.
The great thing is that it is super easy to embed Facebook feeds, and we're here to show you how.
In this post, we provide you with a step-by-step guide on embedding your feed in your site. And, just in case you were still on the fence, we also explain some of the top reasons why you might want to do so, as well as tools you can use.
Curator.io is an easy-to-customize aggregator that lets you pull from over a dozen sources. If you'd like to give Curator.io's free forever plan a spin sign up today.
Top 10 reasons to embed your Facebook feed in your website
If the sheer number of Facebook users is not a convincing enough reason to embed Facebook page feed on your website, here are the top ten reasons for it.
Boost Website Engagement
Embedding your Facebook feed brings fresh, real-time content to your website. This encourages visitors to stay longer and interact with your site.Display Fresh Content Automatically
Your website will be regularly updated with the latest posts from your Facebook Page, saving time on manually updating website content.Leverage Social Proof
Embed Facebook profile for personalization. Showcasing user comments, likes, and shares from Facebook also enhances trust and credibility, providing social proof to potential customers.Encourage More Followers
By showcasing your Facebook feed, you subtly encourage website visitors to follow your page for more updates. This can grow your social media presence and expand your reach.Promote Events and Announcements
Embed Facebook event feed to share updates about promotions, sales, or events without extra effort.Highlight User-Generated Content
Featuring customer photos, reviews, and interactions from Facebook on your website helps boost authenticity and encourages other users to engage. With moderation features you can also approve content before it’s displayed.Improve SEO Rankings
Regularly updating your website with new content from your Facebook feed can help improve SEO, as search engines favor sites with frequently updated content.Showcase Your Brand Personality
Your Facebook feed allows you to inject personality into your website, showing visitors behind-the-scenes content, team updates, or fun posts.Increase Conversions
Embedding your feed allows you to demonstrate product usage or customer satisfaction. Customer feedback and reviews are a major influencer of people's purchasing decisions.Save Time on Content Management
Once set up, the embedded feed automates content updates. You can focus on creating engaging Facebook posts, and they’ll automatically appear on your website.
I am hoping now that you see the potential benefits that arise when you embed Facebook page posts. And, don’t stress about how it’s done. We are going to walk you through the process now.
Tutorial: how to embed your Facebook feed in your site
Now, let's go through the five simple steps to embed your Facebook feed. These steps will work whether you're using Curator's free or paid plans.
So go ahead and create an account (if you haven't yet), and let’s get started.
Step 1. Name your feed and set approvals to automatic or manual
The first step is to create a feed. Give it a clear name, such as "Facebook posts."

You'll also need to decide what default post status you want for your posts:
Approved - All posts will be automatically added to your embedded website feed. At any time, you can login to Curator and delete the ones that you don't want to show.
Needs approval - Posts will not get added to your embedded website feed until you approve them. You can login whenever you want to approve the posts that you published to Facebook recently.
Which style you choose depends on what type of content you post to Facebook and how frequently. For this tutorial, we're going to go ahead and select "Needs approval."
Step 2. Choose the right Facebook source to pull content from
After you've created your feed, you'll see it in your dashboard will all of your other feeds. Now you need to click the plus sign to add a source to this feed.

What's a source? A source is simply the social media network or content platform that you want to pull posts from. Of course, we'll choose Facebook, since that's what this post is about, but you can also choose Instagram or a dozen others.
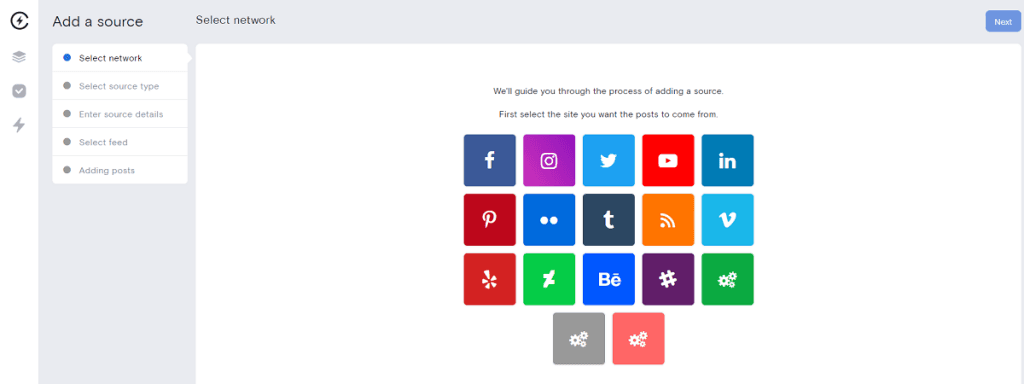
Most sources have more than one source type. For example, with Instagram you could pull posts from your page or a specific hashtag.
With a Facebook page, there are two source types :
A Facebook page's posts
A Facebook page's posts from visitors only

For this example, we'll go ahead and choose Facebook Page, but selecting visitor posts could also be a great way to share testimonials, reviews, customer love, or any other sort of social proof.
If you manage multiple Facebook pages, you'll need to select the correct one.

Keep in mind that you can add more than one source to a feed if you want to combine different social media platforms, or even include both posts from your brand and your page's visitors.
Step 3. Curate your content (delete and approve posts)
Now it's time to curate your posts! You've made your feed and you've selected your source.
Because we selected "Needs approval" in Step 1, we'll need to approve the posts that we want to show up. On the flip side, if you selected "Approved" for your feed, then you would delete the posts you don't want to show.
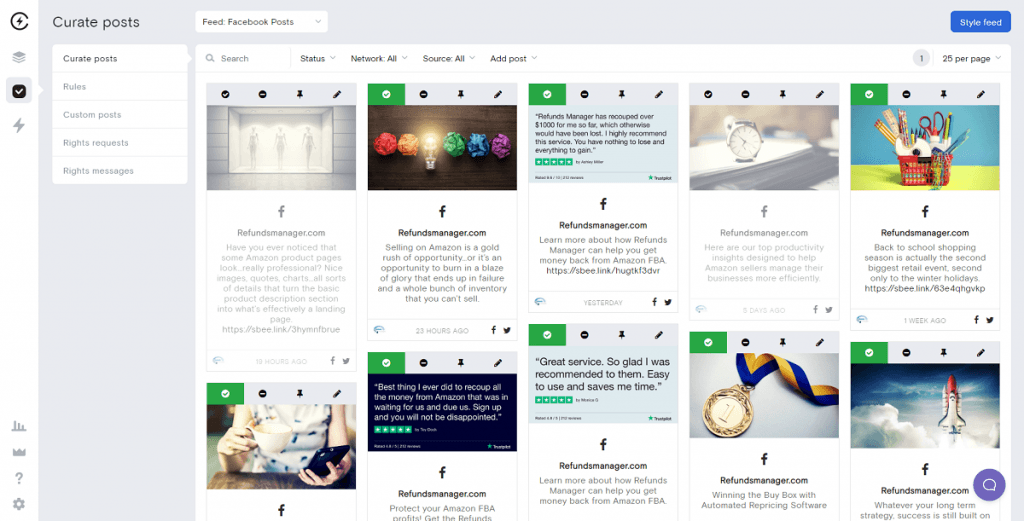
If you'd like to, you can also set up rules. This is especially important when using the automatic approval setting. A rule which excludes posts with profanity is already in your feed as a default, but you can remove it if your audience is find with bad words!
You can also add more rules, such as to reject posts that are very similar, in case you're posting close variations of content successively to get views at different times of the week.

Curator.io is an easy-to-customize aggregator that lets you pull from over a dozen sources. If you'd like to give Curator.io's free forever plan a spin sign up today.
Step 4. Update the style of your feed
The next step is to change the style of your feed. The default template style is called Waterfall. This displays a long running list of posts. This is a great style to choose if you want to put your feed on a dedicated page of your website, such as Updates, News, or Portfolio page.
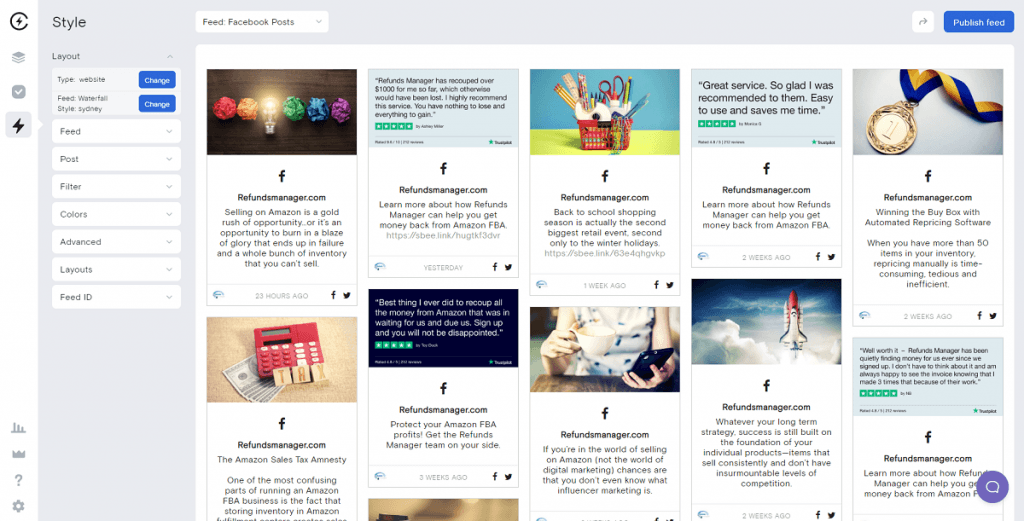
However, for the homepage of your website, Grid or Carousel will likely be a better choice, because these options do not take up so much space as the Waterfall style.
Let's go ahead and choose Carousel, which will slowly scroll through the posts as well as provide arrows for the website visitor to manually click back and forth.
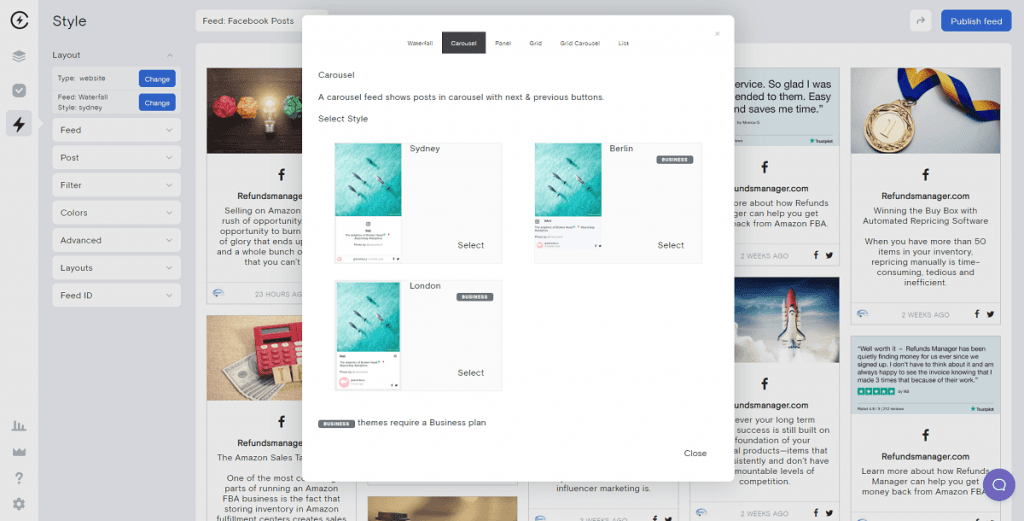
Note that you can do more than change the template. You can also customize whether or not your Facebook posts show text and have borders. Plus, you can change the color of the text, borders, backgrounds, icons, and more.
This way, you can effortless make your Facebook feed match your website's branding.
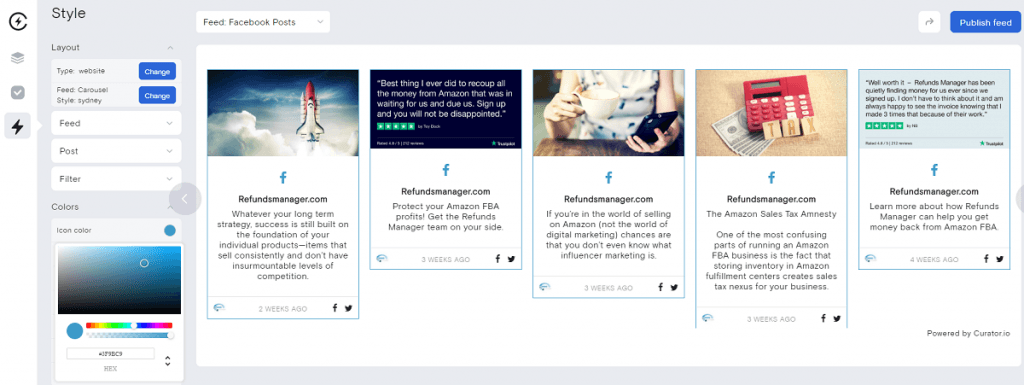
Step 5. Add the HTML code to your site et voilà!
Once you've curated your posts and styled your feed, all you have to do is hit "Publish Feed." Then you can copy the HTML code and paste it inside of any website, whether it's built with WordPress, Drupal, Wix, Shopify, or something else.
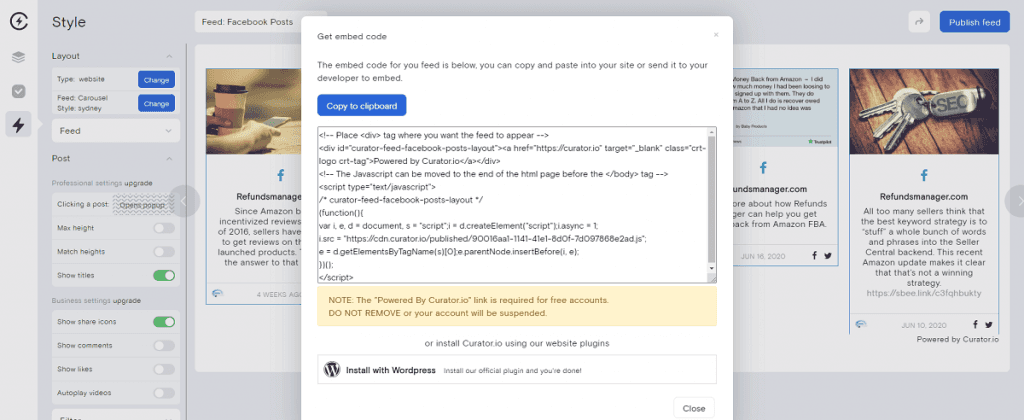
If you have a WordPress site, you can use the Curator WordPress plugin which will provide short code instead of long HTML code. Either way is fine!
Here's what the Carousel-style feed looks like when pasted in the website:
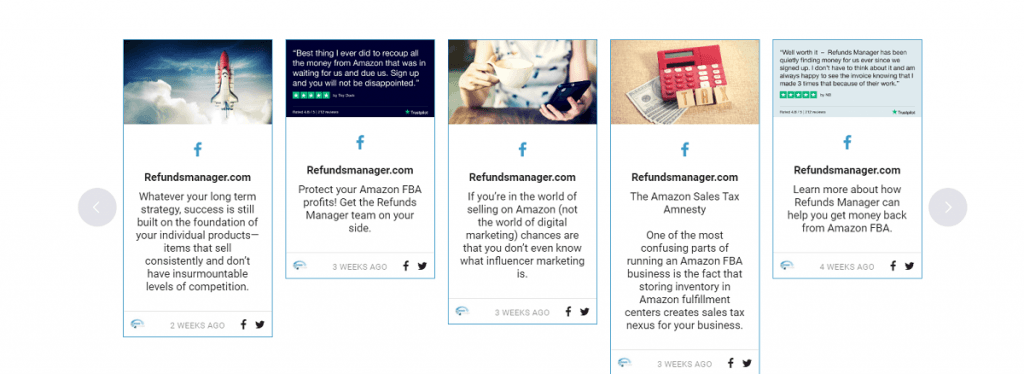
If you want the lengths of the posts to be consistent, this feature is available on a paid plan, and you'll get plenty of other great premium features too.
Embedding your Facebook feed takes just a few minutes to set up. Then it will have your website looking fresh and engaging for a long time to come.
Tools for embedding your social media feeds
When it comes to embedding Facebook pages onto your website, there are three main approaches.
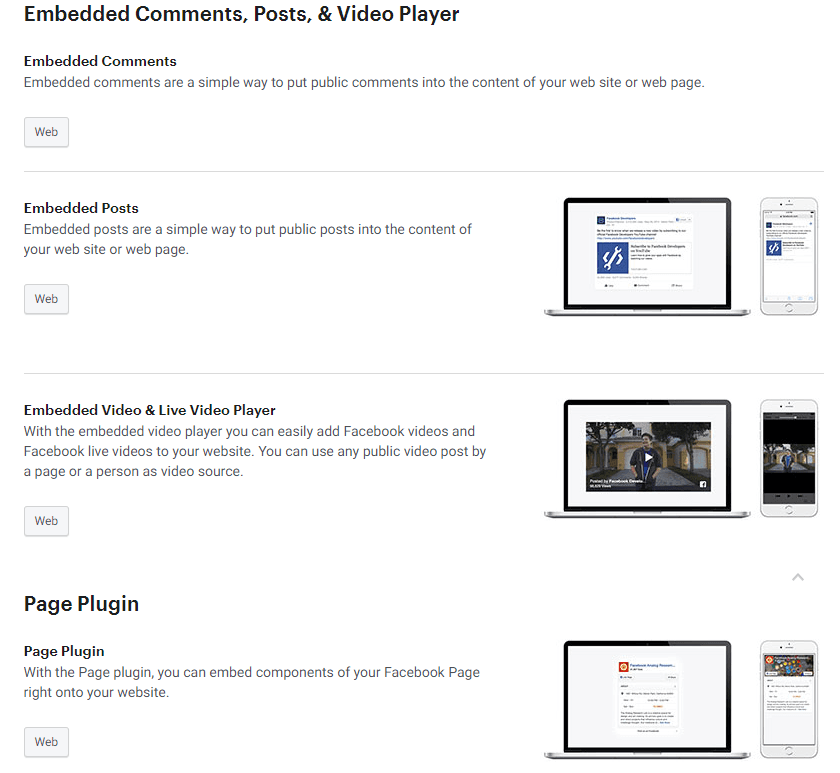
1. Native Facebook Embedding Tools
Facebook Developer offers various plugins for different Facebook feed connection types that you can use to embed your page or posts to your website. The plugins are simple to implement and allow you to display a stream of your Facebook Page’s posts, likes, and activity, helping to keep your visitors engaged with fresh content. However, there are some cons.
Pros:
Quick and direct integration
Mobile-responsive
Cons:
Customization is very limited
The embedded feed will have a uniform look
Overtly feature Facebook's brand
2. Social Media Aggregators
Social media aggregators are our top choice for displaying Facebook Pages on your website. They offer much more flexibility and design customization. This allows you to pull in Facebook Page feeds and control how the feed appears on your site. Thus the style of your feed can match your website’s branding. Most aggregators also offer different display templates (grid, carousel, waterfall, etc.) to enhance visual appeal.
A social media aggregator lets you put your Facebook posts into your website in a way that matches the style of your site, like this:

Social media aggregators also allow you to setup rules for your feed, such as if posts get automatically sent to your website or if they require previous approval to be shown on your site.
Pros:
Customizable appearance,
Ability to mix Facebook content with feeds from other platforms
Filtering and moderation options
Cons:
Free plans may contain company branding
3. Using WordPress Plugins
If you manage a WordPress site, embedding a Facebook feed can be done quickly and efficiently with a variety of plugin options available. These plugins are designed to allow you to display your Facebook Page’s feed directly on your website with minimal coding.

Pros:
Easy integration
Customizable design
Mobile-responsive
Post filtering and moderation option
Cons:
Limited free features
Potential website performance impact
WordPress platform dependency
Example Facebook Feed
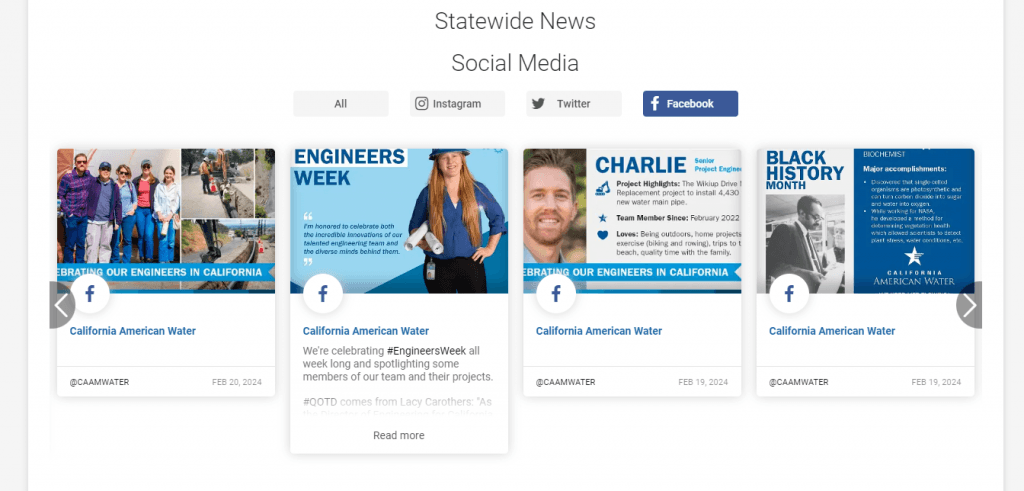
California American Water uses an embedded Facebook feed on their website to engage customers. Being part of the greater American Water Works Company Inc., they share posts related to water services and their ongoing work to keep everyone up to date with what's happening.
With water being such an important and vital resource in our everyday lives, California American Water takes full advantage of their Facebook feed to connect and promote transparency to their customers.
Embedding your Facebook Page on your website is a great utilization of resources. And, utilizing a free content aggregator like Curator takes the risk out of it. Go ahead and see for yourself.
Try our free forever feed
Curator.io is an easy-to-customize aggregator that lets you pull from over a dozen sources. If you'd like to give Curator.io's free forever plan a spin sign up today.
Previous post: