Step-by-Step Guide to Add an Instagram Feed to a Squarespace Site
Dayana Mayfield
on
July 2, 2025
Based on data from Builtwith, over 8 million websites have been built with Squarespace. Does this include you? If so, have you taken full advantage of your website design by incorporating Instagram blocks?
If not, you really should.
Maybe to showcase your beautiful products worn by REAL people, or to show off your awesome wedding venue in action, or what makes your university special.
Whatever the reason...one thing is clear. It's very common to connect Instagram to your Squarespace websites. Instagram feeds are so visually appealing and offer fresh, branded content year-round (or as often as you post).
If you haven’t yet, don’t fret. That’s the point of this post. We’re going to walk you through the steps to connect your Instagram feed, or hashtag campaign, or wherever else feels right for your site.
And the best part, It’s super easy and free.
Quick Start Checklist for Squarespace
Short on time? Here's a rapid overview of how to get your Instagram feed up and running on your Squarespace website. You can follow this quick checklist to go live in minutes — or scroll down for the full step-by-step guide with detailed tips, real-world examples, and best practices.
Quick start checklist:
✅ Choose a social media aggregator (like Curator.io)
✅ Connect your Instagram account, hashtag, or mentions
✅ Select which posts to feature (manual or auto approval)
✅ Customize your feed layout and design
✅ Copy and paste the embed code into a Squarespace block
✅ Review and update the feed regularly to keep it fresh
How to add an Instagram feed to a Squarespace website
A social media aggregator is simply an app that pulls in your social media content and packages it up in a beautiful feed that you can embed into your website.
It only takes a few minutes to set up.
Here's how:
Step 1. Choose a social media aggregator
The first step is to select a social media aggregator tool that will pull Instagram posts into a feed that you can add to your Squarespace website. These tools are designed to save you time while giving you full control over what content appears on your site. Whether you're a small business, an online store, or a large organization, you'll be able to streamline your workflow and keep your site looking polished and current.

When choosing your aggregator, look for key features like:
Automatic or manual moderation, so you can decide what gets published
Multiple display templates to match your site’s design
Custom CSS options for advanced styling
Mobile responsiveness, ensuring your feed looks great on any device
Minimal or no branding, especially on paid plans
Once you’ve picked your aggregator (we recommend Curator.io for its ease of use and design flexibility), you’re ready to start building your feed and embedding it on your Squarespace site in just a few clicks.
Step 2. Create a new feed and set the approval status
In the dashboard, hit the "Create a new feed" button.
Then, give your feed a name and choose the default post status.
If you are only aggregating content from your brand, you can choose "Approved" so that new posts automatically get sent to your Squarespace website.
But if you are aggregating content from other sources (such as hashtags, mentions of your brand, or user-generated content), then make sure to set the default post status to "Needs approval" so that you can manually approve each post that you want on your site.
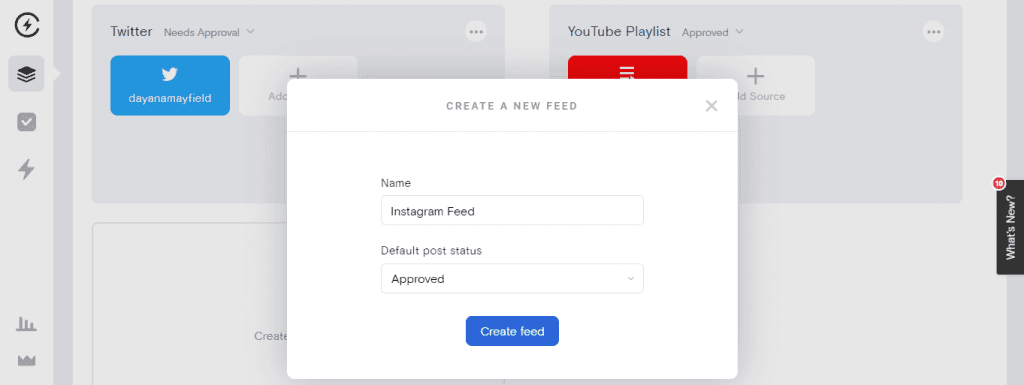
Keep in mind that you can change your approval status at any time.
Step 3. Chose the type of Instagram posts and connect your Instagram account
The next step is to choose the source. In this case, we're choosing Instagram, but as you can see, our social media aggregator also integrates with Facebook, Twitter, YouTube, TikTok, Slack, Tumblr, and many other content sites.
You can later add multiple networks to a single feed, or create a different feed for your favorite networks.
For now, we'll just keep it simple and select Instagram only.
After you select Instagram as the network, you'll need to choose the type of Instagram content.
The most common option is to select an account, so that you can pull all of your posts from a single account. However, many businesses will instead choose mentions, hashtags, or Stories so that they can aggregate customer reviews and UGC.
And just like with the different content sites, you can add more Instagram source types later on.
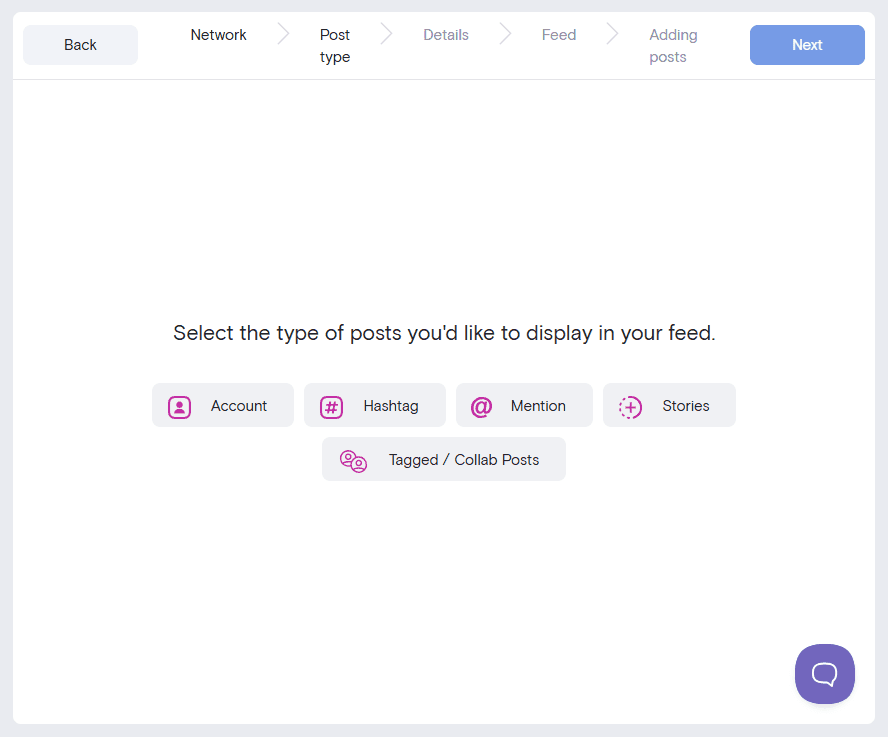
For this example, we'll curate content from Daybring's business account. After you select the type of content, just follow the prompt to login to your account so you can connect it.
Step 4. Curate the content (approve or deny)
After signing in, Curator will pull the content from the chosen source and display the most recent posts.
Now you’ll curate your content.
How to do this will depend on the approval status in Step 2.
If you chose for posts to be "Approved" automatically, all you have to do is delete the ones you DON'T want to show up on your site.
If you chose for posts to "Need approval," then you'll have to approve the ones you DO want showing up.
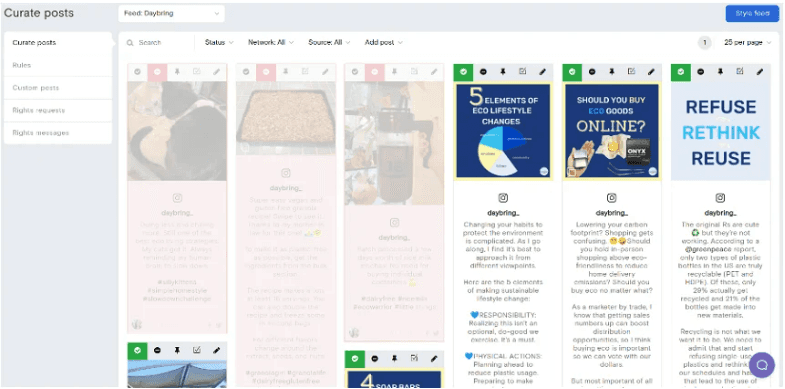
Also, note that you can pin posts as well. That way you can keep the best of the best at the top of your feed.
Step 5. Choose your template style and customize it as needed
Now that you’ve got the posts you want to display, it's time to stylize your feed.
Most website owners want to keep things simple. You can try a Grid style feed, like this one, which will display the Instagram posts in perfect boxes.
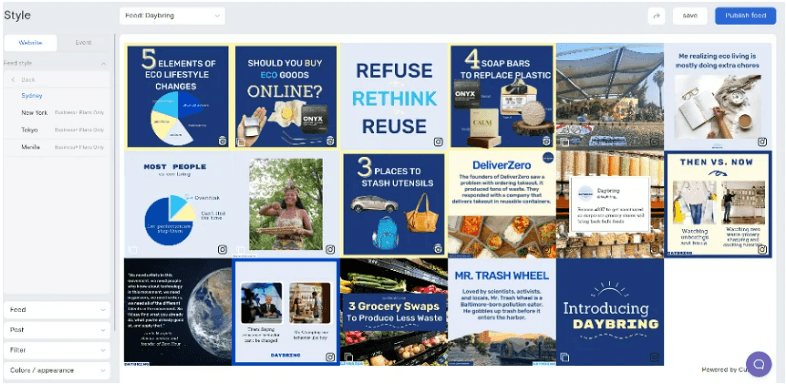
Curator offers lots of different feed templates to choose from, including Waterfall and Carousel.
As you select the different templates, the view on the right will change accordingly so you can preview exactly what it look like when you add it to your website.
What's more, there are tons of customization options. From word count displayed, to border widths and the color of just about everything, you can adjust it with just a few extra clicks. And, If you want total control, you can incorporate your own CSS as well.
Step 6. Embed the feed code in your website
Next, let's add the embed code to your site.
This is easier than you might think.
Simply hit "Publish feed" and you'll see the code that you need to embed. Copy this code to your clipboard.
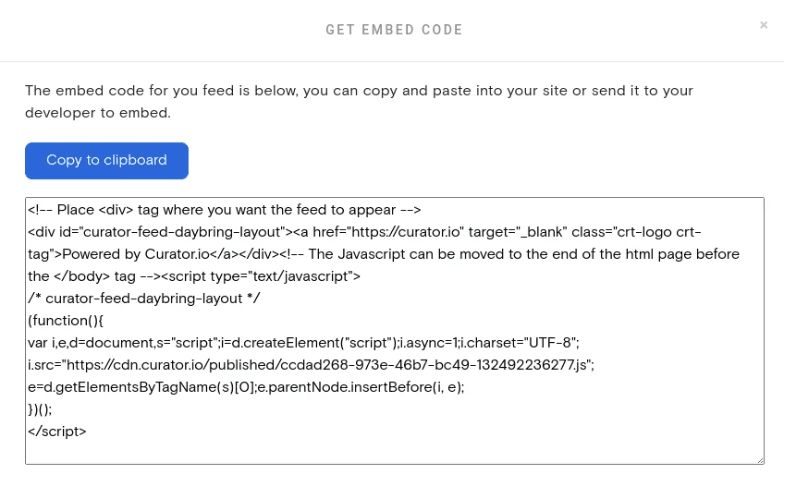
Paste the code in your site where you want it to go. You can create a new Squarespace block of custom HTML code and add it to your website's footer or sidebar. Then just paste the code there, and your posts will fit into the designated space perfectly.
Step 7. Login to the aggregator to approve or deny new posts occasionally
The final step is simply a reminder to make sure that you're checking the content every so often.
If your posts are set to automatic approval, plan on checking your site occasionally just to remove anything you don't want to show up.
If your posts are set to manual approval, you should log in more regularly (perhaps once a week or every other week) to approve posts so that new content is added to your site. Otherwise, your site will be stale.
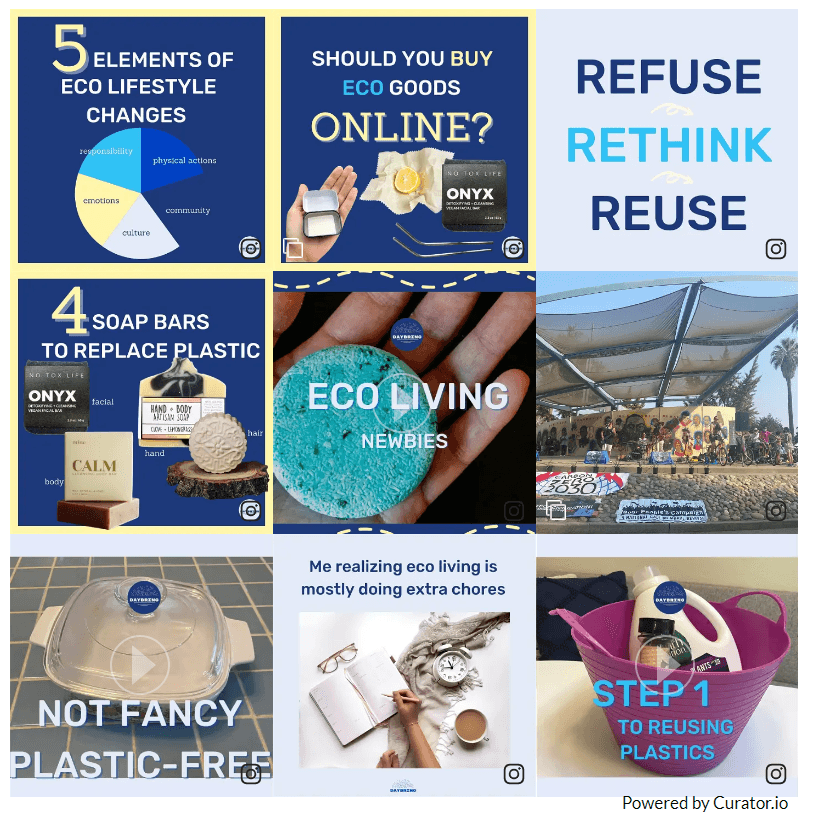
Examples of embedded Instagram feeds
Need some inspiration?
Take a look at these great examples of embedded Instagram feeds. This is easy to do whether your website is created with Squarespace (see below for the tutorial!), Wix, or WordPress.
You can make your embedded Instagram feed super colorful with lots of flair, or just keep it simple and let your posts shine all on their own.
Example 1. Grow It Local's farm photos
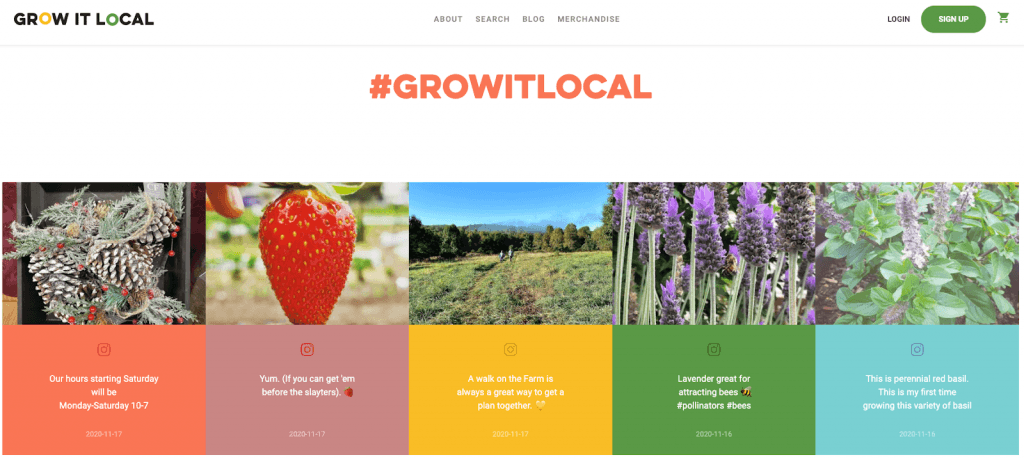
Grow It Local is a local community garden that teaches people how to grow healthy food and be more self-sufficient. The site uses their Instagram account to not only share beautiful photos of the garden, but to also update their audience on recent events.
If you want your embedded Instagram feed to act as a source of news, make sure to either include the captions in your Squarespace website, or add the information in text on the photos before you post them to Instagram.
Example 2. Timbertech's customer deck examples
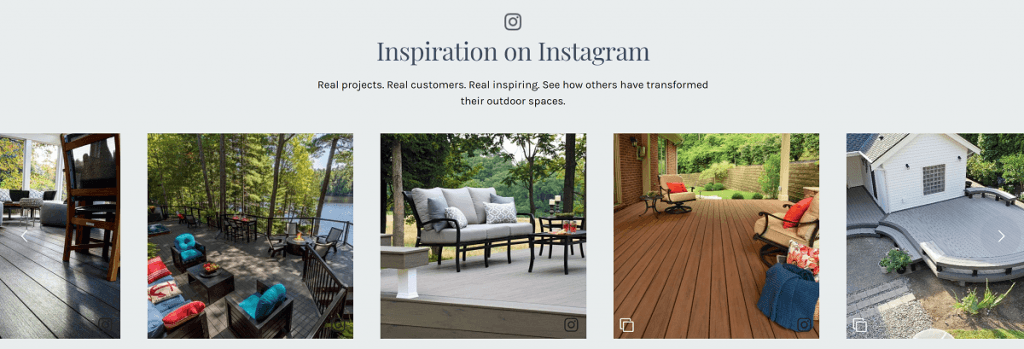
Timbertech, a brand of engineered, composite deck products offers another great example of an embedded Instagram feed. They use their feed to showcase real examples of decks built with their customers. When browsing the different decking products available, these Instagram posts help customers choose the colors and style they like and to dream bigger when it comes to deck design.
Any sort of ecommerce or retail product can benefit from adding their Instagram content to their Squarespace, providing valuable retail experience examples. site because it makes it easier for customers to visualize the products and make better purchasing decisions.
Example 3. South Australia's National Parks visitor photos

The website for National Parks of South Australia features beautiful pictures taken by visitors. This is an example of user generated content (UGC). Just like it sounds, that means content that was created by users, whether those are your clients, customers, or visitors.
This is a smart strategy because you can encourage people to create content for you. Not only does this engage your audience in a deeper way, but it also removes a big burden from your marketing team.
If you want to utilize this strategy, be sure to come up with a branded hashtag and include it right above the embedded Instagram feed. As you can see, the website uses the headline "Your park pics #NationalParksSA" to make it clear that you should use that hashtag if you want to be included.
When curating UGC on your website with a hashtag, make sure to manually approve every post—you don't want unflattering or profane images showing up on your website. In our step-by-step process below, we show you how to manage the approvals.
FAQs and Troubleshooting for Squarespace Users
Got questions? Here are quick answers to common issues when adding your Instagram feed to Squarespace.
How do I manage which posts appear on my site?
To stay in control, set your feed to manual approval. This ensures only the posts you approve get published to your Squarespace site. It’s a great way to keep your embedded feed clean and on-brand—especially helpful if you're pulling in posts from hashtags or user mentions.
Can I customize how the feed looks in Squarespace?
Absolutely. Most social media aggregators (like Curator.io) let you choose from different layout templates such as grids, carousels, or masonry styles. You can also match fonts, colors, and spacing to your existing Squarespace design, or go even further with custom CSS.
Why isn’t my Instagram feed showing up on Squarespace?
First, double-check that the embed code was placed in a Code Block on the right page or section. If the feed still isn’t appearing, your browser may be caching an old version of the page—try a hard refresh. Also, ensure your Instagram account is properly connected and has the right permissions enabled via Facebook (required for Business accounts).
Tips for other website builders
Are you using or thinking of using a different website builder? Here are some step-by-step guides for embedding your Instagram feed on some of the other popular platforms out there.
Tips for creating UGC for your website
The benefits of creating and embedding UGC is big. Learn more about creating, utilizing and managing UGC for your brand or organization.
Curator.io is an easy-to-customize aggregator that lets you pull from over a dozen sources. If you'd like to give Curator.io's free forever plan a spin sign up today.
Previous post: