Curating social media content is one of the best ways to get the most value out of it. It helps you keep your audience informed while showcasing your personality. All while getting more eyes in front of your content.
In this article, if you’re interested, we’ll go over more reasons to repurpose your content and walk you through how to curate and customize social media feed.
Curator.io is an easy-to-customize aggregator that lets you pull from over a dozen sources. If you'd like to give Curator.io's free forever plan a spin sign up today.
Why big brands and small businesses alike add an on-brand social media feed to their websites
Why should you customize social media feed, let alone curate it? There are many reasons you might curate posts; one of them is that it helps increase engagement.
Here are a few other reasons worth considering:
Show how your product is being used, which can increase your sales
Increase organic traffic
Build brand loyalty
Those don’t even cover half of the reasons why curating content is so beneficial to your business.
How to customize the look and feel of your feed
Before you can customize your feed, you’ll need to take a few easy and quick steps first.
Want to jump straight in? Watch the video above!
Step 1: Name your feed
The first thing you’ll need to do to customize social media feed is to name it. You can call it anything you want, as long as it’s clear to you what you’re referring to.
Also, you’ll need to decide on your posts’ approval setting. Here are your options:
Approved - Any content you curate will automatically be added to your website. If needed, you can always manually remove posts that you don’t like.
Needs approval - All social media content you want on your website must be manually added by you.
The setting you choose depends on your brand and the type of content you’re curating.
Step 2: Choose a source
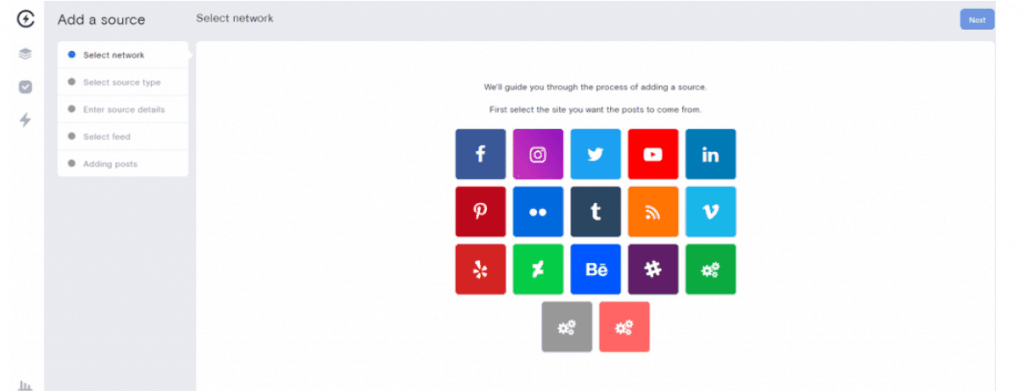
Next, you need to pick a source, a social media platform, or a network that you get social media content from. And below, you’ll see that there are over ten different sources you can choose from.

After you’ve decided on the source and source type, you’ll need to add the necessary details which are unique for each source type.
We discuss how to add and choose a source in more detail here.
Step 3: Curate your social media content
Next, you’ll need to curate your content, this means you’ll need to approve or reject content before it’s published on your site.
If you choose to let your content be published automatically, all you need to do is manually delete any posts you don’t want to add.
Or, if you choose to add your content manually, you only need to pick what posts you want to be published, or none of them will show.
Curator.io is an easy-to-customize aggregator that lets you pull from over a dozen sources. If you'd like to give Curator.io's free forever plan a spin sign up today.
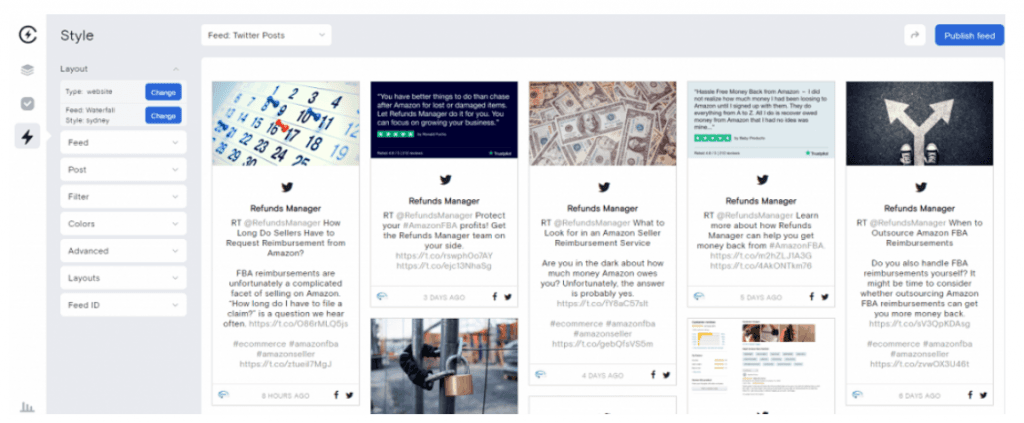
Step 4: Customize social media feed
We’ve covered adding a feed and source and curating social media content, now let’s walk through customizing your social media feed.
Below, you’ll see the default layout option, Waterfall, which allows your content to flow down the page in tiles.

Besides the Waterfall layout, you can also choose from…
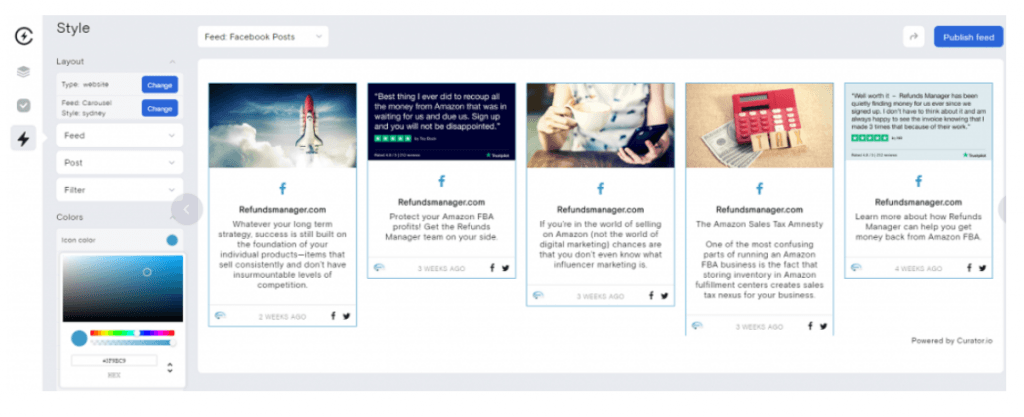
Carousel - One row of your posts will rotate automatically. It’s great for showcasing multiple products or highlighting different variations of the same product.
Panel - Shows one post at a time that’ll change after a set amount of time. It’s perfect for helping your visitors focus on one post.
Grid - Displays a series of posts without the caption; you can see all information related to a post by clicking it. It’s best when you want your visitor to focus on the image.
Grid carousel - A rotating grid with hidden but easily accessible captions. It’s optimal for minimizing space without sacrificing value.
List - Shows your posts in a single list that flows down the page. It’s great if the order of your content matters or if you have a dedicated page for your curated content.
In addition to layouts, you can also choose between different styles, which determines how the posts are displayed.
The layout and style you go for are based on your goal and where you want to place the content. For example, if your curated posts are going on your homepage, consider the carousel, panel, or grid carousel layout.
Each of those is an excellent option to help you save space, share posts, and keep visitors engaged with your original website content.
There are various ways you can customize social media feed to fit your brand and needs.
One way is to change the color of the social media icon, text, feed background, border, link, and background. You don’t need to make drastic changes if it’s not necessary. You just need to find a balance between the posts being aesthetically-pleasing and on-brand.

Not happy with the outcome? You can reset it with one click. Or if you like to keep it simple and prefer the default style, it’s totally up to you.
Examples of customized social media feeds
Let’s look at some examples of how businesses customize social media feed on their website.
UNStudio
UNStudio is an architecture design network that creates building designs with the future in mind. The content they curate is the buildings they designed that is currently being used. Like the rest of their site, the text isn’t what matters; it’s the images.

Garage Sale Trail helps its audience buy or sell secondhand merchandise online or in-person. They use #garagesaletrail to curate social media content. And they customize their posts by changing the hashtag and link color to fit their brand.

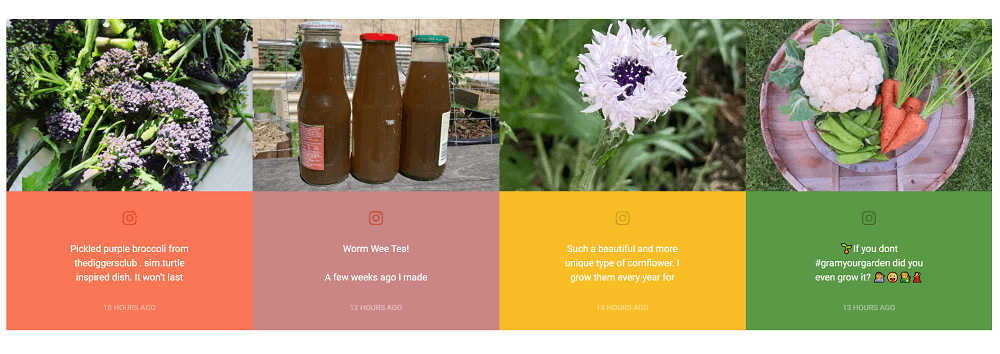
Grow It Local is on a mission to help more people grow and eat their own food and share their results. Because their entire purpose is to share food that people grow, they use #growitlocal to curate content for their site. And they also customized their feed by adding their brand’s colors as the background of each post.

As you can see, just because you’re curating content doesn’t mean you can’t customize social media feed and make it look and feel like your own. And with Curator, you have complete control over the content you want to represent your brand.
Curator.io is an easy-to-customize aggregator that lets you pull from over a dozen sources. If you'd like to give Curator.io's free forever plan a spin sign up today.
Previous post: