How to Use Twitter Geo Location to Boost Your Foot Traffic
Dayana Mayfield
on
October 1, 2020
Want to reach more of your target audience that’s near you? Well, with Twitter geolocation, it’s totally possible.
And in this tutorial, we’ll explain exactly what Twitter geolocation is, how you can use it to market on social media and your website, and provide a step-by-step guide on exactly how to do this.
Curator.io is an easy-to-customize aggregator that lets you pull from over a dozen sources. If you'd like to give Curator.io's free forever plan a spin sign up today.
What is Twitter geolocation?
Twitter geolocation allows you to locate tweets near a specific country, city, street, or business. It can pinpoint a user’s location based on their longitude and latitude from the IP address or GPS coordinates of the device they were using.
While this is insightful data, one thing to note is that because adding your location is optional; you won’t see every tweet in that area.

How Twitter geolocation helps local businesses with their marketing
You know what Twitter geolocation is, but how does it benefit you? Below, we’ll discuss how geolocation can help your marketing.
Find local customers
Using geolocation, you can find and interact with customers and potential new customers that are physically close to your business.
Create more relevant content for your audience
When you know where your customers are located and what type of content they interact with, you can create more content that they’re interested in. And as a result, more people will likely engage with your content.
The result?
You form relationships with your target audience and increase brand loyalty, ultimately leading to more sales.
Increase foot traffic
When you know who to target and how you can reach more people before offering any sale or promotional deals, for example, with geolocation, you can see what product or service is popular in certain areas. With this information, you can plan accordingly and target your marketing efforts to reach people who are most likely to visit or purchase from your business.
Increase brand awareness
Most people won’t have their location on, so you can’t use geolocation to find their tweets. But, by reaching out and interacting with people who do, they’re likely to mention your business to people who can benefit from what you offer.
So, even if they don’t interact with your business immediately, you’ll be one of the first businesses that come to mind when they or someone they know need your product or service.
Nielsen’s study said that 77% of consumers are more likely to buy a new product when referred to them from their family or friends.
How to use Twitter geolocation as a source for social media content
Everyone knows that they can repurpose blog posts, infographics, and other content marketing forms to increase social media reach.
But what about your website?
While Twitter geolocation can help you with your social media and local marketing plans, it can also increase your reach and much more through your website. And that’s by embedding geolocation posts on it directly from social.
Why embed Twitter geolocation posts to your website
Other than increasing your reach, why should you embed Twitter geolocation into your site?
Below, we’ll list a few reasons why adding a Twitter geolocation feed to your website is pretty essential.
Add more visuals to your website
Visuals help break up the text on your site, making it easier on the eye and for your audience to remember what they read. So by adding geolocation tweets, you’re making it easier for them to absorb what they read while making your site more visually appealing.
Plus, more visuals mean more personality. And who doesn't like a business with character?
Share user-generated content
Of course, by pulling geolocation posts from Twitter, you’re sharing user-generated content. The UGC that you share can keep your website fresh without needing to create new content. It can also encourage more users to share their content with you in exchange for being featured on your website.
Promote a campaign
You can also showcase content that’s relevant to your campaign. Using a branded hashtag or hosting a giveaway? By embedding a Twitter geolocation feed into your site, your social media and website visitors can participate in your campaign while you’re hosting it.
Curator.io is an easy-to-customize aggregator that lets you pull from over a dozen sources. If you'd like to give Curator.io's free forever plan a spin sign up today.
Step-by-step process for creating a social media feed with Twitter geolocation
Now that you know how it can benefit your business, here’s a thorough tutorial on how you can use Twitter geolocation to curate social media posts for your site.
Step 1: Name your feed and choose your approval setting
The first thing you’ll need to do is name your feed, which you can access in the “Organize” tab in Curator.
Because you’re using geolocation, choose a name that’s straightforward like “Local Tweets.” Or, if you plan on targeting tweets in more than one location, then “Geolocation Tweets” or “Location-based Tweets” are also useful.
For this example, we’ll use “Local Tweets.”

After you’ve decided on a name that works for you, next, you’ll need to choose an approval setting.
Here are your options:
Approved - All content you curate will automatically be published on your site. You can manually delete any content you don’t want.
Needs approval - No posts will be added to your website until you manually approve them.
While automatic approval can save you time, manually approved content can help you control what type of content is being curated on your site because you’re using user-centric tweets.
Step 2: Choose the source of your Twitter content
Now you need to choose a source, which you’ll pull your social media content from. Because this is a tutorial for Twitter geolocation, we’re going to choose Twitter. But, as you can see below, there are over 15 different sources you can choose from to help you with your goals.
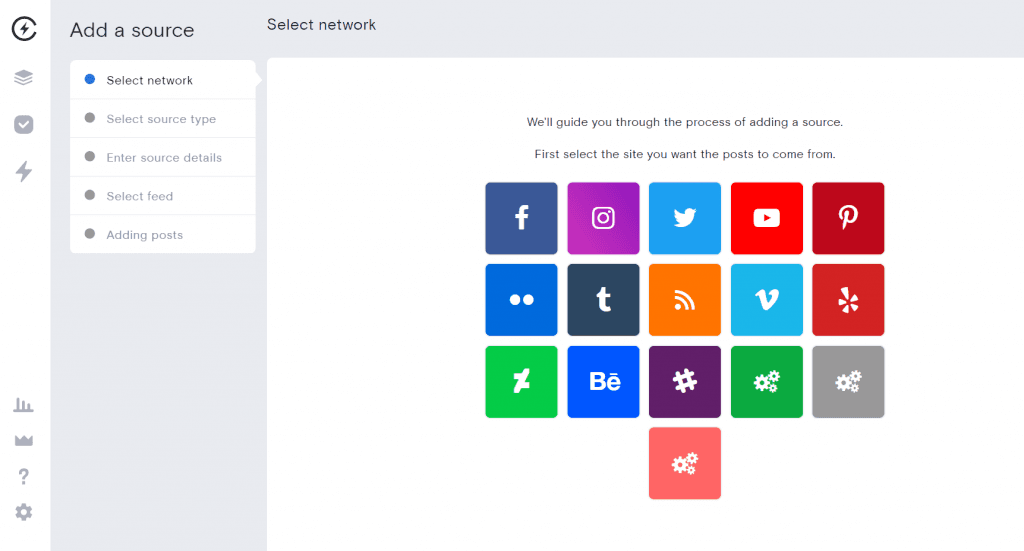
Next, you’ll need to pick a source type. The source types for Twitter are:
Twitter geolocation
Twitter hashtag
Twitter timeline
Twitter user
Twitter user mention
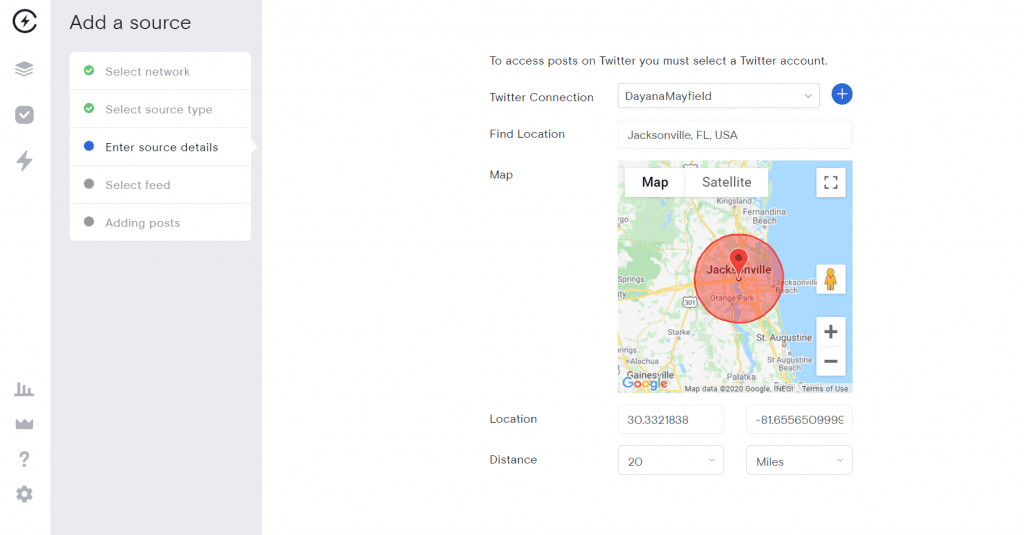
We’ll pick “Twitter geolocation,” which allows you to add content posted in the location you want content from.
Once you’ve chosen “Twitter geolocation,” you’ll need to select your account and the location you want to source content from. After you’ve decided on a location, you’ll need to choose the exact distance, either in miles or kilometers.
You can also move the waypoint to the exact area you’re sourcing to get a more precise reading.
Need more help with choosing a source? We got you covered!
Step 3: Delete or approve posts (depending on your approval setting)
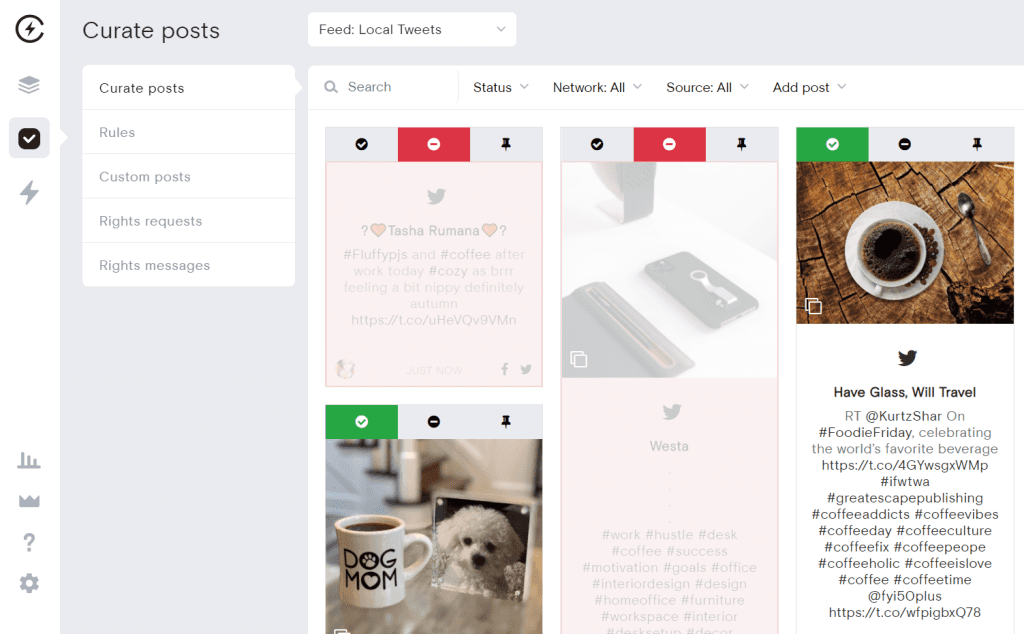
Once you’ve decided on a location, now it’s time to curate your content. Curating means that you’ll delete or approve posts based on your feed’s approval setting.
If you’re allowing posts to be uploaded to your site automatically, just go through and manually delete any posts you don’t want, and you’re all set.
If you want more control over the content you allow on your site and choose to add all posts manually, you need to go through and choose what you want to show.
For this example, we choose to approve our posts automatically. So, you’ll notice that we’re removing posts that we don’t want on our site.
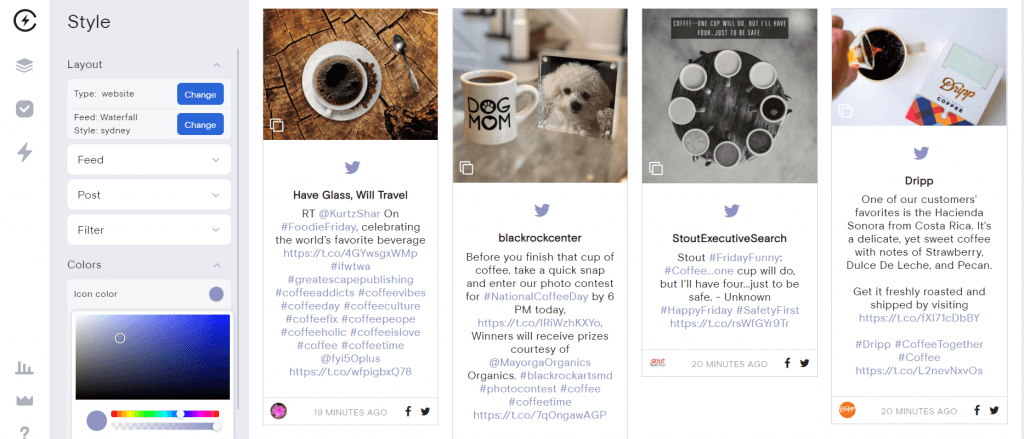
Step 4: Customize your feed
Now that you’ve gotten all the essential information out the way, now you can start customizing your feed!
There are loads of options you can choose from to make your feed your own.
You can get a feel of the default setting for it below.
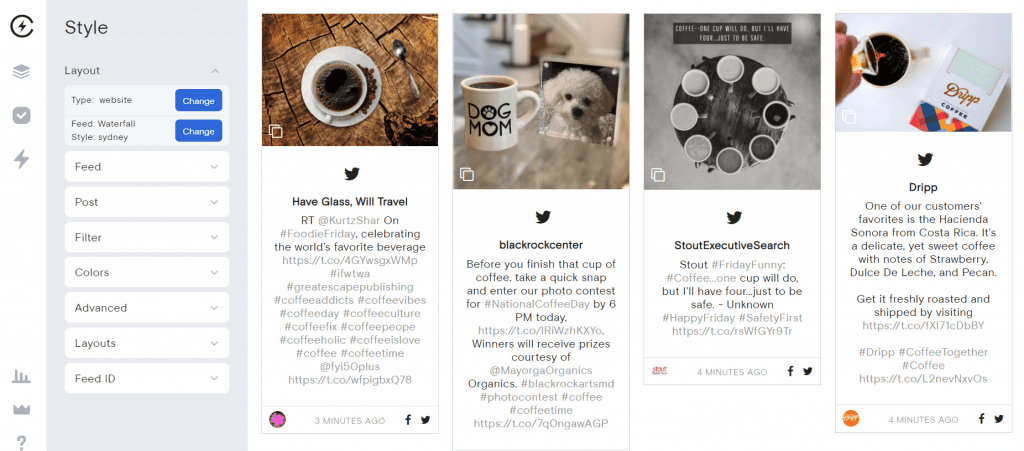
While the default layout feed is Waterfall, there’s also:
Carousel - Rotates the posts in your feed.
Panel - Showcase one post at a time and automatically changes after a specified amount of time.
Grid - Displays multiple posts with hidden captions; hovering over a post provides more information.
Grid carousel - Rotates multiple posts with hidden captions that you can access by clicking on a post.
List - Shows each post in a line that flows down the page.
Also, with each layout, you can customize how your feed is displayed on your page. For example, if you choose Grid carousel, you can change the number of rows, if it rotates, how fast it rotates, and much more. And that’s just the possibilities for one layout!
Plus, there are different styles you can choose from for each layout to display your curated content.
Want to make your posts stay consistent with your brand? Curator also lets you customize the colors of the icon, text, link, background, and more to your preference.
Step 5: Add the HTML code to your site
The last step you need to take before you can add your curated posts to your site is to hit “Publish” and copy the code. From there, you paste it into your site, and your developer can embed it.
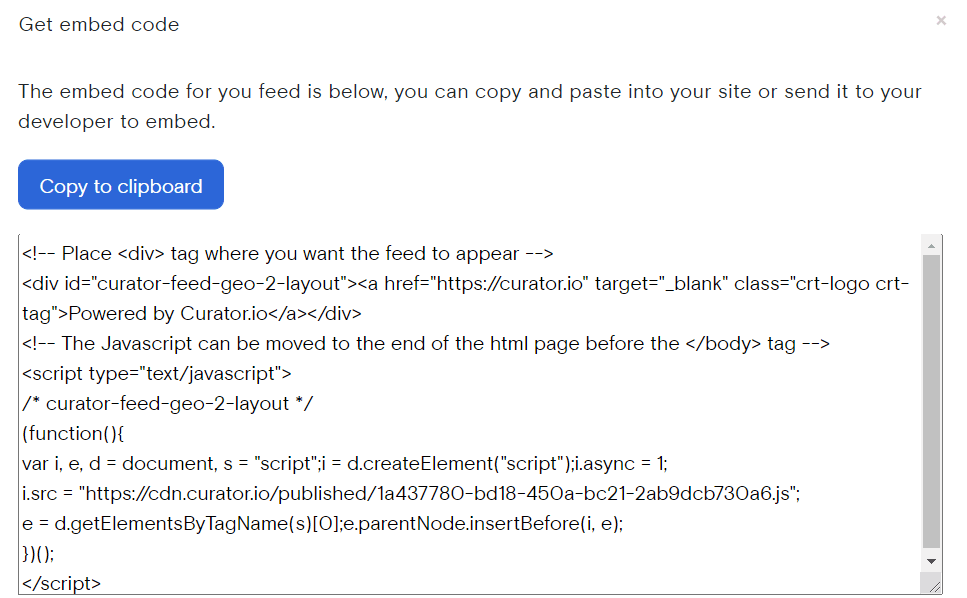
And that’s it; you’re all set! You can add your feed to your homepage, footer, on a dedicated page, or anywhere that fits your needs. You can also add more than one feed to your site. It’s totally up to you.
As you can see, utilizing Twitter geolocation and embedding it into your website is beneficial to your marketing strategy, keeps your customers engaged, and is super simple.
Curator.io is an easy-to-customize aggregator that lets you pull from over a dozen sources. If you'd like to give Curator.io's free forever plan a spin sign up today.
Previous post: