Adding a social feed to your HubSpot website works best when it supports the purpose of the page rather than competing with it. Instead of placing a feed near the top of every page, think about where fresh social content adds the most value. Product pages, customer story pages, event landing pages, and the website footer are all strong locations because visitors are already looking for proof that your business is active and trusted.
I’ve found that the highest-performing HubSpot pages use social feeds to reinforce the content on the page, not replace it. For example, a product page can feature customer photos using that specific product, while an events page can display recent event highlights from Instagram or LinkedIn.
Curation is just as important as placement. A feed filled with every social post can quickly become distracting or show content that isn't relevant to the visitor. With one ecommerce customer, we learned that manual moderation worked best when adding a social feed to HubSpot. They created individual feeds for different product lines and embedded them on the relevant product pages. Visitors saw content related to the products they were browsing, which created a more cohesive experience.
For HubSpot websites, I also recommend creating separate feeds for different marketing goals. Your homepage might highlight brand updates, while your careers page features company culture, and your footer displays customer-generated content or recent announcements. This keeps every feed aligned with the visitor's intent.
Finally, keep the design clean and responsive. A compact grid or carousel usually integrates well with HubSpot themes without slowing the page or overwhelming your calls to action. When your feed is thoughtfully placed and carefully moderated, it becomes another trust signal that encourages visitors to stay engaged and continue exploring your website.
Why add your social media feed to your HubSpot website?
Embedding a social media feed in your website is fast and easy, so you don't need reason to make the effort worth it (trust us, it takes about 5 minutes).
However, your website is important. Regardless of how easy it is to embed a feed, you shouldn't do it for no reason. There should be a purpose for every single element on your website.
Here are some reasons why you might add your feed to your HubSpot site:
Add personality - Jazz up your website by showing off pictures of your team, your customers, or anything else.
Add visual content - It's simple. Adding great visual content to your site makes it more interesting and engaging.
Promote a campaign - Are you creating a branded hashtag, a giveaway, a podcast, or something else? Maybe you simply want to aggregate social media posts related to a specific campaign and only add these ones to your site.
Encourage more UGC - User generated content is images captured and uploaded by your customers and fans. By embedding UGC on your website, you can spread awareness that your brand loves receiving these kinds of images encourage more people to share them on social media with a specific hashtag.
Contextualize your product - Images of your product being used (not just sitting pretty) can greatly impact sales.
Promote an event - Do you hold an annual event? Pictures from the event can help generate excitement for next year.
Share portfolio samples - Maybe you offer an artistic or expert service? Showcase your work on your website.
Of course, the above list isn't exhaustive. There are plenty of other strategic motivations too.
Examples of an embedded social media feed
Want to see some examples of what an embedded social media feed actually looks like?
Here are some eye-catching examples to inspire you.
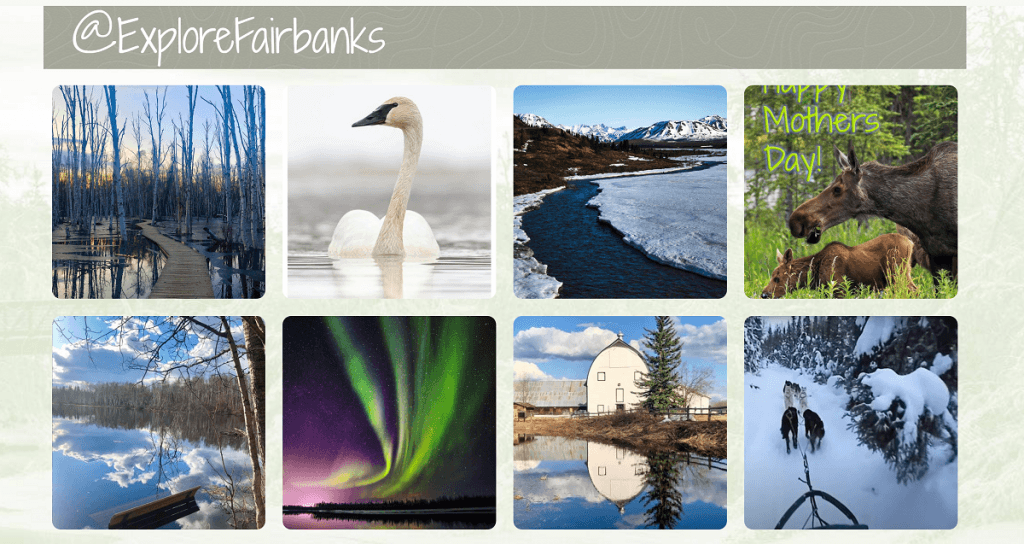
1. Fairbanks, Alaska Travel Site
The Fairbanks travel site uses an embedded Instagram feed to deliver an immersive, visual-first experience. The feed highlights real photos of landscapes, wildlife, and seasonal activities that visitors can expect to see in Alaska. The style is clean, bright, and outdoor-focused, which fits the brand’s nature-driven identity.
This approach gives the site an authentic, user-generated feel while showcasing the destination in a way no static gallery can. The benefit is simple: it inspires wanderlust. Prospective tourists get a vivid preview of what their trip could look like, helping push them from browsing to actually planning a visit.
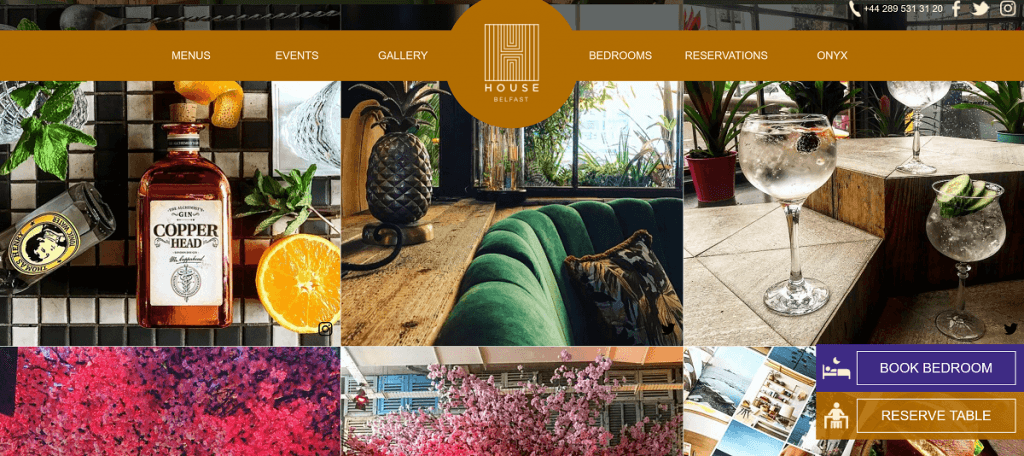
2. House Belfast Hotel
House Belfast’s embedded Instagram feed leans heavily into visual aesthetics with warm lighting, stylish interiors, and glossy lifestyle shots. The feed blends seamlessly with the website design, creating a cohesive brand experience. The style is elegant yet modern, with polished images that highlight both the hotel rooms and its popular restaurant and bar.
Their Instagram feed gives visitors an authentic glimpse of the hotel’s vibe, from cozy rooms to beautifully plated dishes. It feels less like marketing and more like a friend showing you around. And that’s the real benefit: potential guests can easily imagine themselves there, which makes them more likely to book a stay, grab a meal, or check out the hotel’s other amenities.
3. US Track and Field Team
The US Track and Field team’s website embeds its X (formerly Twitter) feed so fans can stay updated without feeling overwhelmed. Visitors can quickly catch announcements, follow the team’s latest accomplishments, and stay connected to what’s happening without leaving the site.
The style is bold and energetic, which reflects the team’s identity. The benefit is in how organized and engaging the layout feels. Fans can quickly find the type of content they want, which boosts interaction and keeps the page feeling fresh.

All of the above examples were created using Curator.io. Curator.io is an easy-to-customize aggregator that lets you pull from over a dozen sources. If you'd like to give Curator.io's free forever plan a spin sign up today.
4. Wake Forest University

Wake Forest University uses an embedded social media feed to bring more life to its website and showcase what is happening across campus. Instead of relying only on static images, the feed highlights real student experiences, campus events, athletics, and university announcements through regularly updated social content. This helps prospective students, parents, and alumni see the community in action without leaving the website.
What makes this approach effective is that the feed complements the surrounding content instead of distracting from it. Visitors can continue browsing while seeing authentic moments from campus life, giving the site a more current and engaging feel. For universities, an embedded social feed is a simple way to demonstrate an active campus culture, encourage visitors to explore social channels, and keep key pages looking fresh with minimal ongoing effort.
5. Baby Organic Clothes

Baby Organic Clothes uses an embedded social media feed to extend the shopping experience beyond its product catalog. Instead of ending the customer journey with static footer content, the website showcases real Instagram posts featuring products, lifestyle imagery, and updates from the brand. This helps visitors see how the clothing looks in everyday settings while reinforcing the company's family-focused identity.
I like that the feed feels like a natural extension of the website rather than a separate social media widget. The images match the brand's soft visual style and add fresh content without distracting from product pages or calls to action. For ecommerce brands, this is an effective way to build trust because visitors can see that the business is active and consistently sharing content. It also encourages shoppers to follow the brand on social media, creating another touchpoint that can lead to repeat visits and future purchases.
6. Leonie Hanne
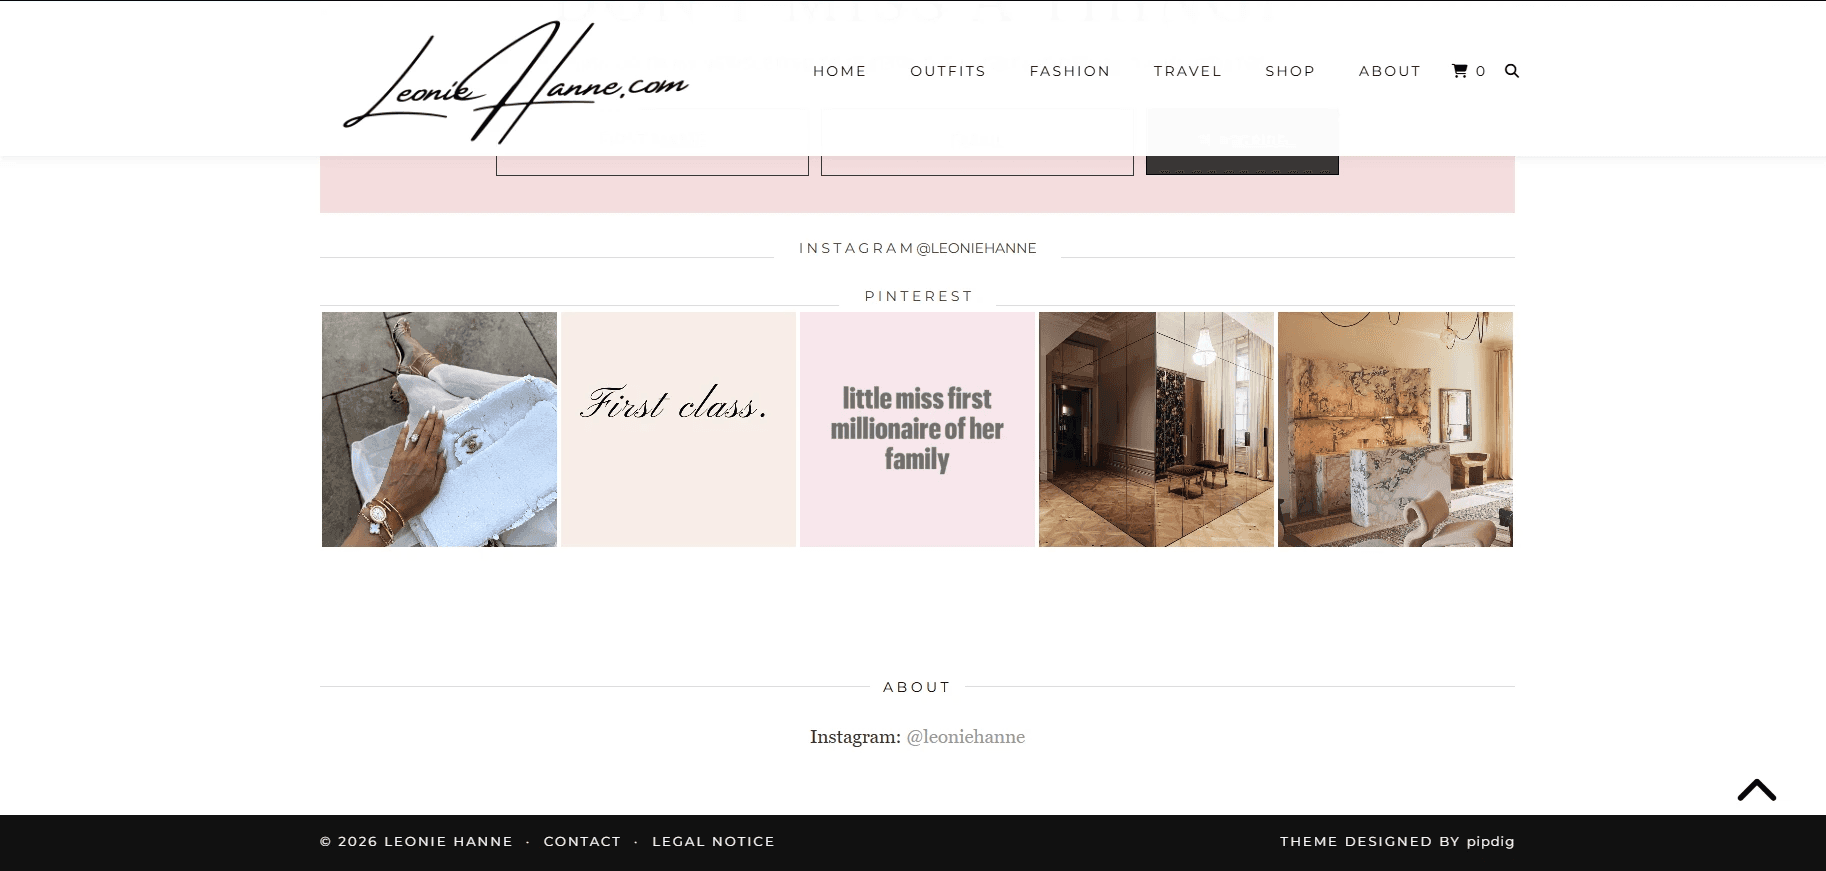
Leonie Hanne gains a more visual, shoppable-feeling experience by embedding a Pinterest feed on her website. Since her brand is built around fashion, travel, and lifestyle inspiration, Pinterest content helps extend that editorial style beyond standard blog posts. The feed gives visitors more outfit ideas, moodboard visuals, and seasonal inspiration without requiring them to leave the site.
It also keeps the page feeling fresh, because new pins can surface alongside existing website content. For a personal brand, this creates stronger cross-channel engagement and encourages visitors to follow her on Pinterest, save her looks, and return when they need new style inspiration.
How to add social media posts to your HubSpot website
Ready to embed your social media feed? The whole process only takes a few minutes, and once it’s set up, your feed updates automatically behind the scenes. However, if you’re being really selective, deleting or approving posts might take you a bit longer.
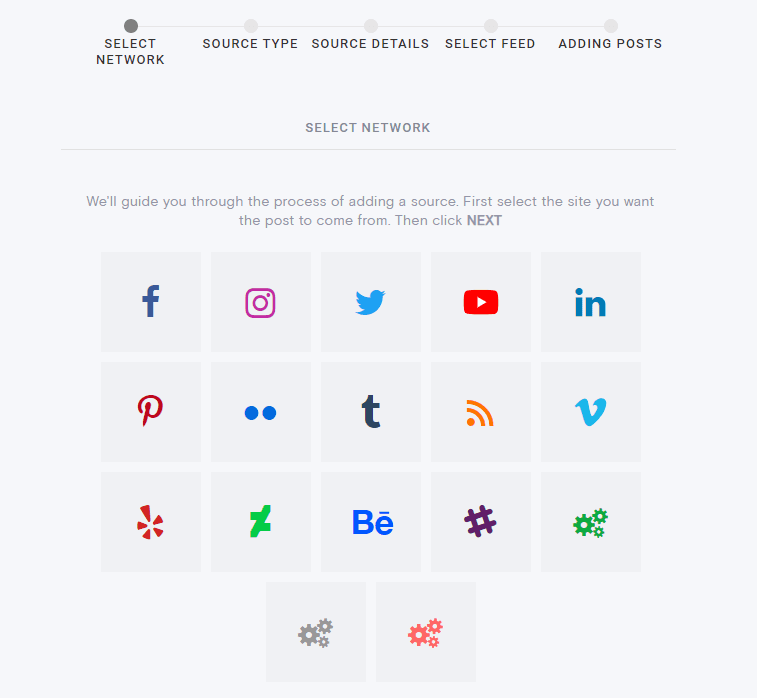
Step 1. Choose where to pull the social media from
Start by selecting the platform you want to pull content from. This is your source. You can combine multiple sources in one feed or create separate feeds for each platform. Curator.io supports a wide range of options including Instagram, X, TikTok, Facebook, YouTube, Reddit, RSS feeds, Slack channels, and more.
Step 2. Add your source details
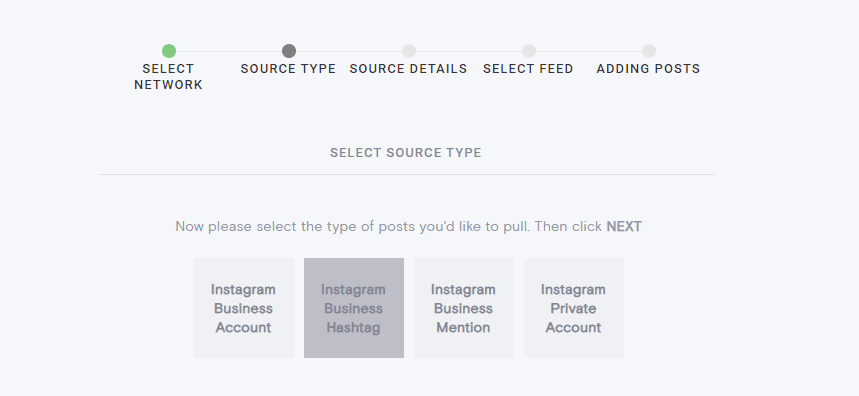
Next, select the network and source type. For example, if you're using Instagram, you can pull content from your Business account, a hashtag, or specific posts.
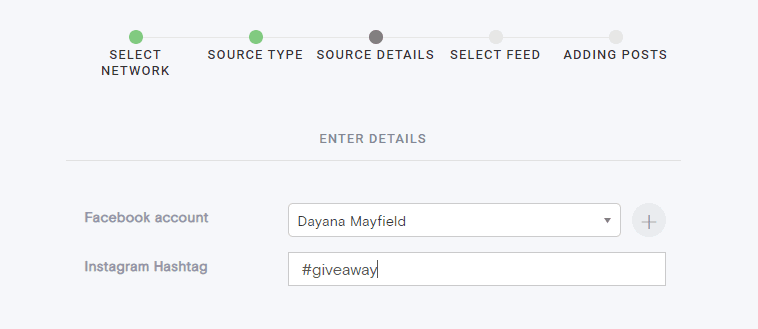
If you choose a hashtag source, you’ll need an Instagram Business account. Enter the needed details, choose the account, and add the hashtag or handle you want to gather content from.
If using a hashtag, it can be a branded hashtag that’s unique to your company or something more generic. Whatever suits your purposes.
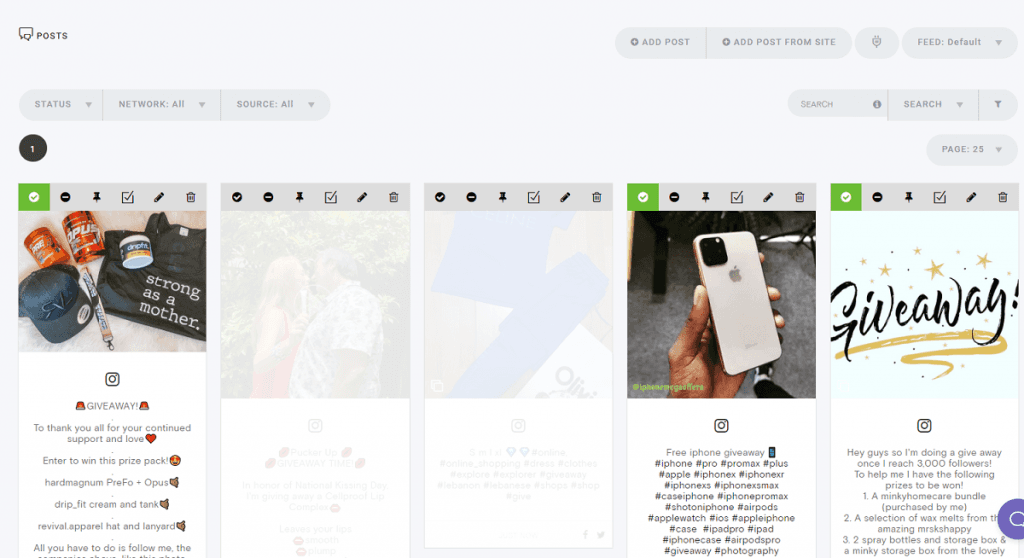
Step 3: Curate your feed
Once your source is connected, you can start curating. You can allow all posts to appear automatically or require manual approval.
Most people leave auto-approval on and simply delete posts they don’t want displayed. Clean up anything off-brand or irrelevant so your embedded feed looks intentional and polished.
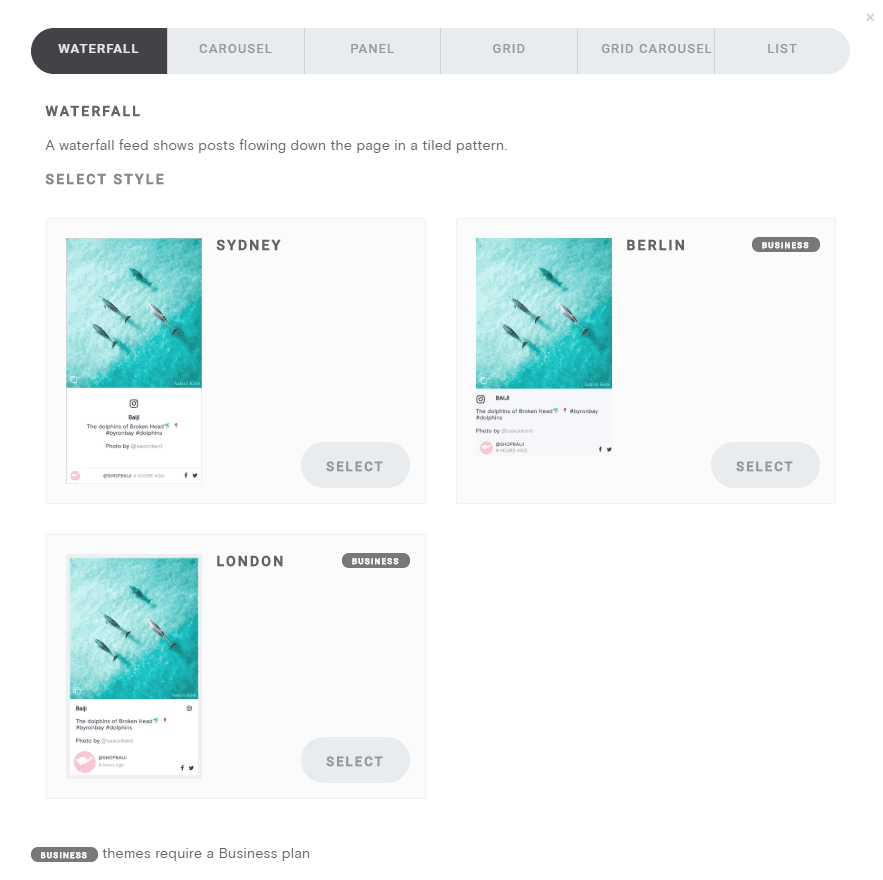
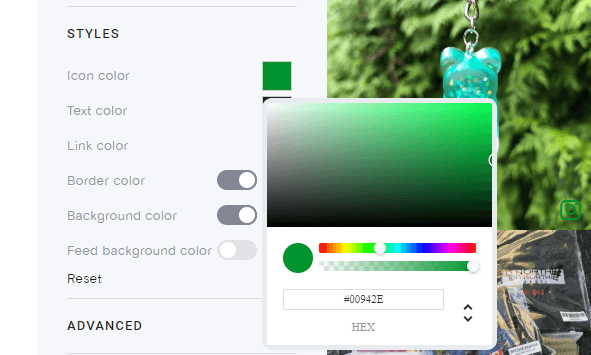
Step 4. Design the style of your feed
After choosing your posts, it’s time to design your feed. You can switch layouts (Grid, Waterfall, Slider, and more), adjust colors, toggle captions, customize hover effects, and match the feed to your site’s style.
A Grid layout offers a neat, modern look, while Waterfall feels more dynamic and content-heavy. Curator.io makes it easy to tweak every detail until it fits your brand perfectly.
You can even change the social media icon color, the text color, link color, background color, and more.
Curator.io is an easy-to-customize aggregator that lets you pull from over a dozen sources. If you'd like to give Curator.io's free forever plan a spin sign up today.
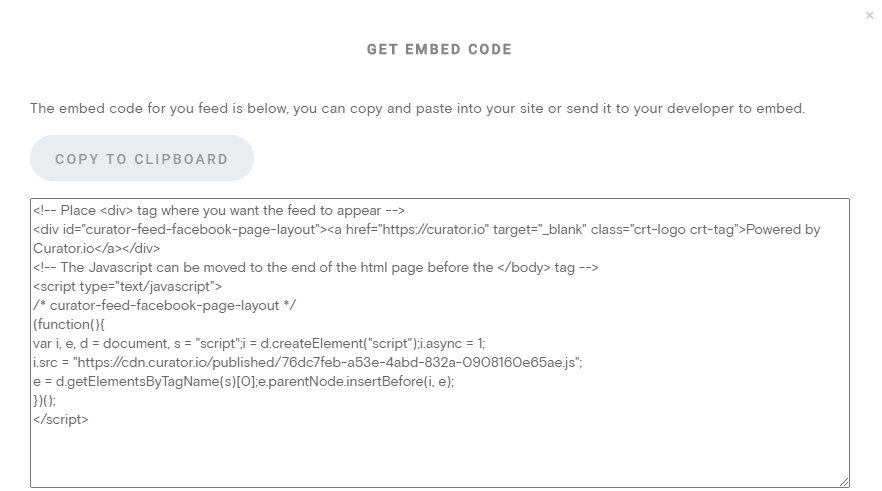
Step 5. Copy the HTML code and paste it in your website
When you're happy with the design, click “Get Code.” Copy the HTML snippet and paste it into your HubSpot site.
HubSpot makes this straightforward. You can add custom HTML to:
A dedicated homepage section
Your global footer
Key page footers
Blog sidebar modules
A dedicated campaign or portfolio page

o edit the header or footer HTML, log in to your HubSpot account → navigate to Website > Pages → select your domain → open the Header HTML and paste the code.
Where you place your feed depends on its purpose. If you want to add personality to your homepage, spotlight reviews, or highlight community content, choose a prominent section. If you simply want a consistent social presence across all pages, the footer works perfectly.To add the HTML code to the footer of your website, check out this simple HubSpot tutorial with steps.
Here's what the completed feed looks like:
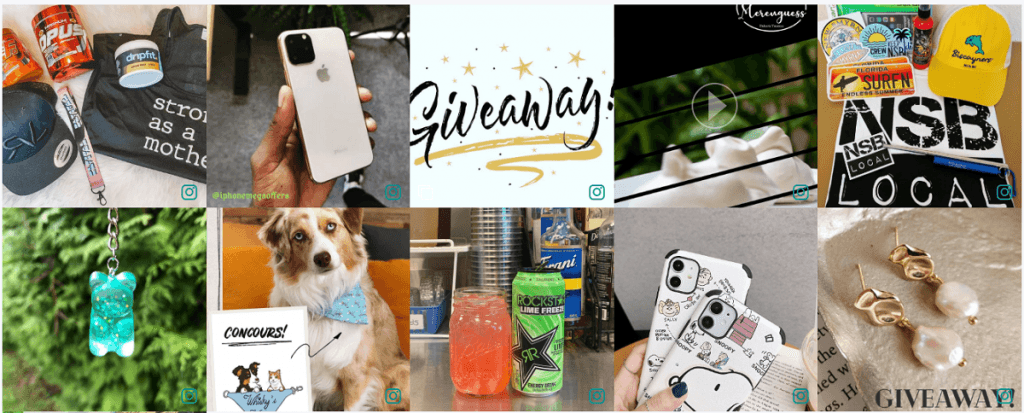
As you can see, adding your social media feed into your HubSpot website is a simple task that can have a big impact on your marketing and your brand.
FAQs
What is an RSS feed in HubSpot?
An RSS feed in HubSpot is a way to automatically pull content from blogs, websites, or other sources into your HubSpot site or emails. It keeps your content fresh without manual updates.
Can I embed a social media feed on my HubSpot website?
Yes, you can embed multiple feeds from different platforms. You can display them separately or combine them into one feed to showcase all your social content in a single, easy-to-navigate space.
Do I need coding skills to add a social feed to HubSpot?
No coding skills are needed. Tools like Curator.io generate a simple copy-and-paste HTML snippet. Just drop it into HubSpot’s custom code section, and your feed will automatically update with new posts from your selected platforms.
How do I embed a social media aggregator on a HubSpot website?
To embed a social media aggregator on HubSpot, create and customize your feed using Curator, then copy the generated embed code. In HubSpot, open the page editor, add a Rich Text module, paste the code into the source editor, save your changes, and publish the page.
Can I customize my social media feed before embedding it in HubSpot?
Yes. Social media feed tools like Curator let you customize the layout, colors, fonts, spacing, and display style before generating the embed code. This helps the feed blend naturally with your HubSpot theme, creating a consistent user experience while reinforcing your brand identity across every page.
Where should I place a social media feed on my HubSpot website?
The ideal placement depends on the page's purpose. Product pages can feature customer-generated content, landing pages can reinforce trust with recent social updates, and footers work well for displaying fresh content without distracting visitors from your primary call to action or conversion goals.
Can I add a social media feed to any HubSpot CMS page?
Yes. You can embed a social media feed on virtually any HubSpot CMS page, including homepages, landing pages, product pages, blog posts, and website footers. Simply paste the embed code into a custom HTML or Rich Text module. Place the feed where it supports your content without distracting from your primary call to action.
Which social media platforms can I connect to HubSpot CMS?
Social feed tools like Curator support a wide range of platforms, including Instagram, Facebook, TikTok, LinkedIn, YouTube, X, Pinterest, and Google Reviews. Some platforms also let you combine multiple social networks into a single feed, making it easy to display fresh content without managing several separate embeds.
Will the social media feed update automatically on HubSpot CMS?
Yes. Once your feed is embedded, new posts are typically pulled in automatically by your social feed provider. That means you only need to publish content on your social channels, and your HubSpot website stays fresh without manually updating the page every time you post.
Can I customize how the social media feed looks on my HubSpot page?
Yes. With Curator, you can customize before adding a social feed to HubSpot. You can customize layouts, colors, fonts, spacing, post limits, and display styles before generating the embed code. This makes it easy to match your HubSpot branding and create a feed that feels like a natural part of your website.
Ready to add a beautiful social feed to your website? Use Curator's free templates and moderation features.
Previous post: