Want to add your social media feed to your WordPress site? Maybe you want to have a beautiful rolling feed of your most recent Instagram posts at the bottom of your site, or maybe you want to have your best tweets displayed in a separate page called "Updates."
The possibilities are endless, but you can't capitalize on any of the opportunities to give your social media content a second life if you have no idea how to actually put these posts in your WordPress site.
There's no need to pull your hair out. In this post, we're covering all of the technical steps (which are super easy, we swear) and also offering up some tips to help you get the most of this social media sharing strategy.
Why add your social media feed to your WordPress site
Before we dive into adding a social media feed to your site, let's cover the basics of why you would want to embed social media feed on WordPress in the first place.
While this list is by no means exhaustive, here are the main reasons why you'd want to include your social content in your website:
Add color, personality, and informal content to your website - Let's start with the most basic reason of all, shall we? Maybe you simply want to make your website more engaging, exciting, and beautiful. Aesthetics is a perfectly valid reason to add your social media feed to your WordPress site, and as simple as it is, this just might be the most common reason of all.
Share user generated content and encourage more customers to submit content - Another popular motivation for setting up a social media feed in your site is two prong: showcase the UGC you already have and inspire more customers to share their content for a chance at being featured. This works particularly well for ecommerce companies and consumer brands.
Inspire website visitors to follow your social media accounts - You might also add your social media feed to your website as a way to simply let website browsers know that you exist on social media. Website visitors might know that you have social media accounts on their favorite platforms. They might not know on these accounts, you share really helpful content, tips and tricks, coupons, flash sales, and other tidbits they'd like to stay privy too. Use your embedded social feed as a way to invite them deeper into your world.
Repurpose your social media content into a strategic new page - You might also want to add a social media feed to your site in order to repurpose your content. For example, this stair renovation company posts portfolio samples on their Instagram account, then they embed the feed on their Recent Work website page, so their prospective clients can easily look up real samples.
Keep your website visitors informed and up to date - Another reason to embed a social media feed in your website is to keep website visitors informed. For example, a school or government site might embed social media feeds that share announcements, safety information, guidelines, events, etc.
Now that we've learned the top reasons why you'd want to add a social feed plugin to your website, let's dive into the process to embed social media feed on your website.
Step-by-step process from content curation through to WordPress installation
To generate the code that you'll copy over to your site, you need to follow a simple process. These steps show you how to choose a social media account to pull content from and design your feed.
Let's get started!
1. Choose your sources
The first step is to decide where you want to pull content from and connect the source(s) to your Curator feed.
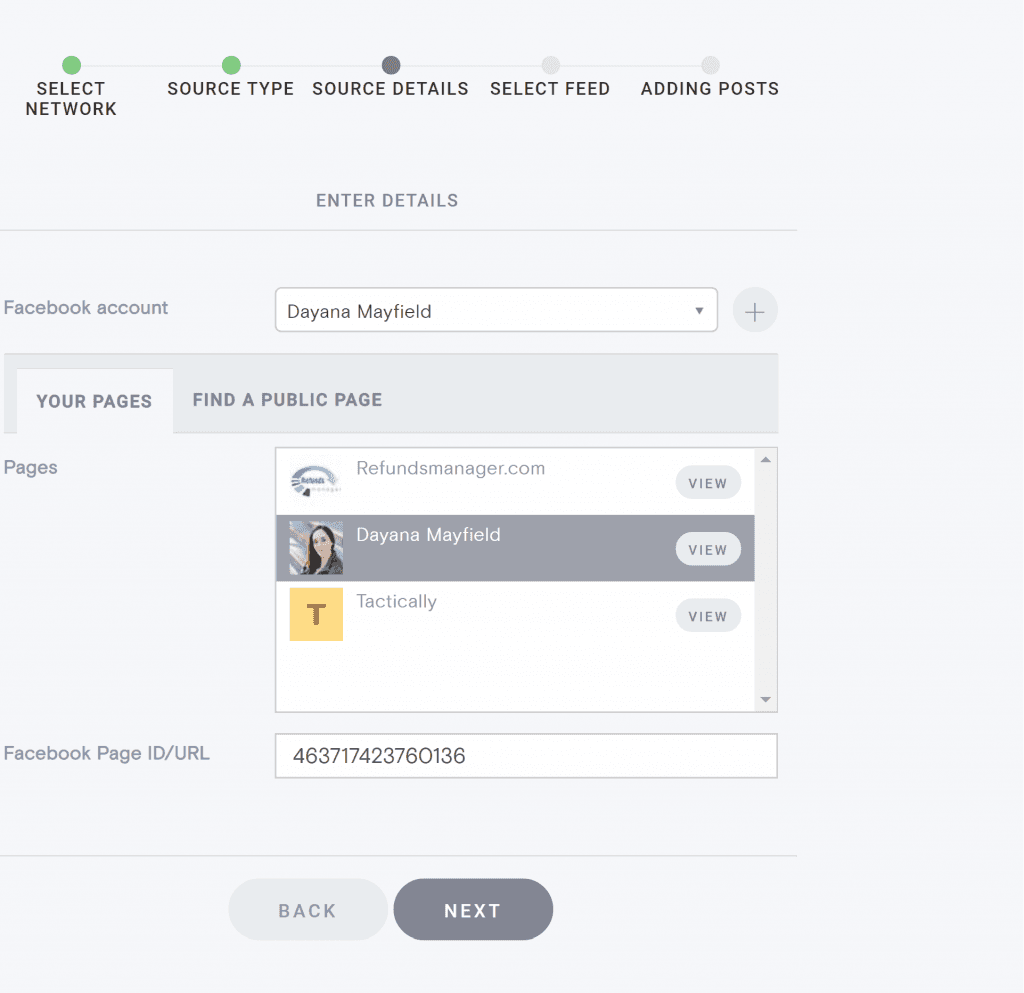
There are over a dozen networks to choose from. For this example, let's go with Facebook.
Instagram, Twitter, and Youtube are other popular options.
After you choose the right network, you need to login to connect your account, and then you can select from the right business profile that you manage. Note, that you must be a manager of a Facebook business account in order to utilize its content.
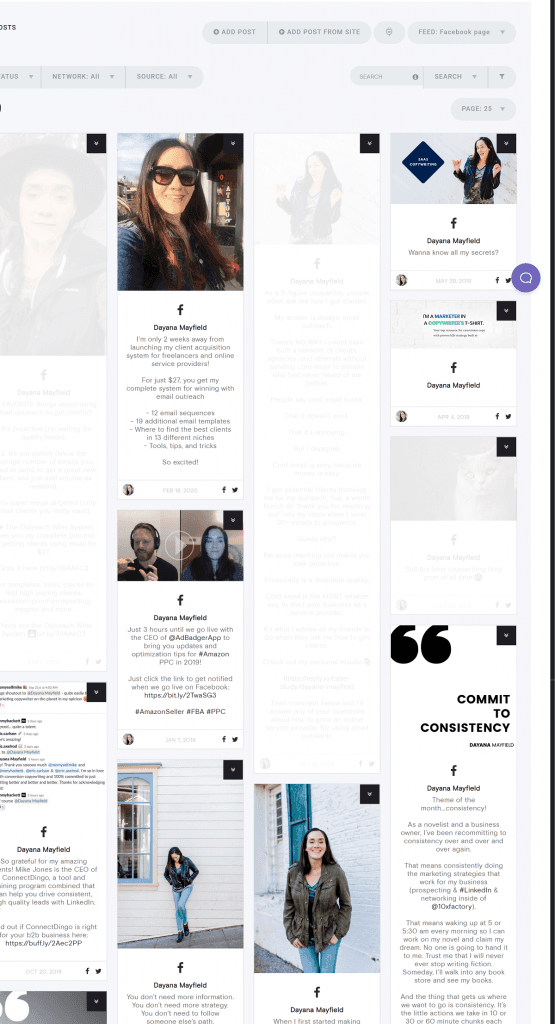
2. Curate your content (approve and delete posts)
The next step is to curate the posts that get added. This means you can delete the ones you don't want to show. You can choose for posts to be automatically approved (which requires you to regularly login and delete some you don't want showing), or automatically not approved (which requires you to regularly login and approve the ones you want to show).
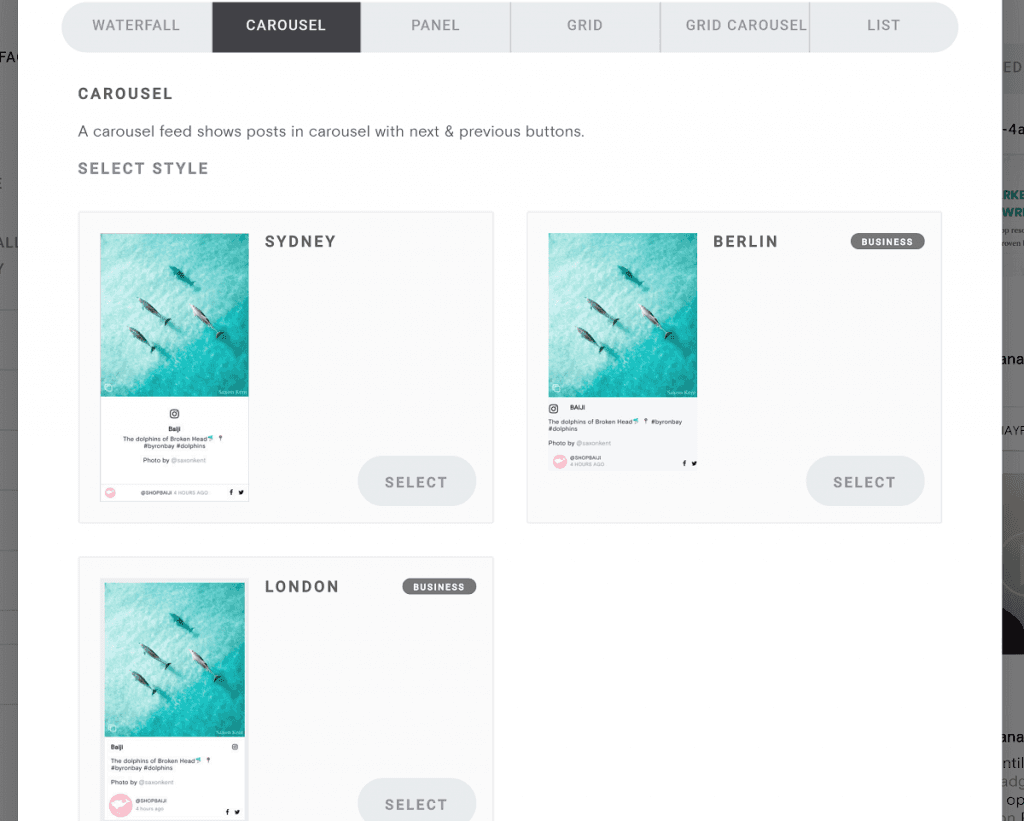
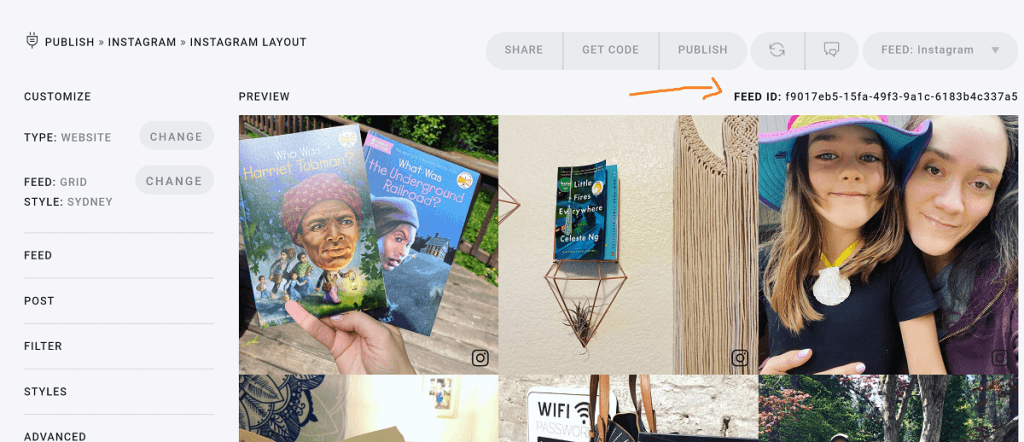
3. Pick the template and update the style
With your first batch of posts curated and ready to go, it's time to design how your feed will look.
Curator offers plenty of templates in different styles: waterfall, carousel, panel, grid, grid carousel, and list.
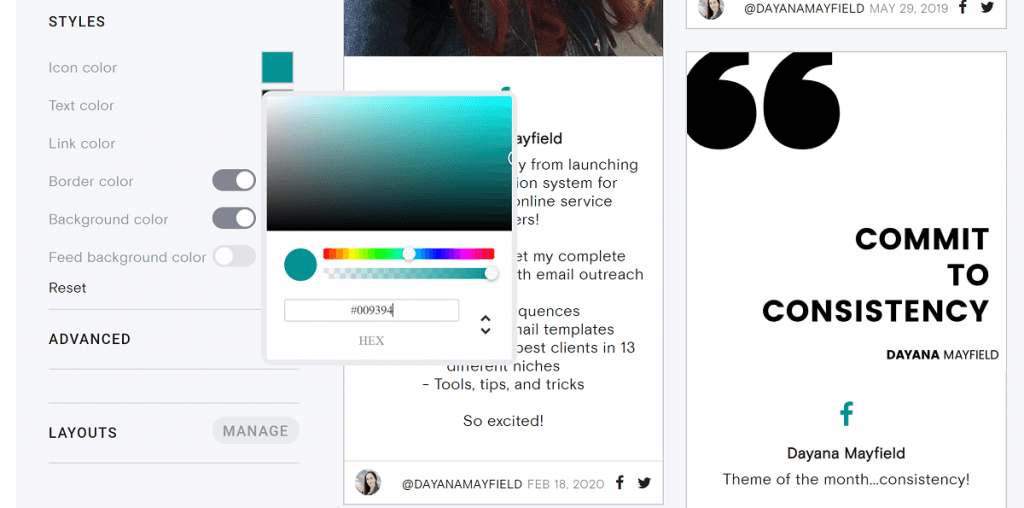
In addition to choosing the template, you can also update the colors if you'd like. This is especially important when adding the feed to your website. To fit your site's style, you might want to change the icon color, text color, background color, and more.
4. Choose the method to add your feed to your site
Now that your curated feed is ready to go, it’s time to add it to your WordPress site. You have two easy options to choose from:
Use the HTML embed code provided by Curator. If this is your preference Step 5 below has got you covered.
Install the Curator WordPress plugin and use a shortcode. More details on the approach can be found in Step 6 below.
Both methods are beginner-friendly and take just a few minutes. The one you pick depends on how your site is built and your preference for either copy-pasting code or installing a plugin.
5. Install and configure the WordPress plugin
If you prefer not to mess with HTML, using the Curator plugin is the most straightforward option to add social media feed plugin. It allows you to place your feed anywhere on your WordPress site using a simple shortcode.
Here’s how to do it:
1. In your WordPress dashboard, go to Plugins > Add New and search for “Curator”.
2. Click Install, then Activate the plugin.
3. Head over to your Curator.io dashboard and copy your Feed ID.
4. In WordPress, paste the shortcode wherever you want the feed to appear. It’ll look something like this:

You can add this shortcode to a blog post, a sidebar widget, the homepage, or even the footer—wherever it makes sense for your layout. It’s that easy.
6. Add the feed using HTML embed code
If you don’t want to install a plugin or you need a little more flexibility with placement, using the HTML embed code is a great alternative.
Here’s what you need to do:
1. Go to your feed in the Curator.io dashboard and click “Get Code”.
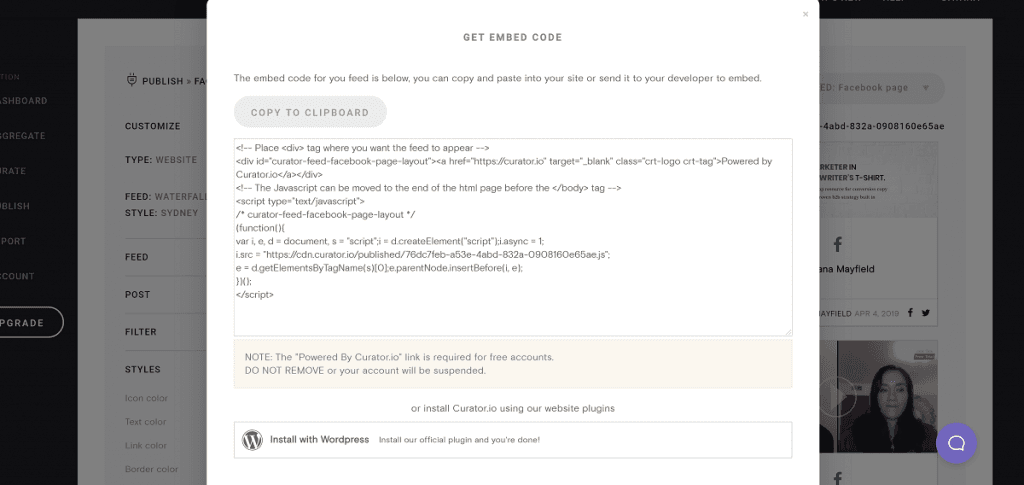
2. Copy the HTML snippet provided by clicking the”Copy to clipboard” button
3. In WordPress, open the page or post where you want the feed to appear and paste the code into an HTML block (not the visual editor—otherwise it won’t work).
You can embed the feed anywhere: at the bottom of your homepage, inside a landing page, or even on a custom “Live Updates” page. As long as you paste the code into a block that supports raw HTML, it’ll display beautifully.
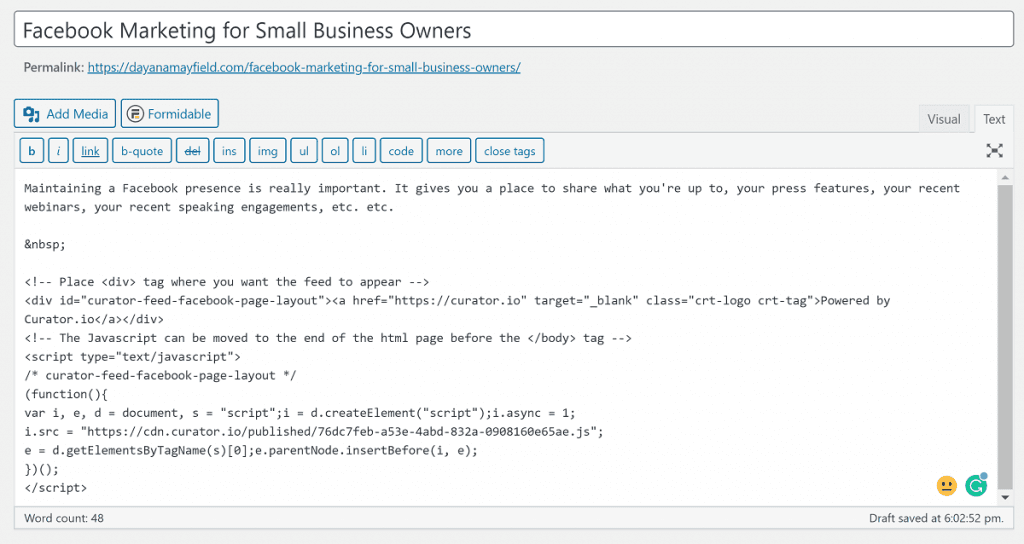
7. Review the new social feed on your WordPress website
Now that you have your new social media feed embedded, it’s time to check it out and make sure it is what you were expecting.
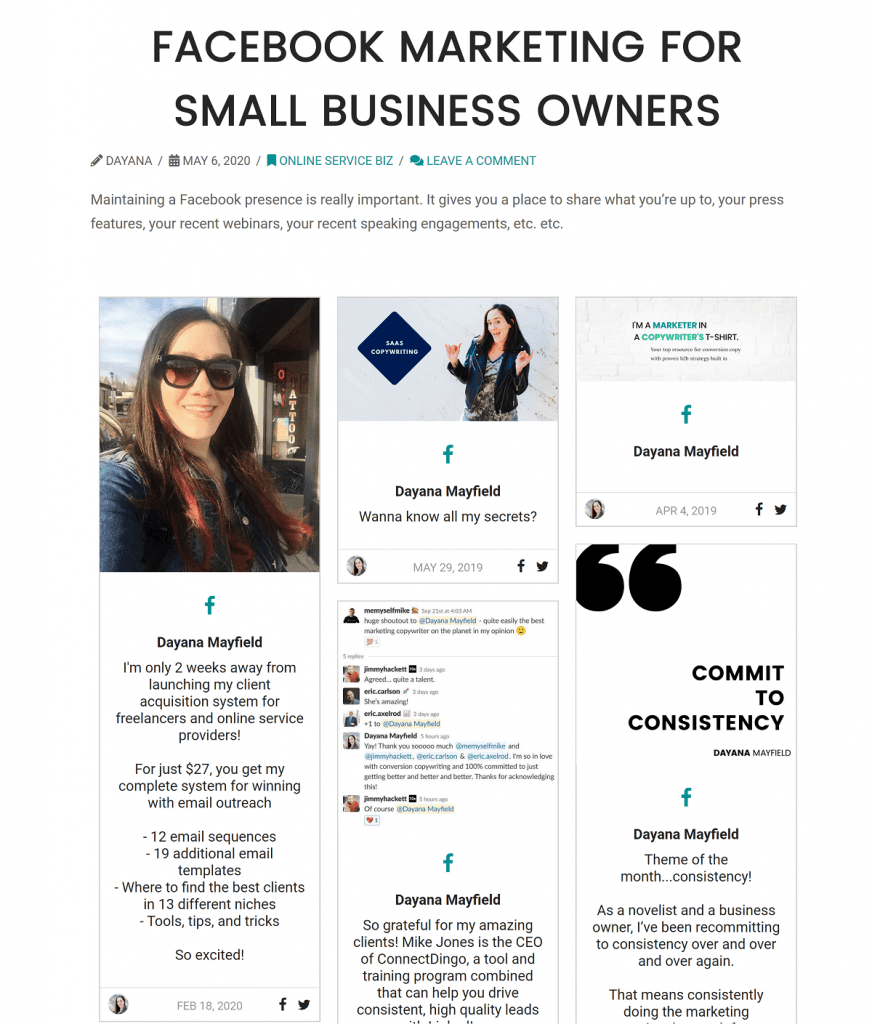
Here's what the feed looks like when added to a blog post.
If your design or layout doesn’t seem just right, don’t worry. Just go back into the feed on Curator.io, make the changes you noted and click “Publish”.
The changes will be automatically applied to your website. Thats it.
5 great WordPress social media feed examples
Wanting a little inspiration? Check out how these sites are embedding social content to improve engagement, brand experience, and functionality.
1. Adding instant personality with a vibrant Instagram feed

Take a look at how Discover Albany uses an embedded Instagram feed on their website. The grid of colorful, high-quality images—from scenic trails to city architecture—adds visual interest and personality to the page. It’s an easy way to keep the site feeling fresh and vibrant, while also showing off the spirit of the city.
Adding wordpress social media plugins for a feed like this is a simple strategy for any brand or organization that wants to make their site more dynamic and engaging without constantly updating static content. The rotating visuals provide instant impact and help draw visitors deeper into your brand.
2. Showcasing user creativity with a branded hashtag campaign
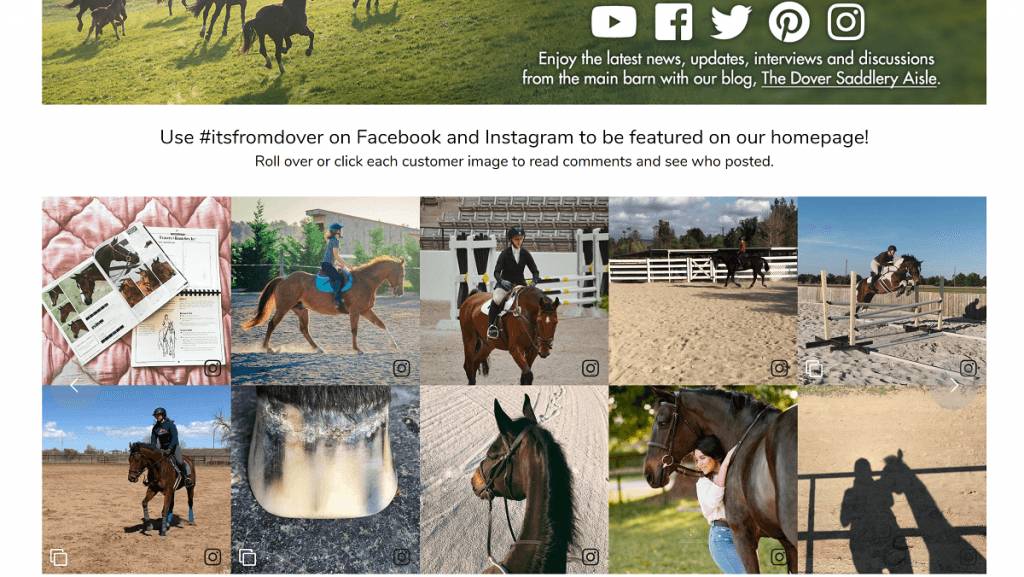
Dover Saddlery features customer photos on their website by embedding a social feed driven by the hashtag #itsfromdover. The feed pulls in posts from Facebook and Instagram, showing real customers riding, training, and spending time with their horses—all while using Dover’s products.
This kind of user-generated content serves as powerful social proof. It also encourages more customers to share their own experiences for a chance to be featured. It’s a win-win: happy customers get a moment in the spotlight, and the brand gets authentic, community-driven visuals that update automatically.
3. Inspiring new followers with a content-rich updates page
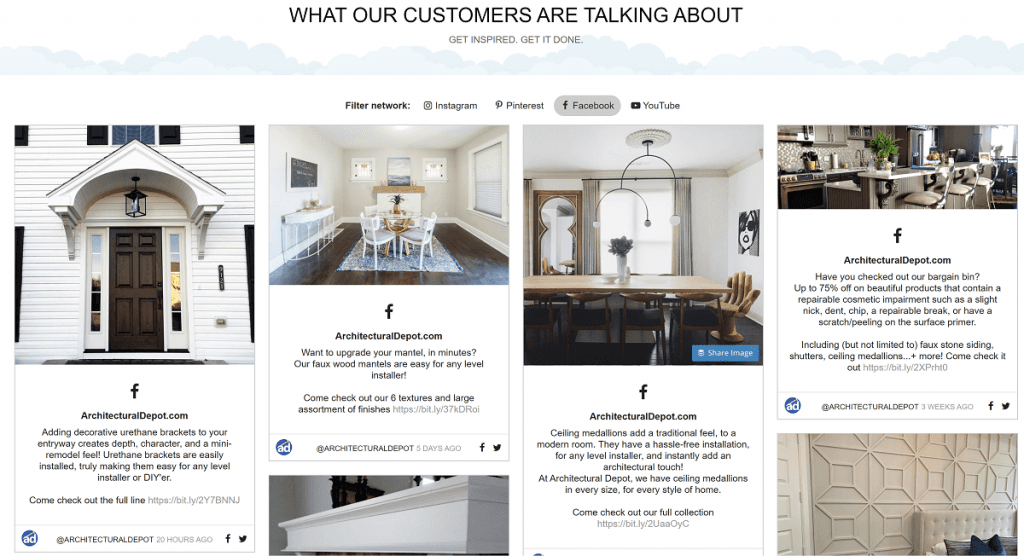
Architectural Depot uses a curated social feed to bring their customer stories and product updates front and center. On their website’s “What Our Customers Are Talking About” section, they embed a mix of Facebook, Instagram, and Pinterest posts that highlight customer installations, product promos, and how-to inspiration.
The feed acts like a live lookbook and a social proof engine all in one—while also making sure visitors know that the brand is active and helpful across multiple platforms. This is a great example of how an embedded feed can drive visibility for your social channels and build trust with potential customers.
4. Turning an Instagram feed into a live project showcase
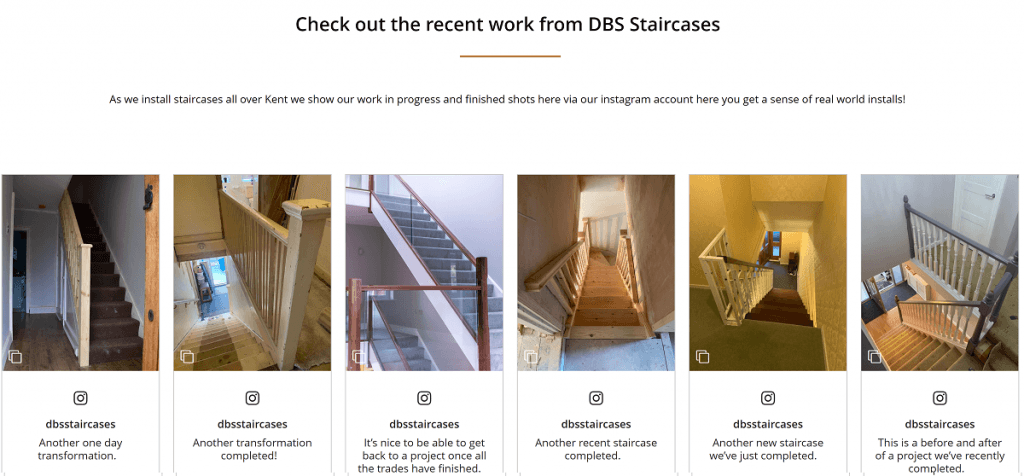
Real-world results are front and center on the DBS Staircases website. Instead of relying on a static portfolio page, they stream their latest installs directly from Instagram. Each post highlights a different staircase project—often showing progress over time or dramatic before-and-after comparisons.
This feed gives potential clients a real sense of the team’s craftsmanship, while also keeping the website updated automatically as new installs are shared. It’s an effortless way to maintain a current and credible online presence that speaks for itself.
5. Delivering real-time updates right from the footer
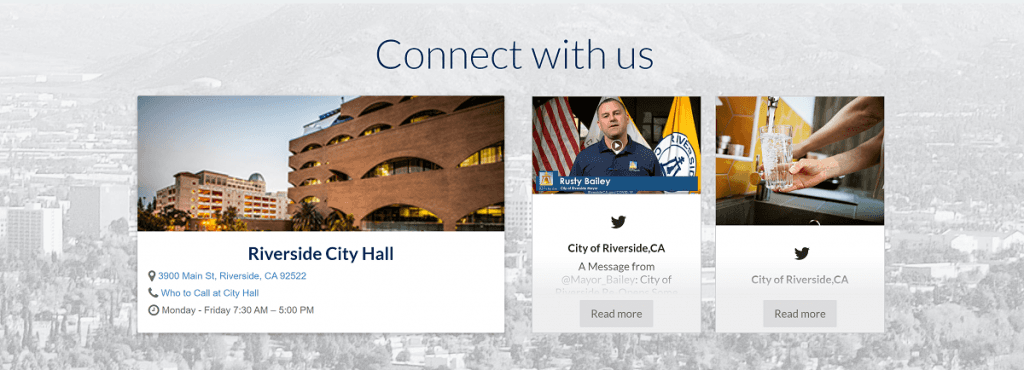
The City of Riverside embeds its X (Twitter) feed directly in the website footer, turning a traditionally static space into a real-time communication channel. Visitors browsing any page are met with local updates, from city council messages to utility tips, without needing to navigate to a separate news section.
By placing the feed at the bottom of the site, they make sure important information is always visible, without disrupting the main layout. It’s a smart move for public institutions and organizations that want to keep their audience informed with minimal effort.
Additional tips for creating a beautiful feed on your site
Want to make the most out of this strategy? Here are some additional tips to consider.
Be selective about the posts
Make sure that the posts you're allowing to come through reflect the quality you want on your website. While most brands upload quality Instagram content, Twitter posts can get a little bit messy.
Be sure to choose the right approval setting (automatically approved or needs approval) based on the level of curation required.
You don't want your website looking messy or overwhelming.
Have a purpose for the feed
You might also consider having a clear purpose for the feed. Do you want to share news? Highlight your team? Highlight your employees? Showcase examples?
Having a clear purpose will make your feed more engaging and successful.
Capitalize on attention with promotions and announcements
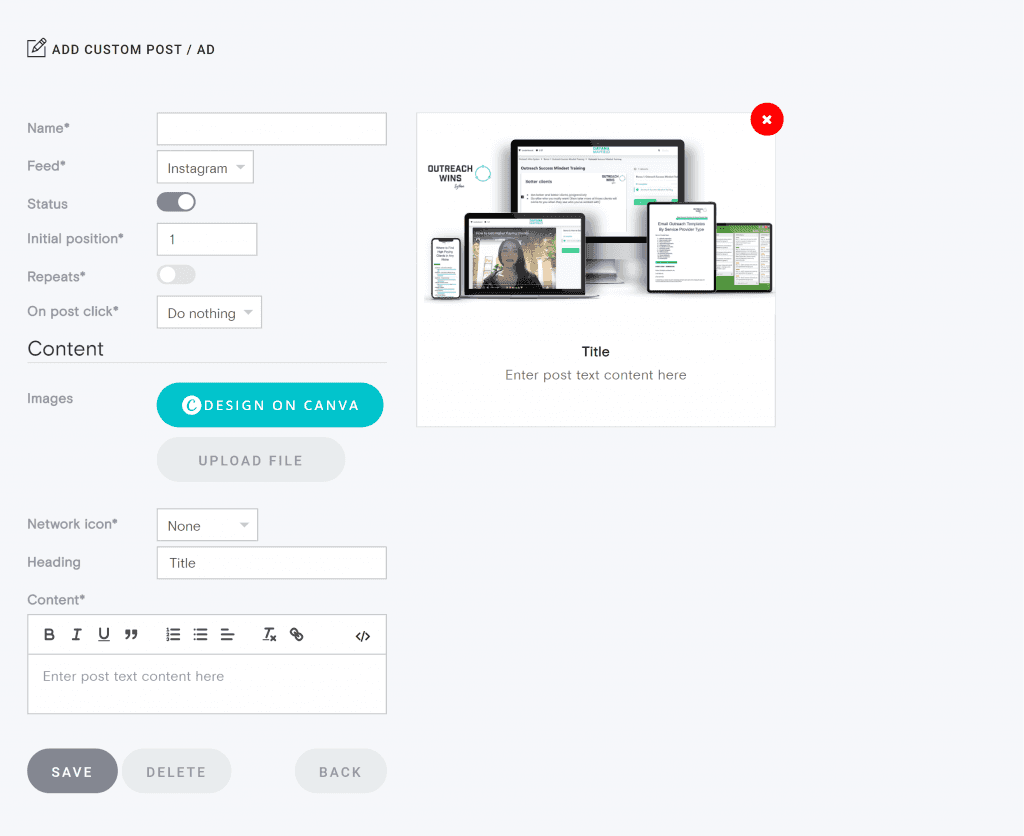
Are there pictures, promotions, or announcements that you want to show on your website that you didn't post on social (because you didn't want to disrupt the aesthetics of your feed)? With curator you can add custom posts to your feed that aren't in your social media accounts where the rest of the content is coming from.
Create as many feeds as you need
Keep in mind that you might need more than one feed. Maybe you want to highlight UGC only on your home page, but on your blog side bar you want to show all posts. Or maybe you want to show all posts on your home page, and portfolio samples only on your Portfolio page.
With Curator, you can create endless feeds to satisfy different purposes.
Embedding your social media feeds in your WordPress website is a smart but easy way to engage website visitors and inspire them to take a desired action.
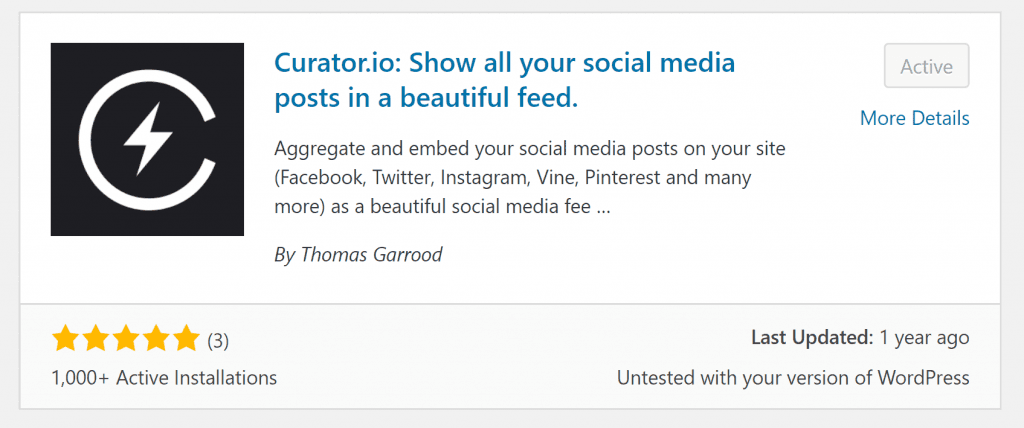
Curator.io is an easy-to-customize aggregator that lets you pull from over a dozen sources. If you'd like to give Curator.io's free forever plan a spin sign up today.
Previous post: