Looking to add some buzz to your website?
Say hello to the X widget—the ultimate way to bring your social media feed to life right where it matters most!
If you haven't yet taken advantage of integrating your X posts, you are in the right place.
Whether you're showcasing your latest posts, flaunting glowing mentions, or tracking trending hashtags, an X widget is your ticket to keeping your site fresh and dynamic.
In this guide, we’ll walk you through everything you need to know about X widgets—from what they are to the step-by-step process of embedding one on your site. Plus, we’ll spotlight the top tools to get the job done with style.
What is an X widget?
An X (formerly Twitter) widget is a customizable tool that allows you to display content from X directly on your website. It's similar to an X plugin by providing a seamless way to showcase your latest posts, user mentions, or trending hashtags in real-time, helping you keep your site dynamic and engaging.
With an X widget, you can embed curated content from your X profile or community onto your site. You can embed a timeline, hashtags, or mentions, offering visitors insights into your social media presence without navigating away from your website.
These widgets are widely used by businesses, creators, and organizations to increase audience engagement, promote social proof, and keep their websites visually appealing.
Key Benefits of Using an X Widget:
Increased Engagement: Encourage visitors to interact with your social media content by showcasing real-time updates.
Social Proof: Display mentions or user-generated content to build trust and credibility.
Streamlined Updates: Automatically refreshes with your latest posts, ensuring your site stays up to date.
Customizable Design: Align the widget's style with your branding for a cohesive look.
7 steps to install an x widget on your website
Are you ready to incorporate your content with an X feed widget? Follow these steps to quickly get your X feed up and running on your website.
Step 1. Select an easy-to-use widget
Choose a widget provider that is user-friendly and meets your needs. Look for platforms that offer seamless integration, customizable templates, and moderation controls.
Curator is a great easy-to-use option. And the free forever plan makes it really affordable to display your X content on your website.
Also, make sure the platform supports your website builder. With curator, there is a WordPress plugin ready to go, and also an embed code option that works on any website builder that lets you add your own custom HTML.
Step 2. Create a new feed and set the moderation style
Once you’ve signed up, create a new feed to set up your X widget.
Do this by hitting “Create New Feed.”
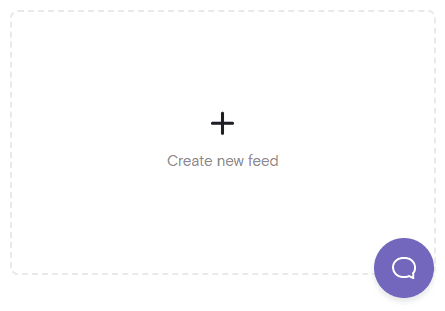
Name it appropriately (e.g., "X Feed" or "Latest Tweets")
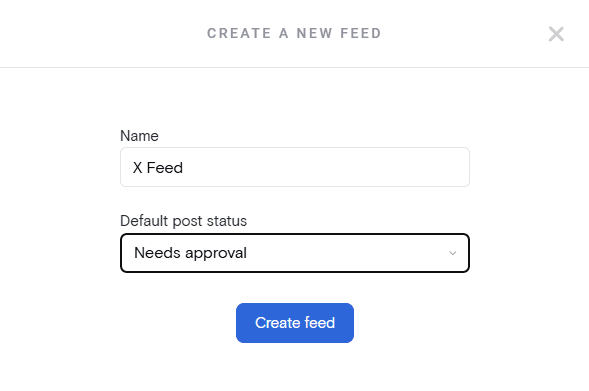
Then decide on the moderation style:
Approved: All posts from the selected source are automatically added to your feed.
Needs Approval: Posts require manual review before they appear on your website.
Choose "Needs Approval" if you want more control over the content displayed.
We recommend choosing the “Needs Approval” for any content that is not strictly your own. That way you can avoid “those” moments—you know what we’re talking about.
Step 3. Choose X as the social media source and select the types of posts to display
With your feed set up, it is time to select the types of feeds you want displayed.
Click “Add Source” and select "X" as the platform.
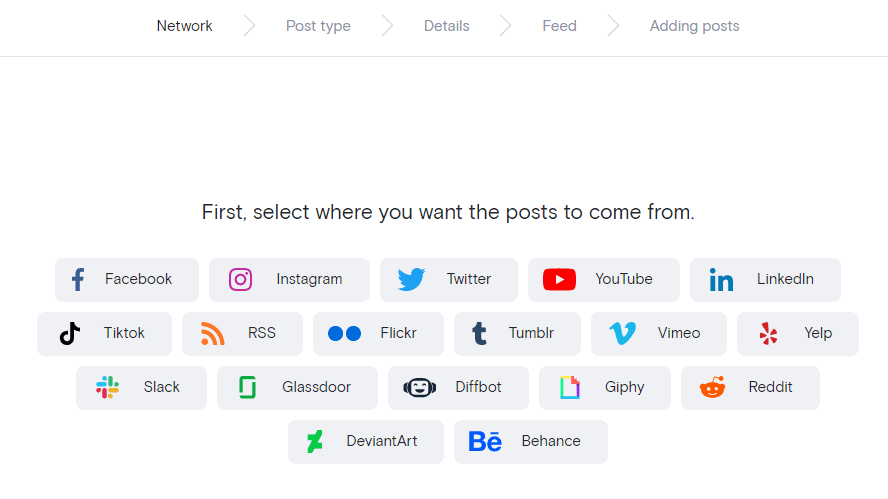
Options include:
User account: Display posts from your X account.
Hashtags: Aggregate content based on specific hashtags.

You can pull multiple types of content to make your feed dynamic and engaging.
After you select the post type you’ll have to link to the user or hashtag to pull the content.
Step 4. Delete any posts that you don't want showing up in your widget
Now that your feed is pulling the posts, it is time to review the content.
If you chose "Needs Approval" moderation style, review the posts pulled into your feed and click the green checkmark to approve those you want to display.
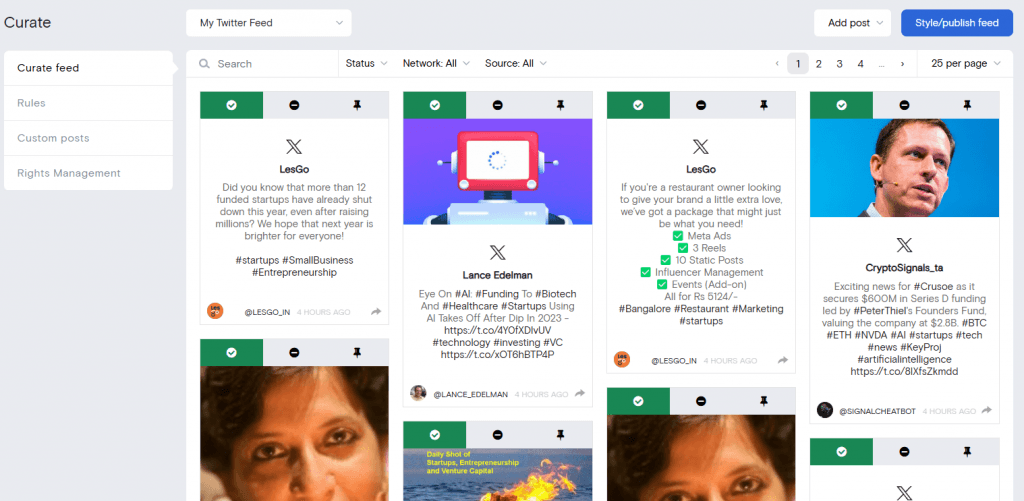
If you opted for "Approved," scan your feed for any irrelevant posts and click the trash icon to delete them.
You can also use Curator’s filtering options to set rules (e.g., block posts with profanity) for automatic moderation as well. It’s totally up to you.
Step 5. Select a template for your widget and customize the style
You’ve got your reviewed X content ready to go.
Now for the fun part.
It’s time to choose a template and stylize your X feed. Do this by navigating to the “Style/publish feed” page (it’s the big blue button in the top right corner).

Curator offers various layouts such as Grid, Mosaic, Carousel, and more that you can choose from. You can also customize the widget through the various options on the left menu bar. For example, you can:
Update colors and fonts to match your brand.
Adjust the number of rows or columns for optimal display.
Preview changes in real-time within the dashboard.
Step 6. Add the widget to your website
Once you’ve got your styling complete, it’s time to add the widget to your website. Start by clicking the “Get Code” button. This will present the HTML embed code you need to add to your website.
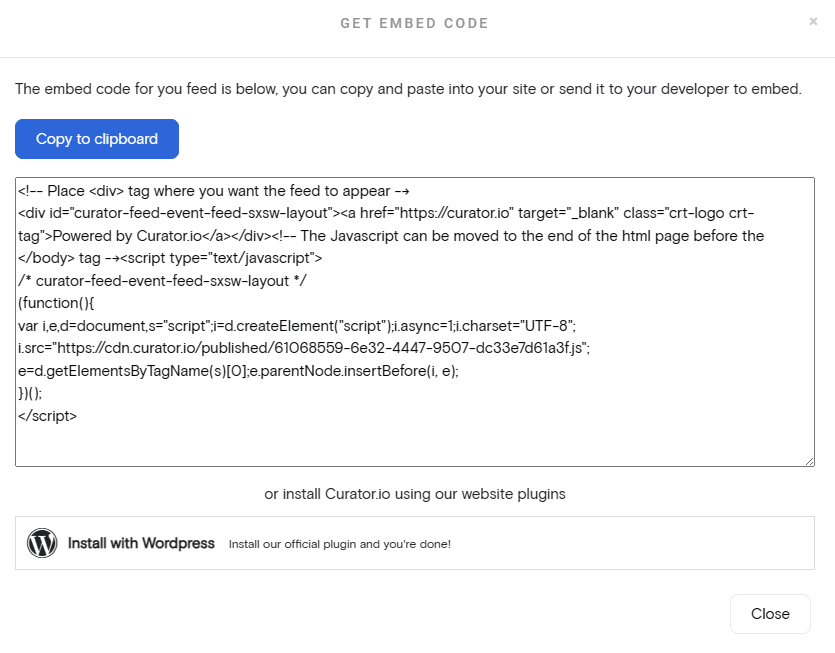
Click the “Copy to clipboard” button to copy to code.
If your site is built on WordPress you can use the Curator plugin option to further simplify the process, but the copy code is easy enough as well.
Step 7. Regularly moderate posts as needed
You did it! You’re done!
Well not quite. Everything should be up and running.
Now it’s just about keeping the content fresh. Depending on your moderation setting you’ll have to approve or remove X posts with time.
We recommend setting up a weekly time that you dedicate to this. Of course if you are hosting an event or something special you’re going to want to increase the frequency, but weekly is a good pace for most.
5 free and affordable X widget tools
These free X widgets (and their affordable options) work for WordPress, Wix, Squarespace, Webflow, and any other website builder that lets you add your own custom HTML:
1. Curator
Curator is a versatile social media aggregator that allows you to embed X feeds alongside other platforms like Instagram, Facebook, and TikTok. Known for its customization, moderation features, and user-friendly interface, Curator is ideal for creating engaging and beautifully styled feeds with minimal effort.
Key features:
Multi-platform support
Advanced customization options
Moderation controls for content approval
Easy-to-use dashboard
Real-time analytics to monitor engagement
Variety of pre-designed templates for quick styling
Pricing:
Free Plan: Free forever for up to 3 sources, including moderation controls.
Paid Plans: Start at $25/month, offering real-time updates, advanced customization, and more sources.
2. X for websites
The official X widget enables direct embedding of X content into your website. While it provides a simple and free integration method, it lacks advanced customization and moderation options found in third-party tools like Curator.
Key Features:
Direct integration with X
Multiple feed types (e.g., timeline, likes, mentions)
Light and dark theme options
Real-time updates
Pricing:
Free Plan: Fully free but with limited design and moderation capabilities.
3. Juicer

Juicer aggregates content from multiple platforms, including X, and presents it in a feed on your website. While it’s straightforward to use, Juicer lacks the advanced customization and moderation features of Curator in the free plan.
Key Features:
Multi-platform support
Pre-designed templates for easy setup
Basic moderation tools
Simple integration
Pricing:
Free Plan: Includes two sources but prominently displays Juicer branding.
Paid Plans: Start at $25/month, offering more sources and removing branding.
4. Walls.io

Walls.io specializes in social media aggregation with a focus on live events and social walls. It supports X feeds but is significantly more expensive. Definitely worth checking out if you are managing a lot of live events or anticipating heavy real time interactions.
Key Features:
Multi-platform aggregation
Live event features (e.g., social walls and polls)
Pre-designed templates for quick styling
Basic content moderation options
Pricing:
Free Plan: 14-day free trial available.
Paid Plans: Start at $250/month.
5. Onstipe

Onstipe aggregates content from various platforms, including X, with features designed for live events and social media walls. Its moderation and customization features, however, are not as comprehensive as some of the other options. You’ll also have to pay to get X.
Key Features:
Multi-platform content aggregation
Social media wall templates for live events
Real-time content updates
Basic moderation tools
Pricing:
Free Plan: Supports two sources with Onstipe branding, but X feeds are excluded.
Paid Plans: Plans including X feeds start at $25/month.
Ready to set up your own X widget. Try our free forever widget.
Previous post: