How to Embed Your Instagram Feed on Your WordPress Website
Dayana Mayfield
on
December 17, 2025
Looking to embed your Instagram feed on your website? We've got the super simple tutorial you need.
All sorts of businesses and organizations embed their social media content on their websites: ecommerce companies, coaches, consultants, universities....the list goes on.
Most companies choose to use their social media content on their website to:
✅Keep their website fresh and interesting
✅Repurpose their best content
✅Encourage website visitors to follow them on social media
✅Spread important announcements
✅Share customer and influencer photos
Whatever your motivation, you'll be happy to know that adding your content is both easy and free.
Curator.io is an easy-to-customize aggregator that lets you pull from over a dozen sources. If you'd like to give Curator.io's free forever plan a spin sign up today.
How to embed your Instagram feed on your WordPress website
Let's hop straight to it. Follow these steps and you'll be able to add your Instagram feed posts to your website in under 10 minutes.
Note on approval: Using this strategy, you can "set and forget" your feed so that all posts are automatically added to your WordPress website, OR you can manually approve the posts if you'd rather.
Note on aggregating content from hashtags (not your account): These steps will also work for you if you want to pull in content from a hashtag or mentions, so you can add customer content to your site.
1. Log in to your social media aggregator
The first step is to sign up for a social media aggregator if you don't have one yet. While the software has a fancy name, it's really quite simple. It aggregates all of your social media content into one customizable, embeddable feed that you can add to your site.
You can sign up for a free Curator account to get started, or for more information, you can check out our article on the best Instagram WordPress widgets.
Curator.io is an easy-to-customize aggregator that lets you pull from over a dozen sources. If you'd like to give Curator.io's free forever plan a spin sign up today.
2. Create a new feed
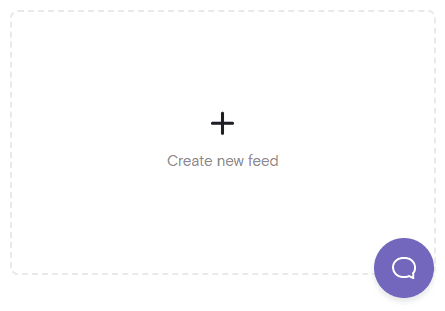
After you log in to your aggregator dashboard, you'll be able to hit the plus sign (+) to create a new feed.
3. Give your feed a name and choose the approval status
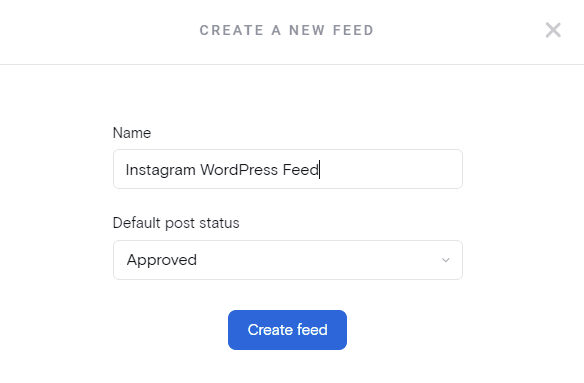
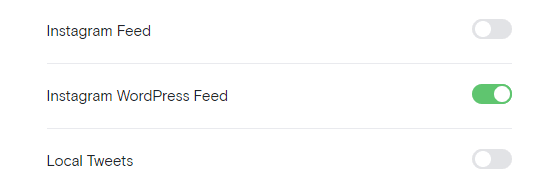
Next, give your feed a name that will remind you what kind of content it's for. For instance, "Instagram WordPress Feed" would be a super clear title.
Then, you need to choose the approval status. You have two options:
Approved - The most popular option is to allow your content to automatically get added to your WordPress site whenever you publish a new Instagram post.
Needs approval - If you only want some of your Instagram content showing up on your website (or if you're going to pull content from a hashtag, not your own account), then this is the right option for you.
4. Add Instagram as the content source for your feed
Now that you've created a feed, you need to add the content (called a source). Click the plus sign to add a new source.
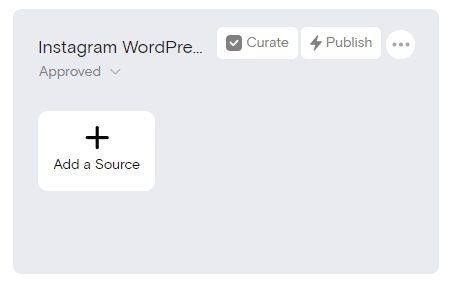
After you click "Add a Source," the next step is to select "Instagram."
Keep in mind that you can later add multiple sources to pull content from different social media platforms, or from different accounts, hashtags, or user mentions on the same platform.
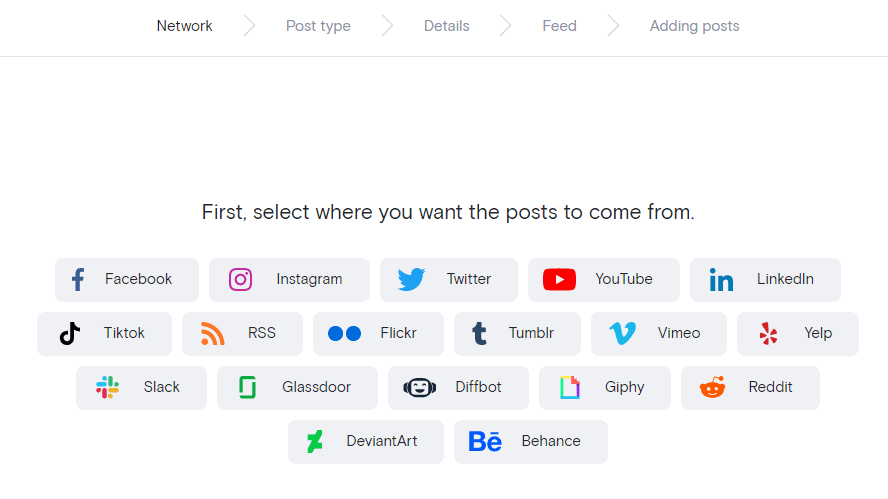
Instagram offers several different content types:
Business Account - Pull posts from your business Instagram account.
Private Account - Pull posts from a private Instagram account.
Hashtag - Pull posts from any hashtag (manual approval recommended).
Mention - Pull posts that mention your account in the caption (manual approval recommended).
Stories - Pull Stories from your own account.
Tagged / Collab Posts - Pull posts that your account is tagged in (manual approval recommended).
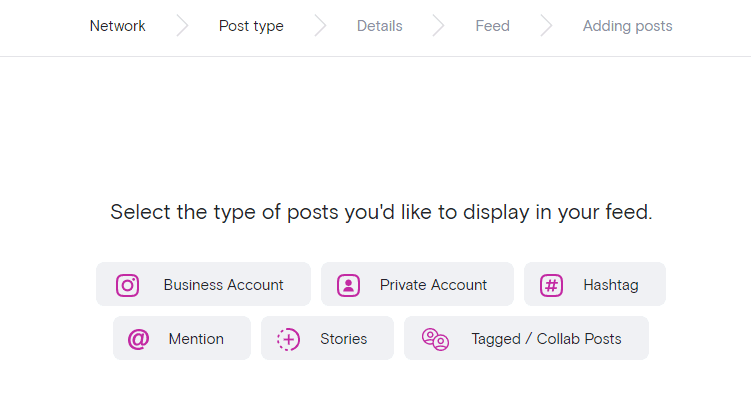
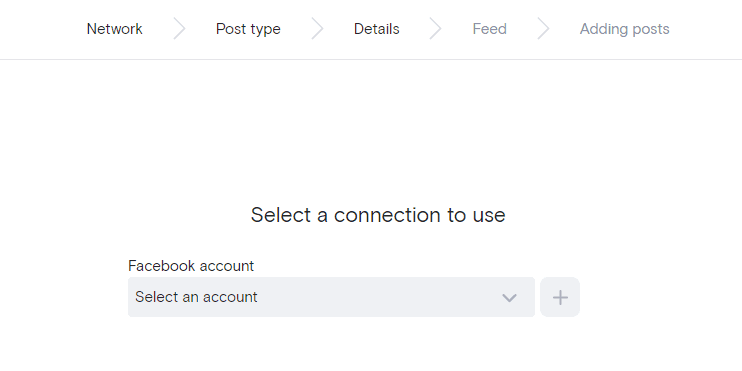
Pulling content from a Business Account is the most common. After you select the correct content type, the next step is connect your account to your social media aggregator. Most content types are run through an Instagram Business Account, meaning you'll need to connect your Facebook account (because Facebook owns Instagram).
5. Check the feed content to make sure it's pulling the right content
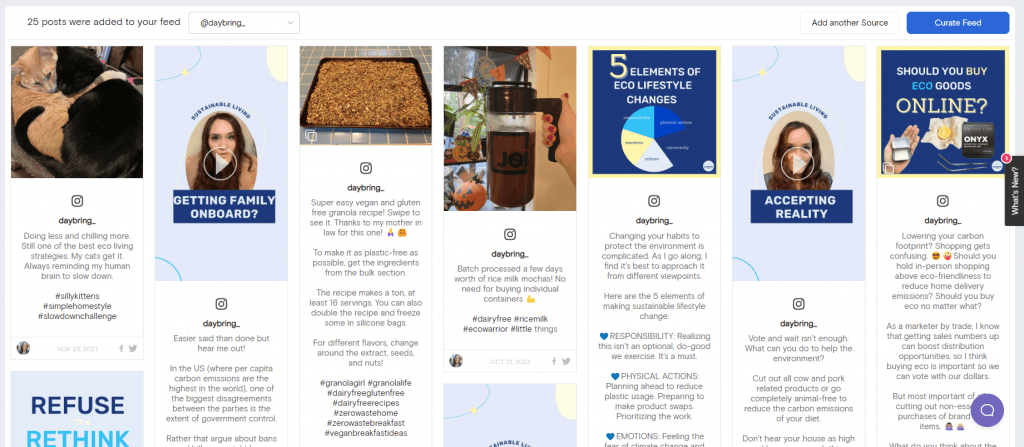
After you've connected your source, the content will appear. Make sure that it's pulling the correct content. If you're pulling from a hashtag, search that hashtag in Instagram on your phone just to double check it's giving you the same content.
6. Delete any Instagram posts you don't want to embed on your website
Next, you should delete any Instagram posts that you don't want on your WordPress website.
If you're using manual approval, then you will need to manually check each post that you want to appear. Otherwise, no content will come through on your site!
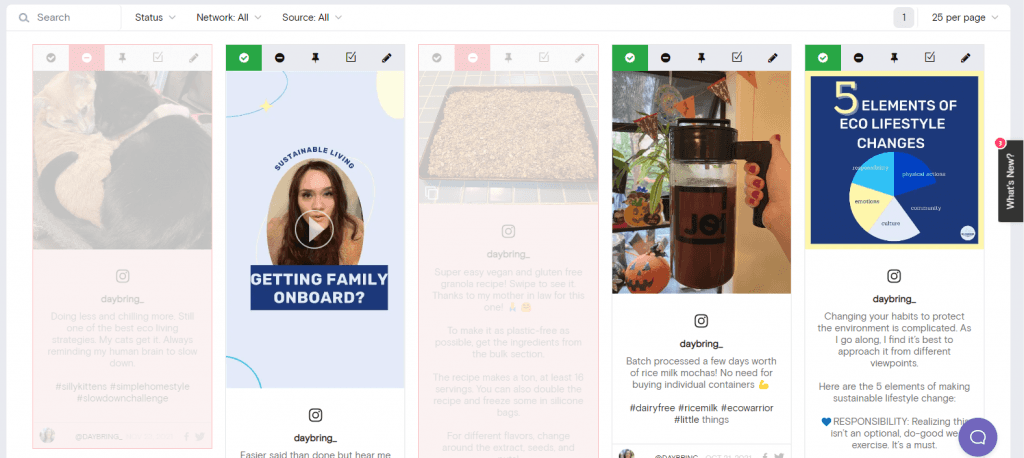
If you're using manual approval, you'll then need to login once a week or once a month to approve new posts.
7. Choose your feed style
Next, choose your feed style. There are many to choose from including Waterfall, Grid, Grid Carousel, Carousel, Mosaic, and Tetris.
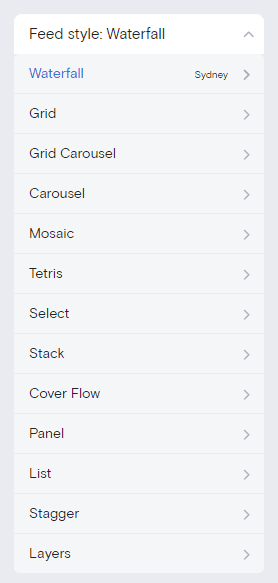
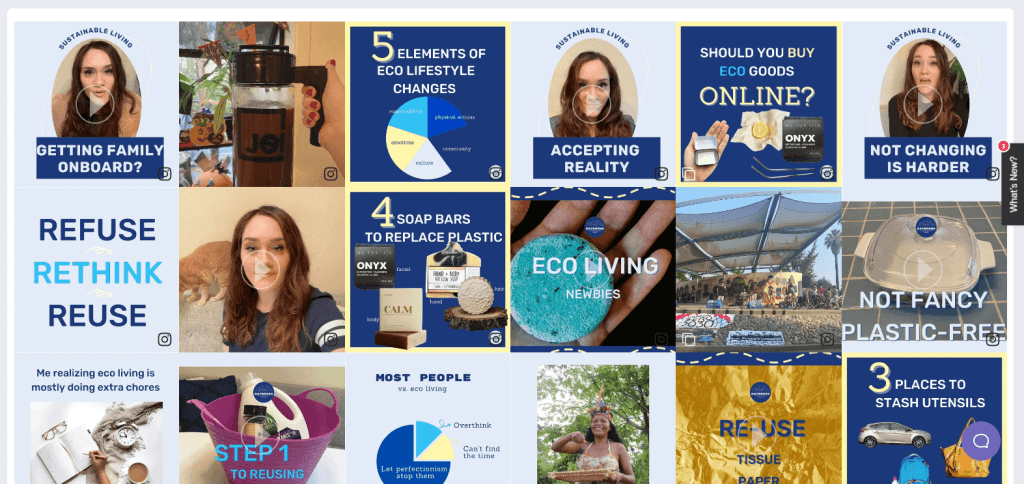
Grid is the most common feed style for Instagram posts because it gives you that clean, square look. You won't have different lengths of text showing, because text captions don't show up at all.
Here's what the grid style looks like:
8. Customize the colors and appearance of the feed
Next, you can update the colors of your feed. If you're going for the clean grid look, you can skip this step. If you're using Waterfall or one of the other styles, then you might want to update the colors of the icon color, text color, tab index color, link color, border color, background color, and feed background color.
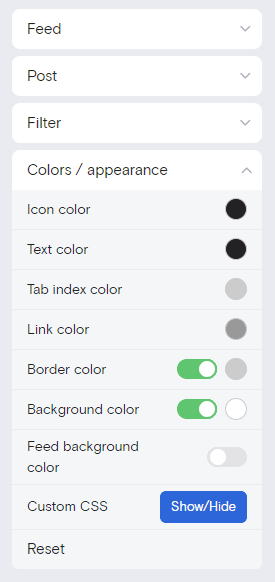
Professional WordPress website designers will be happy to know that custom CSS is an option too.
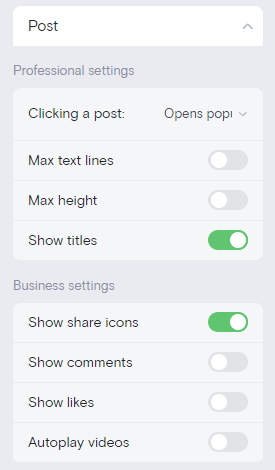
9. Choose the post settings
There are a variety of post settings that you can update to fit your needs. For instance, if you don't want posts to open up Instagram when clicked, you can turn that off. If you want to show comments and likes, you could turn those toggles on.
10. Embed the finished feed on your WordPress website
The last step is to embed the code on your WordPress website.
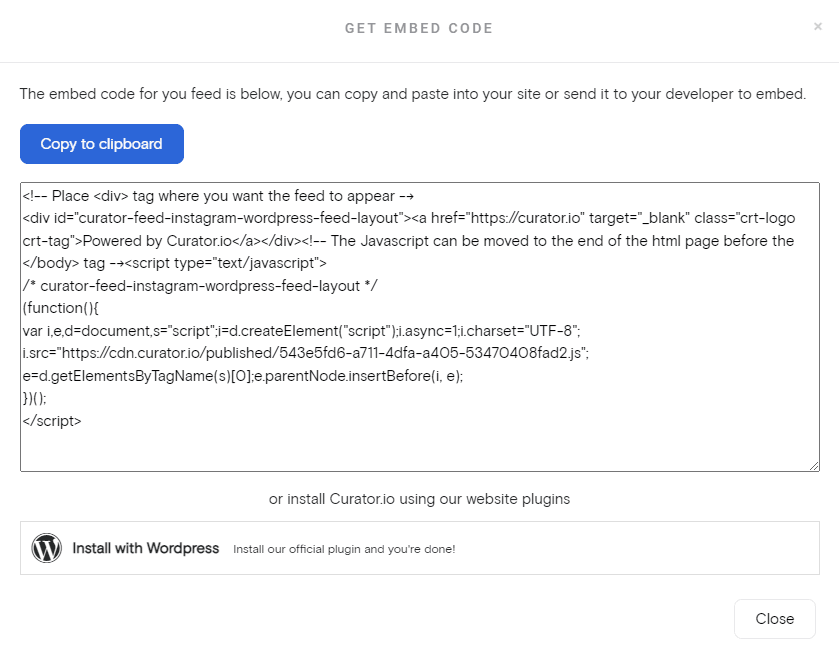
All you have to do is hit "Publish feed," "Get code," and "Copy to clipboard." Then paste it in your website's backend where you want the feed to appear. Keep reading for more tips below on embedding and pasting code.
And if you'd like to add your Twitter feed to your WordPress website, the process is pretty much the same! You'll just select Twitter as the source instead of Instagram.
How to embed the Instagram feed code on your website (two methods)
Embedding your Instagram feed on your website is a great way to showcase fresh content, engage visitors, and build social proof. There are two main ways to do this: one method requires copying and pasting long-form HTML code, while the other involves using a Feed Public Key for a simpler setup.
No matter which method you choose, both function the same way. Once embedded, any updates you make in your social media aggregator—such as changing the feed’s design or filtering content—will automatically reflect on your website. You won’t need to re-paste the code every time you make a change.
Method 1: Copy and paste the form code
To use this method, navigate to your social media aggregator, select “Publish feed”, then click “Get code.” Copy the provided HTML code and paste it into your website’s backend. This approach works well for most site builders and CMS platforms.
If you’re unsure where to paste the code, check the final section of this article for guidance.
Method 2: Install the WordPress plugin and then copy and paste the short code
If your website runs on WordPress, the easiest option is to install a dedicated Instagram feed plugin. These Instagram widgets generate a shortcode, which you can copy and paste into any page, post, or widget area.
Instagram display plugins are widely used across ecommerce, coaching, consulting, education, and nonprofit websites. They allow businesses to seamlessly showcase their latest Instagram content without needing to edit website code manually.
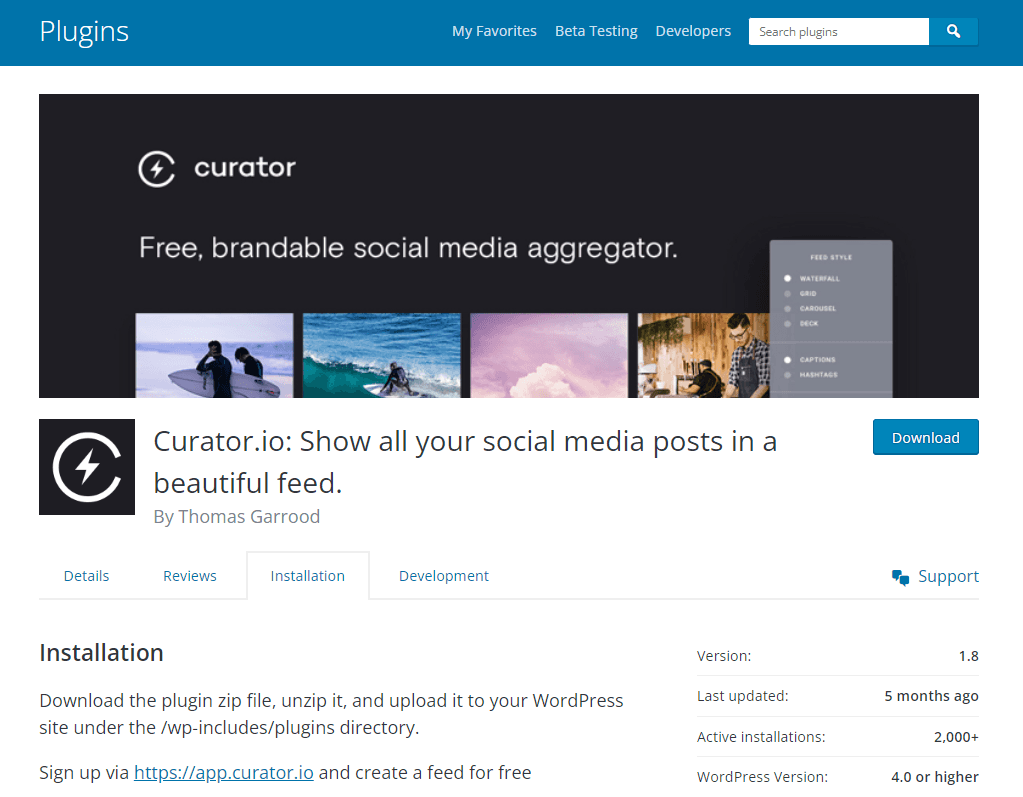
You can install Curator's WordPress plugin in your website.
Whichever method you choose, embedding an Instagram feed can enhance your site’s visual appeal and keep content fresh with minimal effort.
Examples of Instagram feeds on WordPress websites
Check out these Instagram feed examples.
1. Discover Albany

The Discover Albany website embeds an Instagram feed on its “Virtual Visitors Center” page to add dynamic, visually rich content that reflects real-time life in the city. The live feed acts as social proof, showcasing vibrant photos and authentic community moments. It keeps the page fresh, encourages visitors to scroll and explore, and creates an easy bridge to Albany’s social channels. It also works as a quick announcement tool, allowing the bureau to share events, updates, and community highlights in real time.
2. Dave Blunden Staircases
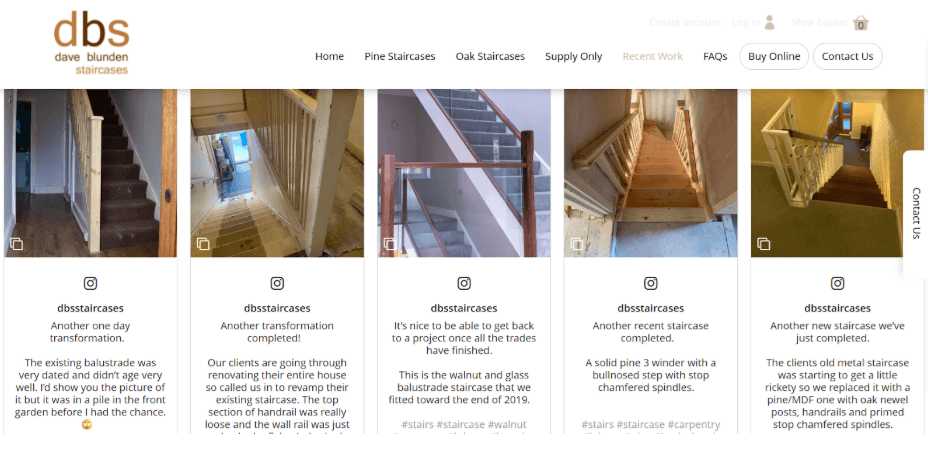
The DBS Staircases website uses an embedded Instagram feed on its “Recent Work” page to display real, up-to-date staircase projects in a highly visual way. The feed acts as a living portfolio, showing craftsmanship, variety, and quality without needing constant manual updates. It builds trust, keeps the page fresh, and encourages visitors to explore more of the company’s work on social media.
3. Jungmaven

JungMaven uses an embedded Instagram feed to make the site feel warm, real, and lived-in. Instead of polished studio shots alone, visitors see everyday people wearing the clothes, sharing outfits, and showing how the pieces look in real life.
The feed keeps the page feeling fresh with new posts rolling in and subtly nudges visitors to explore the brand’s Instagram community. It’s an easy, natural way to blend shopping, inspiration, and social proof all in one spot.
4. Raycon

Raycon uses videos on its website showing users enjoying their products — working out, relaxing, and having fun. These clips act like embedded social content, providing authentic social proof, showcasing real-life use, and making the brand relatable. They engage visitors, highlight lifestyle appeal, and help potential customers visualize how the products fit into everyday life.
5. Pepsi
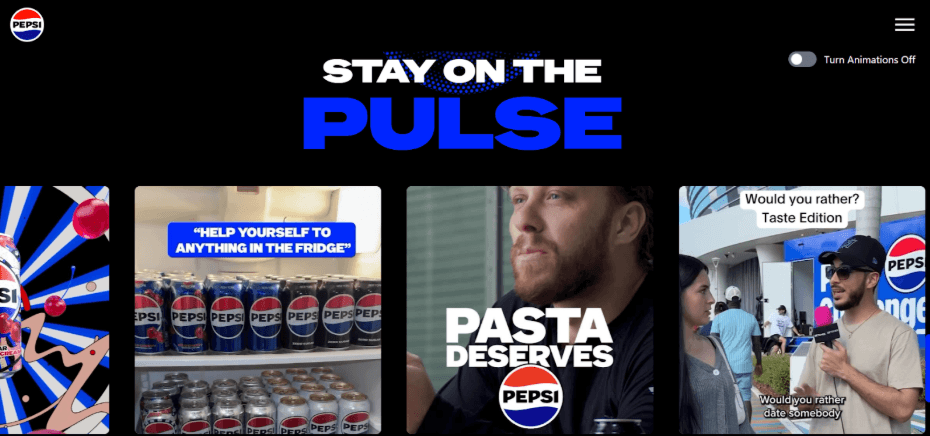
Pepsi uses embedded Instagram videos on its landing page to bring energy and life to the site. For example, a video shows friends at a beach party, laughing, playing music, and enjoying Pepsi together. This not only showcases the product but also conveys a fun, social lifestyle. By connecting the brand to real-life experiences, the video builds emotional appeal, encourages engagement, and inspires viewers to associate Pepsi with joy and togetherness.
6. Wake Forest University

Wake Forest University leverages embedding an Instagram feed on WordPress for its Homecoming site to showcase real-time photos from alumni events, tailgates, and campus activities. This dynamic content brings authenticity, highlights traditions, and fosters community engagement. Visitors see actual experiences, stay updated on event highlights, and connect emotionally, making the page more lively, informative, and visually engaging. It even turns casual scrolls into a mini-nostalgia trip for alumni.
7. Fenty Beauty

Fenty Beauty uses embedded UGC tutorial videos to showcase products across all skin tones, letting real users demonstrate foundation, lipstick, and contour looks. These videos build trust, highlight shade versatility, and create an inclusive community vibe.
They also serve as practical tutorials, teaching application techniques and product tips. By blending authentic content with brand messaging, Fenty helps visitors visualize themselves using the products, boosting engagement, loyalty, and conversions. You can achieve the same by embedding an Instagram feed on your WordPress site if your audience shares tutorials, reviews, or real-life product usage.
Where to paste the feed code in WordPress
If you're not a developer or website designer, you might be unsure where to paste your Instagram feed code in WordPress. Fortunately, it’s a straightforward process, and as long as you place the code correctly, your website will function as expected.
There are two main ways to embed your Instagram feed:
In a widget that appears on every page (e.g., footer or sidebar)
On a dedicated page (e.g., portfolio, testimonials, or customer showcase)
Here’s how to do both.
In your footer or sidebar
The most common placement for an Instagram feed is in the footer or sidebar, ensuring it appears across your entire website. This makes Instagram content an integrated part of your website’s design.
To do this, follow these steps:
Log in to your WordPress dashboard.
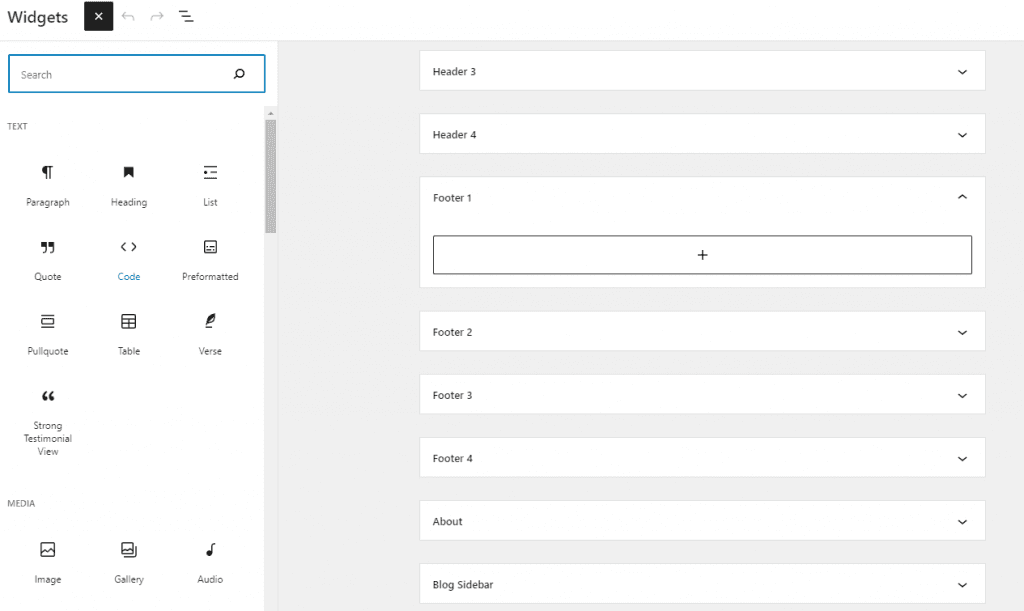
Navigate to Appearance > Widgets.
You’ll see multiple widget areas, such as:
Header
Footer
Blog Sidebar
Click the widget area where you want the feed (e.g., Footer Section 1).
Click the + button and select Custom HTML or Code as the content type.
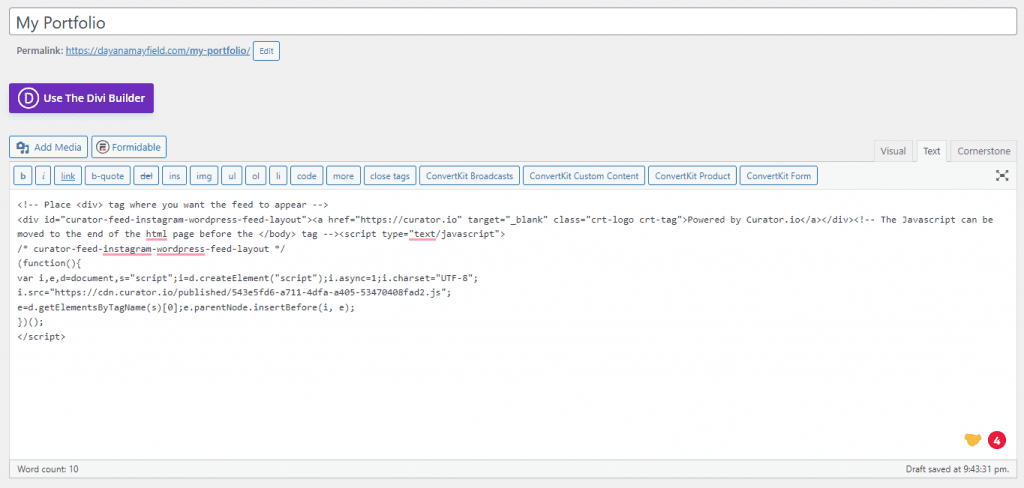
Paste the Instagram feed code into the text box, save it, and check your website to ensure it displays correctly.
On a dedicated page
If you prefer a more curated approach, you can embed your Instagram feed on a dedicated page, such as:
A portfolio page – Showcasing your work through Instagram posts
Customer product images – Featuring user-generated content from purchases
Customer testimonials – Highlighting positive reviews from social media
Behind-the-scenes content – Giving visitors a glimpse into your process
To maintain a polished look, make sure the Instagram posts align with the page’s purpose. For example, on a Portfolio page, filter out unrelated posts before embedding the feed.
Adding your Instagram content to WordPress is a quick and simple process—most users can complete it in under 10 minutes.
Tips on embedding Instagram content from a hashtag
Embedding Instagram content from a hashtag is a great way to showcase user-generated content and engage your audience. To make the most of it, follow these tips to ensure a seamless and effective integration:
Use manual approval – This helps you filter out any inappropriate or off-brand posts before they appear on your website.
Promote your branded hashtag – Feature it in your social media bios, website homepage, email marketing, and even printed materials to encourage more people to use it.
Pull from multiple hashtags – If you're a hotel, for example, you can feature posts not just from your hotel's hashtag but also from regional hashtags to highlight the local experience.
Ensure your embed tool is mobile-friendly – Many users will view your embedded content on their phones, so choose a tool that displays Instagram posts well on all screen sizes.
Give credit to content creators – When displaying user-generated content, acknowledge the original poster to foster goodwill and encourage more people to tag your brand.
By following these steps, you can create a dynamic and engaging Instagram feed that enhances your website and strengthens your community.
How to embed different types of Instagram content in the same feed
Embedding different types of Instagram content (Reels, feed posts, and Stories) into the same feed can add variety and keep your audience engaged. Most social media aggregation tools allow you to pull in each type as its own source, giving you control over what appears.
If you're using automated approval, you can simply delete posts you don’t want. With manual approval, you can handpick content for a curated look.
Mixing different formats makes your feed more dynamic, helping you showcase important announcements, trending content, or user-generated posts in different ways. Reels can highlight engaging video content, Stories can showcase time-sensitive updates, and feed posts provide a more structured presentation.
However, a mix of formats can also make your feed feel busier, which might not align with your brand’s aesthetic. Sticking to a single format, like just Reels or just feed posts, can create a cleaner, more cohesive look, but it may limit content variety.
How to aggregate content from brand mentions
Brands can aggregate content from Instagram mentions instead of just pulling from their own account, making it easy to showcase user-generated content (UGC) and influencer collaborations. When customers, influencers, or partners tag a brand in their posts, these mentions can be collected and displayed on a website or social media feed using aggregation tools. This approach helps brands build social proof, increase engagement, and highlight real customer experiences. Since many influencers and satisfied customers tag brands in their content, pulling from mentions provides a steady stream of fresh, authentic posts that enhance credibility and encourage more users to engage.
Ready to set up your own feed? For the simplest content aggregator, check out Curator.
Curator.io is an easy-to-customize aggregator that lets you pull from over a dozen sources. If you'd like to give Curator.io's free forever plan a spin sign up today.
Previous post: