How to Add Customer Testimonials to Your Website (3 Easy Methods)
Dayana Mayfield
on
Nov 18, 2025
Customer testimonials are proof that your business delivers. In fact, research shows that customers who voice complaints and feel heard often become more loyal than those who’ve never had an issue.
These customers tend to buy more, stick around longer, and even recommend the business because they’ve experienced the brand’s reliability under stress. That’s the power of authentic feedback. In this guide, we’ll explore three simple ways to add testimonials to your website and put your brand ahead of its competitors.
First, we'll show you how to embed Google reviews and social media testimonials using Curator. Then we'll dive into two other equally easy methods.
Method 1: Use Curator to aggregate and embed testimonials
Curator is a powerful tool that helps you easily aggregate and embed customer testimonials on your website. Instead of manually updating reviews, Curator automatically pulls in content from sources like Google Reviews and social media, keeping your testimonials fresh and authentic.
What makes it stand out is the flexibility in how you showcase feedback. You can create layouts such as a Testimonial Wall, a Wall of Love for reviews, or other engaging display styles that fit your brand’s design. This makes Curator not just a tool for collecting feedback, but a way to turn customer voices into real visual impact.
Another reason to choose Curator is its user-friendliness and ability to seamlessly embed testimonials on any type of website, including WordPress, Wix, and other sites. Best of all, you don’t need to know how to code, and a free version is available to get you started.
Steps to aggregate and embed testimonials on your website with Curator
Step 1. Choose Curator as Your Aggregator
Start by creating a Curator account. Curator lets you pull testimonials and reviews from places like Google Reviews, Instagram, TikTok, X (formerly Twitter), Facebook, LinkedIn, and more. Even on the free plan, you can connect up to three sources to build a strong stream of customer voices.
Step 2. Collect Testimonials
Once you’re set up, click “Create new feed” inside Curator, name it, and choose your moderation style. You can let testimonials auto-approve, or select “Needs approval” to handpick the ones that appear. Curator can pull content directly from your social accounts or via hashtags and mentions, giving you fresh, authentic user-generated feedback.
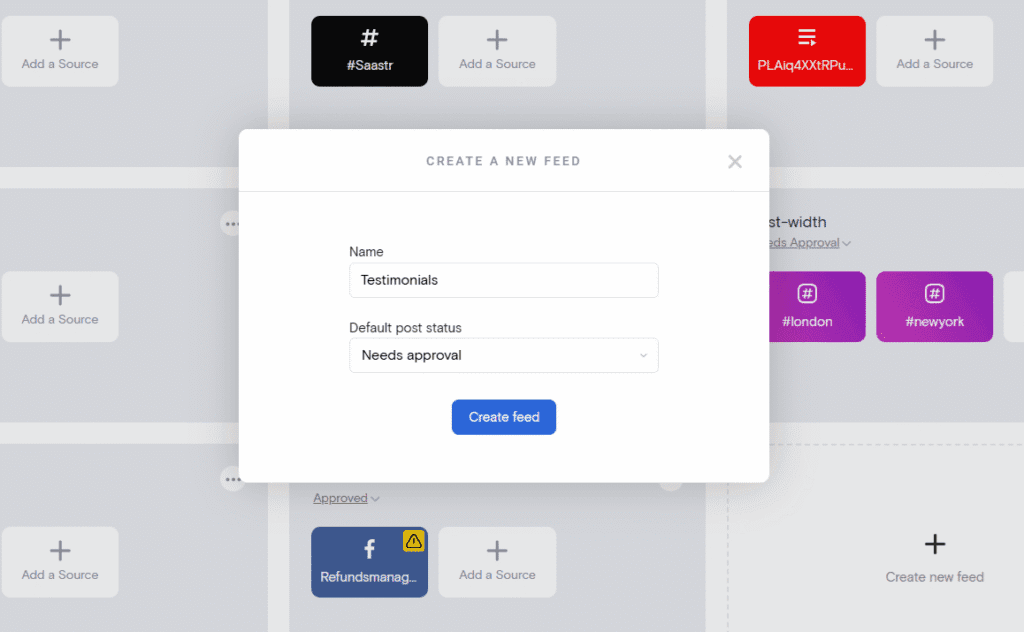
Once you've created your feed, you can then choose your source for testimonials, such as Instagram user-generated content or Google Reviews.
Then, you can approve the posts you want to show up on your website.

Step 3. Customize the Display
Next, style your testimonial feed to match your brand. Curator provides ready-to-use layouts like Grid, Mosaic, and Waterfall, which you can further tweak with colors, fonts, and spacing. If you want deeper customization, you can even apply custom CSS.

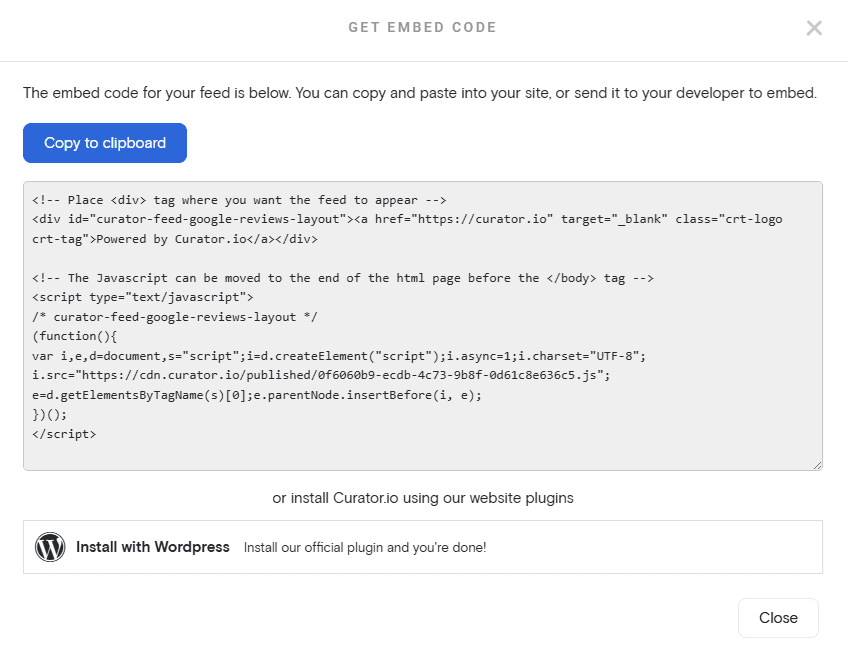
Step 4. Embed Testimonials on Your Website
When your feed looks the way you want, click “Get code” to grab your embed code. Paste this into your site’s HTML where you’d like the testimonials to appear. If you’re on WordPress, you can simplify things even further by using Curator’s official plugin.
Step 5. Moderate Regularly
Once live, check in to keep your testimonials feed fresh. Approve the best content and remove anything that doesn’t fit your message. You can automate moderation for speed or review everything manually for tighter control.
Method 2: Use your website builder’s testimonial or text block
Using your website builder’s testimonial or text block means adding customer feedback directly into your site using the built-in tools most platforms provide. Whether you’re on WordPress, Wix, Shopify, or Squarespace, these blocks let you manually type in or paste testimonials. You can then style them with fonts, colors, or layouts that match your brand. This method is quick, straightforward, and requires no extra tools or technical skills.
However, it has limitations compared to a tool like Curator. For instance, testimonials added this way are static. You have to update them yourself whenever new reviews come in. There’s no option to automatically pull in fresh content from places like Google Reviews or social media, so your testimonials can quickly feel outdated.
Since each website builder works differently, we’ve put together the steps for adding testimonials on the most popular platforms.
Steps to add testimonials to WordPress
Open the page: Log in to your WordPress dashboard, then go to Pages > Add New (or edit an existing page).
Insert a testimonial block: Click the “+” icon to open the Block Inserter. Search for “Testimonials” or use a Quote block to add customer feedback.
Add customer details: Include the person’s name, role, and optional photo or logo using Heading and Image blocks.
Style the block: Use the sidebar settings to adjust typography, colors, borders, and spacing to match your brand.
Preview and publish: Click “Preview” to ensure the testimonial looks good on desktop and mobile. Once satisfied, hit “Update” or “Publish” to make it live.
Steps to add testimonials to Wix
Open your site editor: Log in to your Wix account, choose the site you want to edit, and click “Edit Site” to open the Wix Editor.
Add a testimonial section: In the editor, click the “+ Add” button on the left sidebar. Go to Strip > Testimonials (or type “testimonial” in the search bar). Select a ready-made testimonial layout or start with a blank strip.
Customize the content: Click on the placeholder text and replace it with your customer’s feedback. Add their name, role, and photo or logo by selecting the image and choosing “Change Image.”
Adjust the design: Use the Design panel to change fonts, colors, borders, or backgrounds. You can also resize and reposition elements to better fit your layout.
Preview and publish: Click “Preview” to check how the testimonial section looks on desktop and mobile. Once satisfied, hit “Publish” to make it live.
Steps to add testimonials to Squarespace
Open your editor: Log in to your Squarespace account, select your site, and click “Edit” on the page where you want testimonials to appear.
Add a testimonial block: Click the “+” icon to add a new block. In the block menu, choose “Quote”, “Text”, or “Testimonials” (depending on your template).
Enter customer details: Replace the placeholder text with real customer feedback. Add the person’s name, role, and optional photo or logo to give the testimonial credibility.
Customize the style: Use the Design panel to adjust fonts, spacing, and colors so the testimonials fit your brand. You can also arrange multiple testimonials in a grid or carousel format, depending on your template.
Publish: Click “Preview” to make sure everything looks polished on desktop and mobile. When satisfied, hit “Save” or “Publish” to push your changes live.
Steps to add testimonials to Shopify
Open your theme editor: Log in to your Shopify admin, then go to Online Store > Themes. Click “Customize” on your active theme.
Add a testimonial section: In the left sidebar, click “Add section” and search for “Testimonials” (most themes include a testimonial block). If your theme doesn’t have one, you can add a Text or Quote section instead.
Enter customer details: Replace the placeholder text with real customer feedback. Add the person’s name, title, and optional photo or logo to personalize the testimonial.
Adjust the design: Use the theme editor’s settings to tweak fonts, colors, and layout so the testimonial matches your store’s branding.
Preview and publish: Click “Preview” to see how the testimonials display on desktop and mobile. Once satisfied, click “Save” to publish your changes.
Method 3: Embed Google reviews directly
Embedding Google Reviews directly on your website is one way to showcase authentic customer testimonials. It usually works by pulling reviews from your Google Business Profile and embedding them with a snippet of code, a plugin, or a third-party widget. Once set up, the reviews appear in a box or feed on your site and automatically update to show fresh feedback from verified Google users.
The biggest advantage of embedding Google Reviews is credibility because they come directly from a trusted, verified platform. Potential customers recognize the Google brand and often put more weight on reviews they see there. Embedding also keeps testimonials connected to an external source, so visitors know they haven’t been edited or fabricated.
However, this method comes with notable shortcomings compared to a tool like Curator. For instance, not all platforms allow direct embedding, and even when they do, you get limited design options. Moderation is another challenge, since you have little control over which reviews appear.
Steps to embed Google reviews on WordPress
Since WordPress doesn’t support embedding Google reviews directly, you need a plugin like Curator’s Google Reviews Widget. Here’s how to use it:
Open your dashboard: Log in to WordPress and go to Pages > Add New or edit an existing page.
Add a plugin or code block: Install a plugin like Google Reviews Widget for automatic syncing, or insert a Custom HTML block into the page.
Insert reviews: If you’re using a plugin, you’ll need your business’s Google Place ID (found via the Google Place ID Finder). This ID connects the plugin to Google’s API and pulls in live reviews. If you’re using Google’s embed option instead, copy the iframe code from Google Maps by searching your business, clicking Share, then selecting Embed a map.
Adjust settings: Plugins let you filter reviews, change layouts, and style the feed. With the iframe embed, customization is minimal and the design may look clunky.
Publish: Click Preview to ensure everything displays properly, then hit Publish or Update.
Steps to embed Google reviews on Squarespace
To embed Google Reviews on Squarespace, you’ll need to use the Google Maps embed code. It’ll show your business location along with the sidebar reviews. Here’s how to do it:
Open the editor: Log in, pick your site, and click “Edit” on the page where you want reviews.
Add a code block: Click the “+” icon, choose Code, and place it in the section where reviews should appear.
Insert the embed code: Paste in the Google Reviews embed code or a third-party widget script. You can get this from Google Maps (for the default embed) or from services like Elfsight, SociableKIT, or Curator (for a more customizable display).
Adjust the design: Squarespace won’t let you style Google’s embed much, but you can tweak surrounding fonts, spacing, or background.
Publish: Click “Preview” to confirm it looks right on desktop and mobile, then select “Save” or “Publish.”
Steps to embed Google reviews on Wix
Open the Wix Editor: Log in, select your site, and click “Edit Site.”
Add an embed element: From the left sidebar, click “+ Add” > Embed > Embed a Widget.
Paste the code: Insert your Google Reviews embed code or a third-party widget script into the widget box. To get the code, go to Google Maps, search your business, click Share, then choose Embed a map to copy the iframe.
Adjust placement and size: Drag and resize the widget so reviews fit seamlessly into your design.
Preview and publish: Click “Preview” to test how it looks, then select “Publish.” (Note: Wix requires a premium plan for custom embeds.)
Steps to embed Google reviews on Shopify
Open the theme editor: In your Shopify admin, go to Online Store > Themes > Customize.
Add a custom HTML section: From the sidebar, click “Add section” and select Custom HTML.
Paste the embed code: Insert your Google Reviews code snippet or third-party widget script into the HTML box. You can get the code from Google Maps by searching for your business, clicking Share, then selecting Embed a map to copy the iframe. Alternatively, use a script from a widget tool like Curator for a more customizable display.
Adjust styling: Some widgets allow style adjustments in their settings. Otherwise, the layout will follow your theme’s default styling.
Preview and save: Click “Preview” to check how reviews appear across devices. Once happy, hit “Save.”
Why add customer testimonials to your website
Customer testimonials do more than just look good on your site. They provide powerful benefits, such as:
Builds trust and credibility: Testimonials act as social proof, showing potential customers that real people have had positive experiences with your business. This reassurance convinces customers to try your product.
Humanizes your brand: Reviews highlight customer success stories and experiences, making your brand feel approachable and relatable rather than just a faceless company.
Creates emotional connections: Potential buyers can imagine themselves achieving similar results, which can be more persuasive than listing product features or sales copy.
Boosts engagement: Regularly updated testimonials provide fresh, relevant content that keeps visitors engaged and helps convert them into customers.
Accelerates purchase decisions: Reading authentic feedback reduces buyer hesitation and helps potential customers feel more confident about making a purchase.
Improves SEO: When keyword-rich testimonials are published directly on your site, they can contribute to higher rankings in search results.
Amplifies reputation: Testimonials reinforce your reliability and success, turning happy customers into advocates who help attract new clients.
Which method should you choose?
Each method of adding testimonials to your website comes with its own benefits and drawbacks. Website builder blocks (like those in WordPress, Wix, or Squarespace) are the most straightforward.
You simply copy and paste customer quotes into a testimonial section. The advantage here is simplicity, as no extra tools are required. However, these testimonials are static, meaning you must manually update them, and they lack the credibility of being pulled directly from external platforms.
Embedding Google Reviews is a step up in authenticity since visitors can see feedback straight from Google. It reinforces trust but comes with limited design flexibility. Also, not all platforms allow direct embedding, and the iframe approach can look clunky or break your site’s design.
Curator, on the other hand, automates the process by aggregating testimonials from multiple platforms (Google, social media, review sites) and embedding them in customizable layouts. It’s dynamic, user-friendly, requires no coding, and even offers a free plan for getting started.
So, while beginners might prefer builder blocks for their simplicity, those seeking authenticity might opt for Google embeds. However, businesses focused on credibility, aesthetics, and automation should choose Curator.
Dos and don'ts of embedding testimonials on a website
Dos: Always choose authentic, verified testimonials that reflect real customer experiences. Keep them concise and easy to read, and use a mix of text, photos, or video to make them engaging. Also, place testimonials strategically on high-traffic pages and regularly update them to keep the content fresh and relevant. If using third-party widgets, make sure they are responsive and display well on both desktop and mobile.
Don’ts: Avoid using fake or overly polished testimonials, as these can damage credibility. Don’t overcrowd pages with too many reviews—quality matters more than quantity. Refrain from embedding clunky or poorly styled widgets that clash with your site design. Finally, don’t forget moderation; ensure all content aligns with your brand’s message and tone.
Following these simple guidelines helps build trust while maintaining a professional, user-friendly website.
FAQs
Get answers to important questions.
How do I add testimonials to a website?
You can use your website builder’s testimonial block, embed reviews from platforms like Google or Facebook, or use a tool like Curator to aggregate, manage, and display testimonials automatically across multiple sources—saving time and ensuring consistency.
Should I put testimonials on my website?
Yes, definitely. Testimonials build trust with potential customers, provide valuable social proof, and can significantly increase conversion rates by showing that others have had a positive experience with your product or service.
What are the three types of testimonials?
The three main types of testimonials are written text reviews, video testimonials, and social media or third-party platform reviews. Each format offers a unique way to build credibility and connect with different audiences.
What are the rules for testimonials?
Always use real, honest, and verified testimonials. Make sure not to misrepresent customer experiences, respect their privacy, and ensure the testimonial content aligns with your brand values and marketing guidelines.
How many testimonials should be on a website?
There's no perfect number, but most experts recommend featuring between three and ten testimonials per page. Choose a mix of formats and highlight the most relevant ones to your target audience.
Do I need permission to use customer testimonials?
Yes, it’s important to get clear, written permission from customers before publishing their feedback—especially if it includes names, photos, or videos. Platforms like Curator can help streamline this with built-in consent features in submission forms.
Showcasing testimonials on your site is one of the easiest ways to build trust and boost conversions—and with tools like Curator, it’s easier than ever to do it right.
Previous post: