How to Create a User-Generated Content with Automatic Updates
Dayana Mayfield
on
Mar 30, 2025
User-generated content (UGC) is one of the most powerful tools for building trust, engagement, and authenticity online. Whether it’s customer reviews, social media posts, or fan-made videos, UGC showcases real experiences and opinions, making your brand feel more relatable and credible.
But how do you harness UGC effectively? A user-generated content website is the answer. By embedding UGC on your site, you can display authentic, real-world interactions that drive conversions, improve SEO, and foster community engagement.
In this guide, we’ll explore what a user-generated content website is, why it’s valuable, and how you can easily embed UGC on your site using an affordable content aggregator.
What is a user-generated content website?
A user-generated content website is a site that showcases content created by its users rather than just the brand itself. This can include social media posts, customer reviews, blog comments, photos, and videos shared by your audience. Some well-known examples include Reddit, TripAdvisor, and even eCommerce platforms that highlight customer reviews.
Brands use UGC in various ways, from featuring Instagram photos of customers using their products to showcasing community-driven discussions. If you’re looking for inspiration for UGC campaigns, check out these user-generated content examples.
Businesses across industries are embracing UGC as a way to enhance their websites. Whether you're running an eCommerce store, a travel blog, or a community forum, leveraging user-generated content can make your site more dynamic and engaging.
Why you should display UGC on your website
Displaying user-generated content on your website is a powerful way to build credibility, boost engagement, and drive conversions. Here’s why you should integrate UGC into your site:
Boosts trust and authenticity – Customers trust peer recommendations more than branded content. Featuring UGC, such as social proof from Instagram posts or customer testimonials, makes your brand more relatable. Learn more about the power of UGC.
Increases engagement – Interactive content like customer reviews, social media feeds, and user-submitted photos encourages visitors to spend more time on your site. If you’re running a UGC campaign, make sure to avoid these common UGC campaign mistakes.
Enhances SEO performance – Fresh, relevant content improves search engine rankings. UGC provides a steady stream of updated material, helping your site rank higher in search results. Plus, embedding UGC from platforms like Instagram can drive additional traffic.
Encourages community involvement – When customers see their content featured on your site, they feel valued and are more likely to continue engaging with your brand. To ensure your content remains high-quality, follow these best practices for moderating UGC.
Drives more conversions – Studies show that consumers are more likely to buy a product after seeing real customer experiences. If you're planning a campaign, check out these UGC campaign ideas for inspiration.
The benefits of UGC are clear, but how do you actually embed it on your website? In the next section, we’ll walk through a simple, step-by-step process to integrate user-generated content seamlessly into your site.
How to embed UGC in your site
Now that you understand the benefits of user-generated content, the next steps are deciding which platform, or platforms, you will want to use and embedding it on your website.
The good news? If you haven't chosen already, here are some UGC platforms to consider. And, you don’t need to be a developer or have advanced coding skills to integrate UGC seamlessly.
By using a content aggregator, you can automatically pull user-generated content from social media, review sites, and other sources, then display it in a curated feed on your website. This makes it easy to showcase customer testimonials, social media posts, and other engaging content while maintaining control over what gets published.
To get started, follow this step-by-step guide to embedding UGC on your site.
Step 1: Choose a free or affordable content aggregator
To embed UGC on your website, start by selecting a content aggregator that pulls in user-generated content from social media, reviews, and other sources. Look for a tool that offers:
Ease of use – No coding required.
Free plan option - Test the platform before committing to a paid plan.
Customization options – Match your brand’s style.
Content moderation – Filter out irrelevant or inappropriate posts.
Platform compatibility – Ensure it supports key sources like Instagram and Twitter.
We recommend using Curator. It makes it easy to collect, moderate, and display UGC seamlessly—without technical headaches. And with the free forever plan you can get your first feed up and running without any financial commitment, or intrusive advertising.
Step 2: Create a new feed
Now that you’ve set up your Curator account, it’s time to create a UGC feed to collect and display content on your website.
Log in to your Curator dashboard.
Click "Create a new feed" and give it a name (e.g., "Customer Reviews" or "Instagram Highlights").
Set the approval status based on how you want content to be published:
Approved – All posts from the source you choose in Step 3 will be added to your site unless you delete them.
Needs approval – No posts will show up on your site unless you manually approve them first.
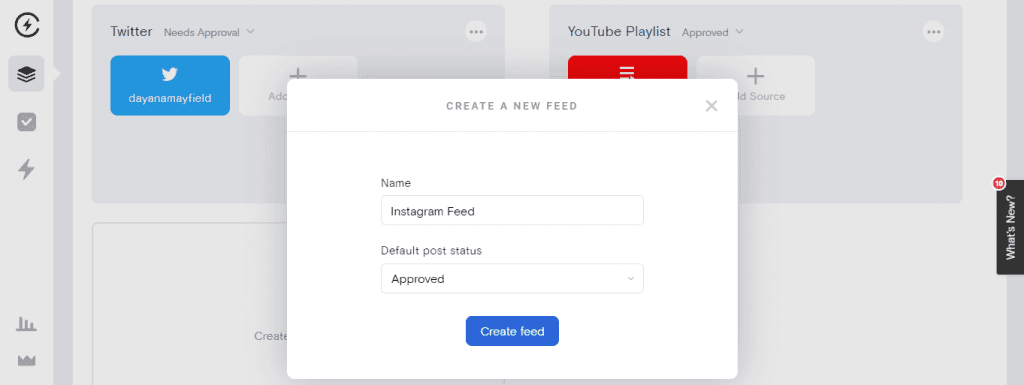
We recommend setting the approval status to “Needs approval” for UGC content. That way you can rest assured that no content appears on your website that doesn’t align with your brand.
Step 3: Select the source of the UGC
Now that your feed is set up, it's time to choose where your user-generated content will come from. Curator allows you to pull in content from various platforms, some of them including:
Twitter/X
Facebook
YouTube
TikTok
Google Reviews
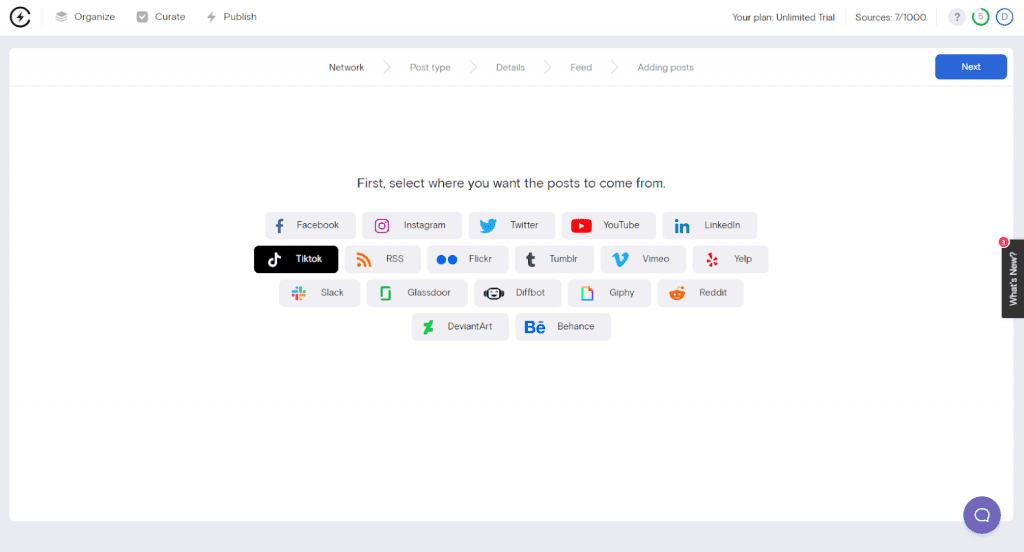
To add a source:
Click "Add source" in your feed settings.
Select the platform you want to pull content from.
Connect your account (if required) and define specific hashtags, mentions, or profiles to track.
Step 4: Curate the user generated content
Once Curator starts pulling in UGC from your selected sources, it’s important to curate the content to ensure only high-quality, brand-appropriate posts appear on your site.
Curating UGC is super simple:
Review incoming content – Go to your feed and check the posts being pulled in.
Approve or delete posts – If you set your approval status to Needs approval, manually approve posts that align with your brand and delete any that don’t.
Filter by keywords or hashtags – Use filters to automatically include or exclude content based on specific words or phrases.
Pin or highlight top posts – Feature the best UGC at the top of your feed for maximum visibility.

By curating your UGC feed, you ensure that only the most relevant and engaging content appears on your website.
Step 5: Customize the UGC feed
Now for the fun part.
It’s time to make sure your UGC feed matches your website’s design. You can start with one of the many templates and then style from there. With the many easy-to-use customization tabs you can fine-tune your feed’s appearance—including colors, fonts, spacing, and many post display settings. These settings are just a few clicks away.

For those who need even more control, Curator also supports custom CSS, allowing you to fully tailor the feed’s styling to match your website’s branding.
Step 6: Add the HTML code to your website
Now that your UGC feed is curated and customized, it’s time to embed it on your website. Curator makes this process simple by providing a copy-paste HTML embed code that works on most website builders and CMS platforms, including WordPress, Shopify, Wix, Squarespace, and more.
To add your UGC feed to your site:
In your dashboard, navigate to your feed and click “Publish Feed.”
Copy the HTML embed code provided.
Paste the code into your website’s HTML where you want the feed to appear—such as a homepage section, product page, or blog post.
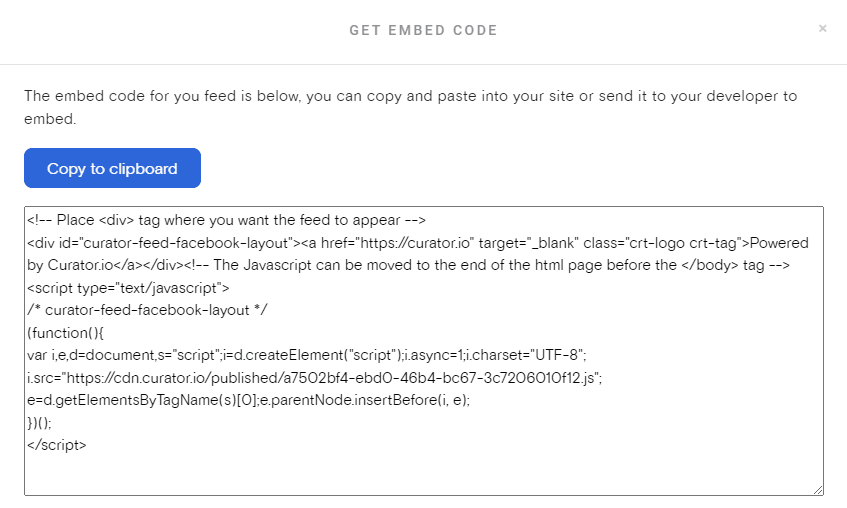
That’s it! Your user-generated content will now display in real time, automatically updating as new approved posts are added.
Before launching, review your site to ensure the feed looks and functions as expected.
Step 7: Review and approve new content
This step is the most important one. For UGC to be successful it needs to stay up to date and relevant. It can’t do that if you forget about your feed once it’s set up.
Make sure to regularly review new content to ensure that it is brand-appropriate and following UGC best practices. If you set your approval status to “Needs approval”, new posts will not be displayed until you manually approve them. Simply log in to your dashboard, review the latest posts, and approve or delete them as needed.
We recommend scheduling a regular time for you or one of your team member’s schedule to review posts. That way you don’t forget about it and have to spend a lot of time catching up.
Ready to create your UGC website? Try our free forever feed.
Previous post: