If you're looking to add a social wall to your WordPress, then look no further. In this tutorial post, we're showing you the best tools for adding your social media feeds to your WordPress website and detailing the process step-by-step.
And keep scrolling for tips and tricks that will make your social wall not only stunning but also effective from a marketing standpoint.
Here's what this post covers:
How to create and embed a social wall
Free and paid tools to use
Examples in different website locations
Tips and best practices
Why embed a social media wall on WordPress?
A social media wall is a dynamic showcase of community, credibility, and content. Embedding one on your WordPress site provides a highly visual way to engage visitors, showcase real-time interactions, and boost trust in your brand.
Here’s why it’s worth adding a social wall to your WordPress site:
1. Drive Social Proof Automatically
Social walls can automatically pull in user-generated content (UGC) from platforms like Instagram, X (formerly Twitter), Facebook, and more. This acts as continuous social proof, showing potential customers that others are engaging with your brand and loving it.
2. Increase Time on Site
Interactive, real-time content keeps visitors engaged longer. Instead of scrolling past static testimonials or blog posts, users are more likely to browse a live wall of fresh, visual content. This can reduce bounce rate and increase the chance of conversions.
3. Turn Fans into Advocates
When customers see their own posts featured on your site, they feel appreciated and are more likely to continue tagging your brand. Creating a wall of love also highlights why your brand is awesome which creates more fans who then become advocates. This works for reviews, hashtag campaigns, testimonials, and even Slack content.
4. Perfect for Events, Campaigns, and Product Launches
Whether you're hosting a virtual summit, launching a new product, or running a seasonal campaign, an event social wall can serve as a real-time content hub. Visitors get to see event photos, customer feedback, and influencer posts in one centralized location.
A dedicated wedding site and hashtag wall is also a great way to get a tone of great engaging content from all your guests on that special day.
5. SEO and Performance Benefits
When done right, embedding a social wall won't slow down your site—and it can even support your SEO strategy. Walls that highlight relevant, keyword-rich posts or user-generated content can contribute to content freshness and keyword density (especially if you embed them on landing pages or blog posts like this one!).
Where to display your social wall
There are many different places to display your new social media feed. You could have several social walls with different purposes. For example, a social wall in blog post might be shared for educational or tactical purposes.
Meanwhile, a social wall in your website might be for branding.
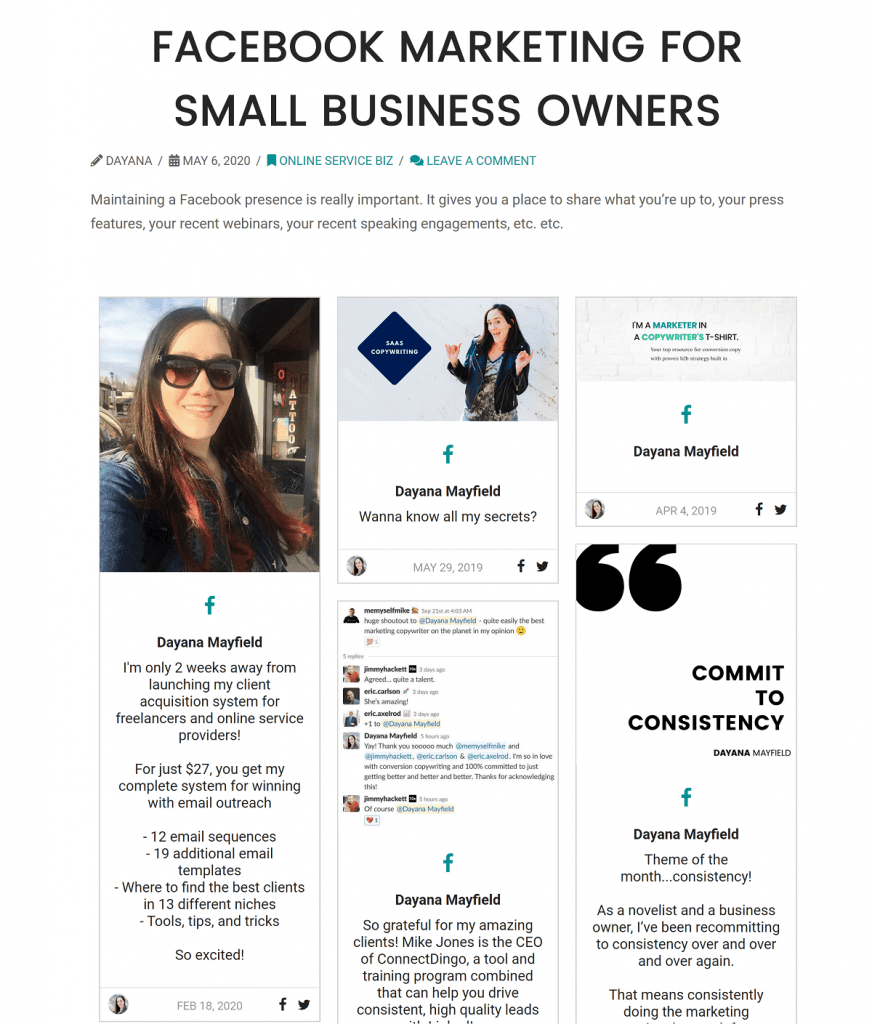
Blog post
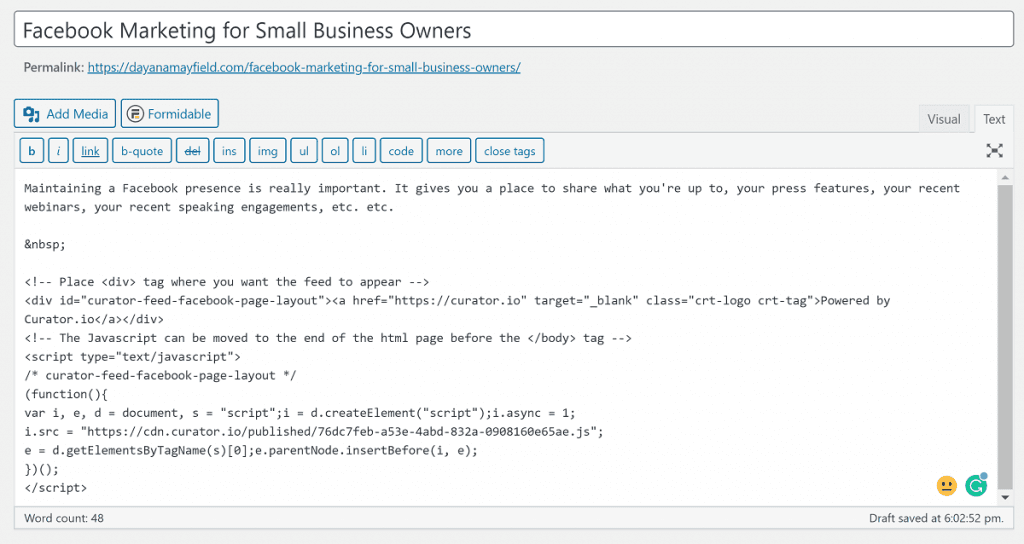
Here's what a Facebook post wall looks like when displayed inside of a blog post. Especially for marketing instructional posts, this is a great way to add imagery. You could use this is a way to add media for just about any blog post purpose you can think of: sharing recipes, promoting events, and so on.
Home page
You can also put your social wall anywhere on the home page of your website. This is a great way to showcase the human side of your brand and make your site more visually appealing.

Separate dedicated page
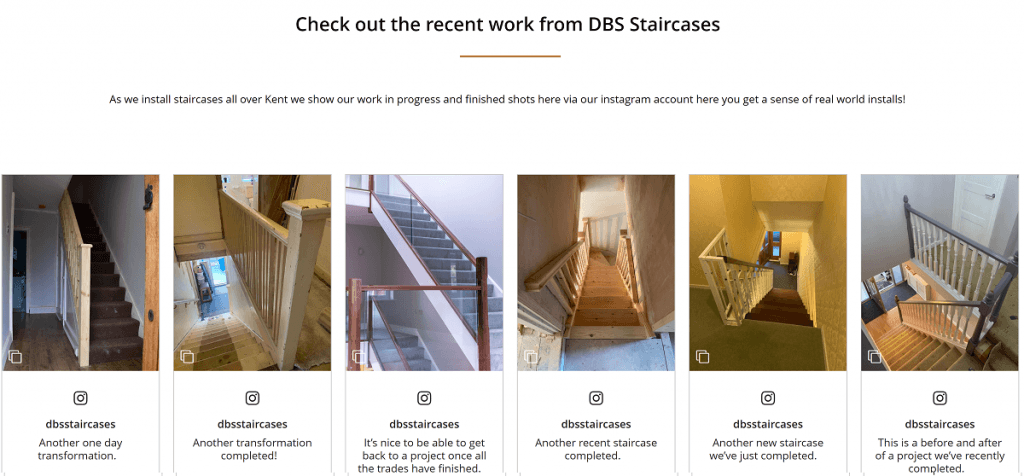
If you use one of your social media accounts for a very specific purpose (such as sharing quotable advice or work samples), why not embed that account in dedicated website page?
In this example, the Instagram posts are being used as a portfolio.
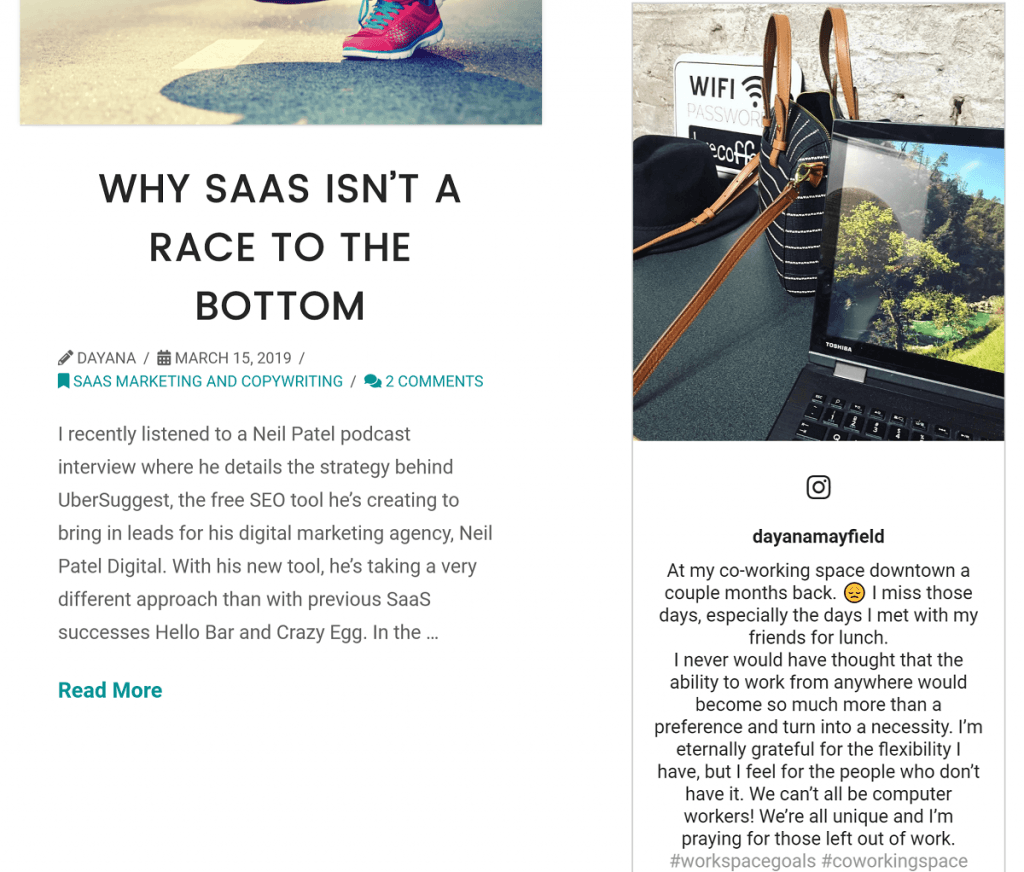
Side bar
Another way to share your social wall is by putting it in the side bar of your website or blog. This gives people another way to engage with you and your brand, and it adds some personality to your site.
How to add a social wall to WordPress
Now that we’ve got a sense of the what and why we should embed social media wall on WordPress, let’s get into the how. Here is step-by-step process to get your social media wall plugin setup in just a few minutes.
Step 1) Select a content aggregator to pull the content for your wall
Because Curator.io is the easiest social wall aggregator to use, it offers a WordPress plugin, and it has a free plan, that's the one we're using.
Whether you want to add an Instagram wall, a Facebook wall, a feed of your YouTube posts, or any other social media feed, the process stays the same.
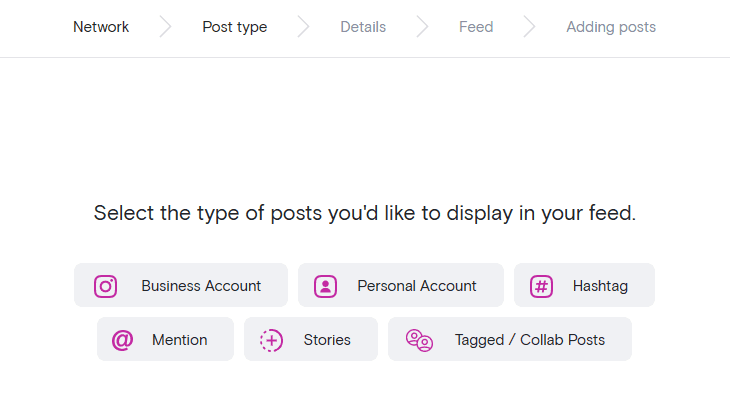
Step 2) Select what social media source to pull content from
Once your Curator account is set up, it’s easy to embed a social wall on WordPress. Start by creating a new feed in your Curator dashboard. Click “Create new feed”, give it a name, and choose your moderation setting—either “Approved” or “Needs approval.” Selecting “Needs approval” ensures every post aligns with your brand before it appears on your social media wall WordPress display.
Curator acts as a powerful social media wall aggregator for WordPress, allowing you to pull content from your brand’s social profiles or collect user-generated content through hashtags and mentions. For example, using a branded hashtag on Instagram lets you automatically showcase real customer posts on your site, turning everyday UGC into a compelling, on-brand experience.
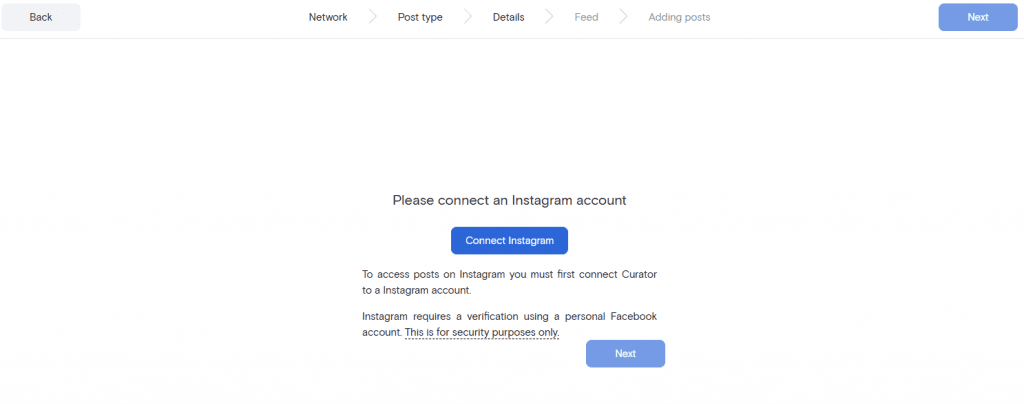
Step 3) Connect that social media source
After you've picked the social media network and the source type, it's time to connect the social media source. The connection procedure will vary slightly based on the source of the content.
For example, an Instagram account connection requires a verification of a personal Facebook account, whereas connecting to a LinkedIn company page only requires the URL. Regardless of the source, you will be prompted through the sign in and connection process.
Step 4) Curate the content
Once you’re signed in, Curator will begin pulling content from your selected source and automatically display the most recent posts. From here, it’s time to curate what appears on your social wall for WordPress.
The way you manage content depends on the moderation setting you chose earlier:
If your posts are automatically approved, all content will appear by default—you simply remove any posts you don’t want displayed on your embedded social media wall on WordPress.
If you selected the "Needs approval" setting, you’ll manually approve only the posts you do want featured. This gives you more control over which posts represent your brand publicly.
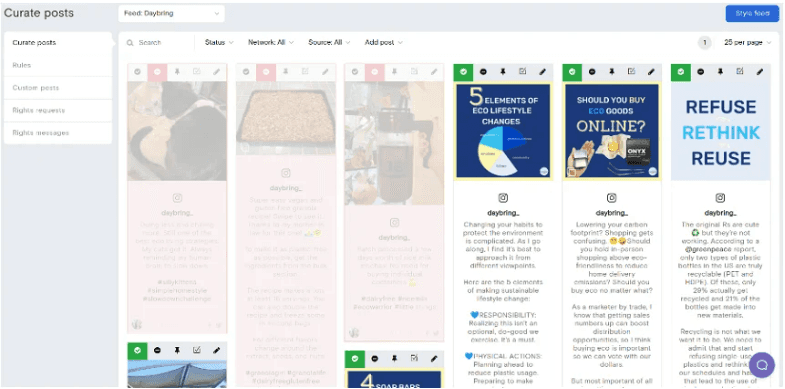
You can also pin specific posts to the top of your wall. This is a great way to highlight testimonials, influencer content, or standout user posts—keeping your most impactful content front and center.
Step 5) Pick the social wall template and stylize
The next step is to pick your template. If (after picking your template) you want to do some more curating, no problem. You can return to Step 4 and curate your posts at any time.
Curator has many different wall templates for you to choose from. You can use the waterfall style, which continues to rain down posts in long columns, or the carousel style which provides left and right buttons to scroll through posts, in order to make the wall much shorter in length.
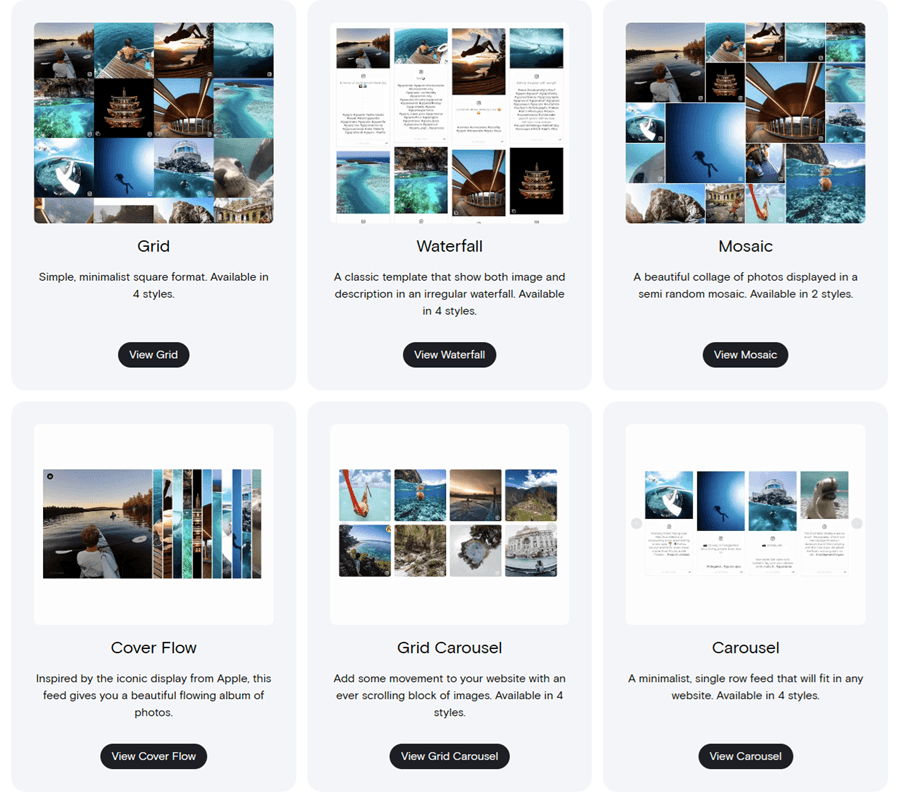
Stylizing the wall is super simple as well. Just go through the options in the left sidebar and change almost anything from colors to spacing to word count. Start with what you think is the right option for your site. You can always go back and make changes later..
Step 6) Copy the code and add it to your site
After you've picked the template you want to try, the next step is select "Get Code" at the top of the "Publish" screen. You can install Curator.io's WordPress plugin to help you embed your new social wall (if you're concerned about copying code in the wrong place) or you can copy the embed code and paste it in your site in the correct HTML widget or text editor.
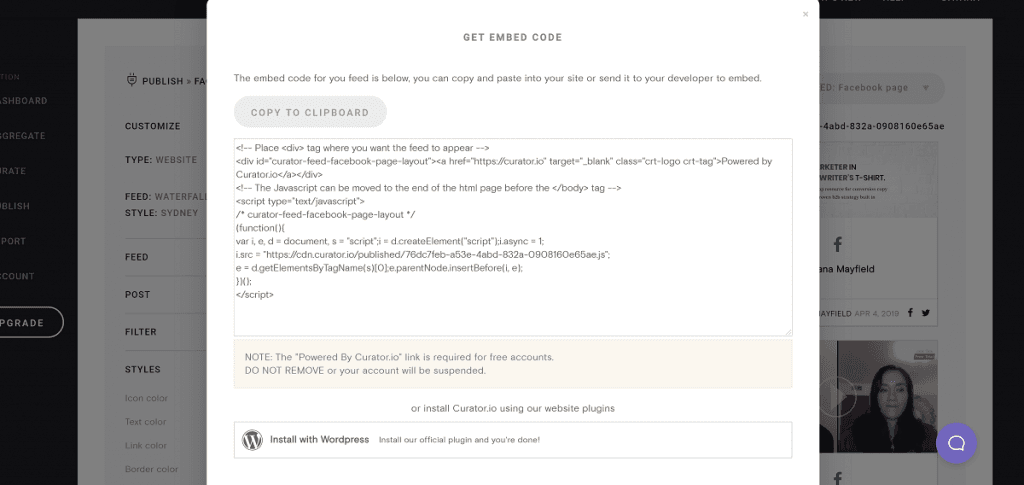
For example, you can copy the code into a blog post by selecting the text editor when you're writing the blog post in WordPress.
That’s it! Go check it out.
3 great tools for adding a social wall to your WordPress site
What tools should you use to embed a social media wall in your website? There are a lot of options available. Here we've picked out the top three to profile.
1. Curator.io
Curator.io is a lightweight, flexible social media wall aggregator designed for seamless website embedding and event displays. It supports over 15 platforms, offers both free and paid plans, and prioritizes clean design with no required branding. With powerful moderation tools and no-code integration, it’s ideal for marketers, brands, and creators.
Pros:
Supports 15+ social media sources
Generous free plan with full moderation
Lightweight and fast-loading
Advanced filtering and moderation options (block keywords, users, etc.)
Has an official WordPress plugin
Cons:
Doesn't include follow buttons (is intended to display posts, not collect follows)
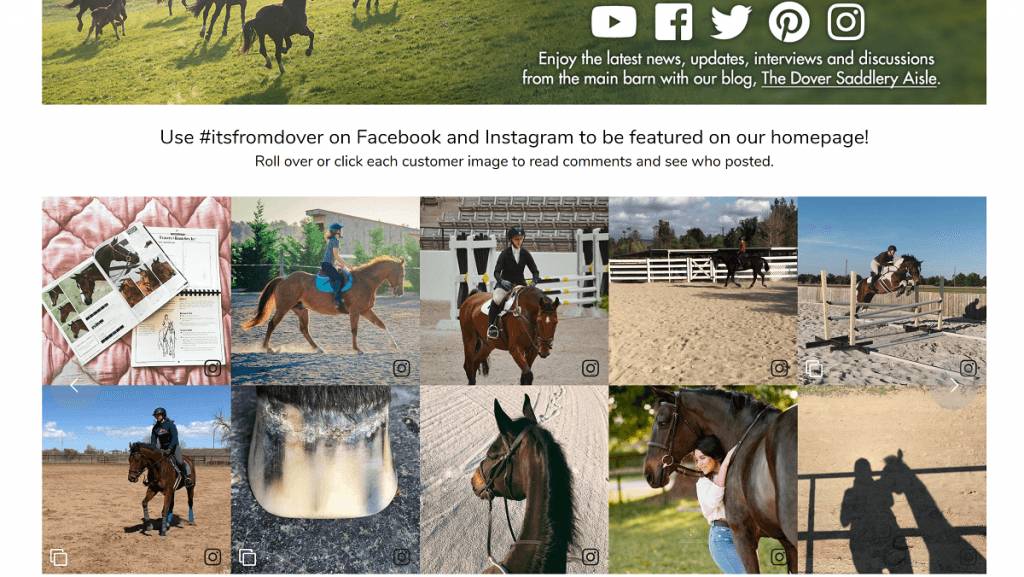
Here's a great social wall example from Dover Saddlery.
As you can see, in this example, the feed has a really clean look by removing the content captions. In order to read the captions for each Instagram post, all a website visitor needs to do is hover over the post.
2. Walls.io

Walls.io is a user-friendly social media wall aggregator ideal for events, campaigns, and digital displays. It supports major platforms, and even allows direct posts. Known for rich features like post moderation and customizable layouts, it’s a strong contender to embed social wall on WordPress—though pricing and branding may be drawbacks.
Pros:
GDPR compliant
Includes post moderation on all plans
Offers 7 different wall layout options
Call-to-action feature for shoppable user-generated content
Cons:
Entry-level plan supports only one social media source
Not the most budget-friendly option
Ads and Walls.io branding appear unless upgraded
3. EmbedSocial

Another option for embedding a social wall in your WordPress website is to use EmbedSocial. They are tailored for UGC and ecommerce. If you are wanting to make your social media posts shoppable, then they are worth checking out.
Pros:
Works with all major social media platforms and sources
Easy to set up and use
Great for ecommerce
Cons:
No free plan available
Designed primarily for ecommerce companies (robust feature set may or may not be a fit for you)
Tricks for making your social wall look awesome
So now that you understand how to create a social wall and all of your options for where to display it in WordPress, you might be wondering if there's anything else you need to know.
The short answer is, yes! There are some best practices you should follow in order to make sure your social wall is both beautiful and effective.
Pick the right template
Remember the template you chose back in Step 4? Is it the right one?
See how it looks on your website.
Do you want the captions shown right away since the text is important, or are the captions detracting from the imagery and should they be hidden unless hovered over?
Consider whether or not you should use a different template.
Customize the style
You might also need to customize your social wall to make sure it matches the look and feel of your website.
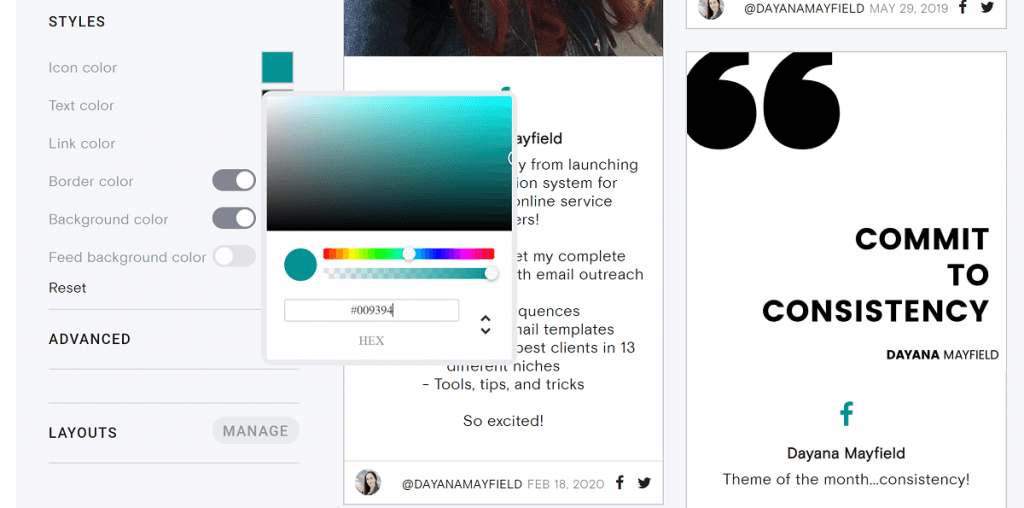
In this example, we've changed the icon color to match the link color used in the blog and throughout the website's CSS styling.
Curate your wall towards a specific goal
Why are you embedding a social wall in your website? What is the goal? Do you want to add personality to your website? Do you want to showcase user generated content (UGC)?
Make sure that you're curating your content around a specific goal so that you have a clean look and feel on your site, and so that the feed is contributing to the success of your marketing.
Here's some inspiration for what you might be trying to achieve with your social wall:
Make your brand more friendly and human on your website
Add images to illustrate a point in a blog post
Curate UGC and encourage customers to submit photos using your branded hashtag for a chance to be featured
Showcase your employees, events, or how you give back
Choose the appropriate automated curation setting
And finally, you should make sure that your social wall has the right setting for automatic curation.
If your goal is to embed all of your Instagram posts to humanize your website content, then you can probably set the feed to automatically publish everything.
However, if your goal is to embed UGC only, then you should set the feed to not approve posts so you can manually approve the customer images that use your hashtag appropriately.
Embedding a social wall is a really fun marketing idea that can make a big impact on your WordPress site—not only how it looks but how customers and site visitors react to your brand.
Curator.io is an easy-to-customize aggregator that lets you pull from over a dozen sources. If you'd like to give Curator.io's free forever plan a spin sign up today.
Previous post: